Choosing the best platform for error monitoring and track the performance of your software is likely to be difficult
Choosing the best platform for error monitoring and track the performance of your software is likely to be difficult.
Which logging and monitoring platforms are the best for our project depends on multiple factors:
- Cross compatibility with iOS and Android
- Easy to setup
- A large number of tools to gather as much useful data as we can
- An intuitive dashboard to analyze the gathered information
With all these things considered, Sentry is one of the top candidates.
In this article I will show a step by step guide on how to integrate Sentry in a React Native app.
Sentry Integration on React Native App
The integration of the Sentry SDK on the React Native is very simple and fast to do. First thing that we need to be sure is to have a React Native App settled up.
After that we need to click this link (https://sentry.io/signup/) which will navigate us to the Sentry Platform where we need to create an account that will be used as an account for identifying and registering our React Native App.
On this way we can check about some of main things or features that Sentry Platform offers that I'm going to show below:
- Real time error tracking (that is provided on cross platforms iOS sentry-cocoa and sentry-android)
- Offline storage of events
- Automatically the health of every new release
- Monitoring the performance of the app and many others things that I will show later on this blog.
Things that we needs to be filled on the registration form are name, organization (for now I will use Sentry Setup as a Organization name), email and password.
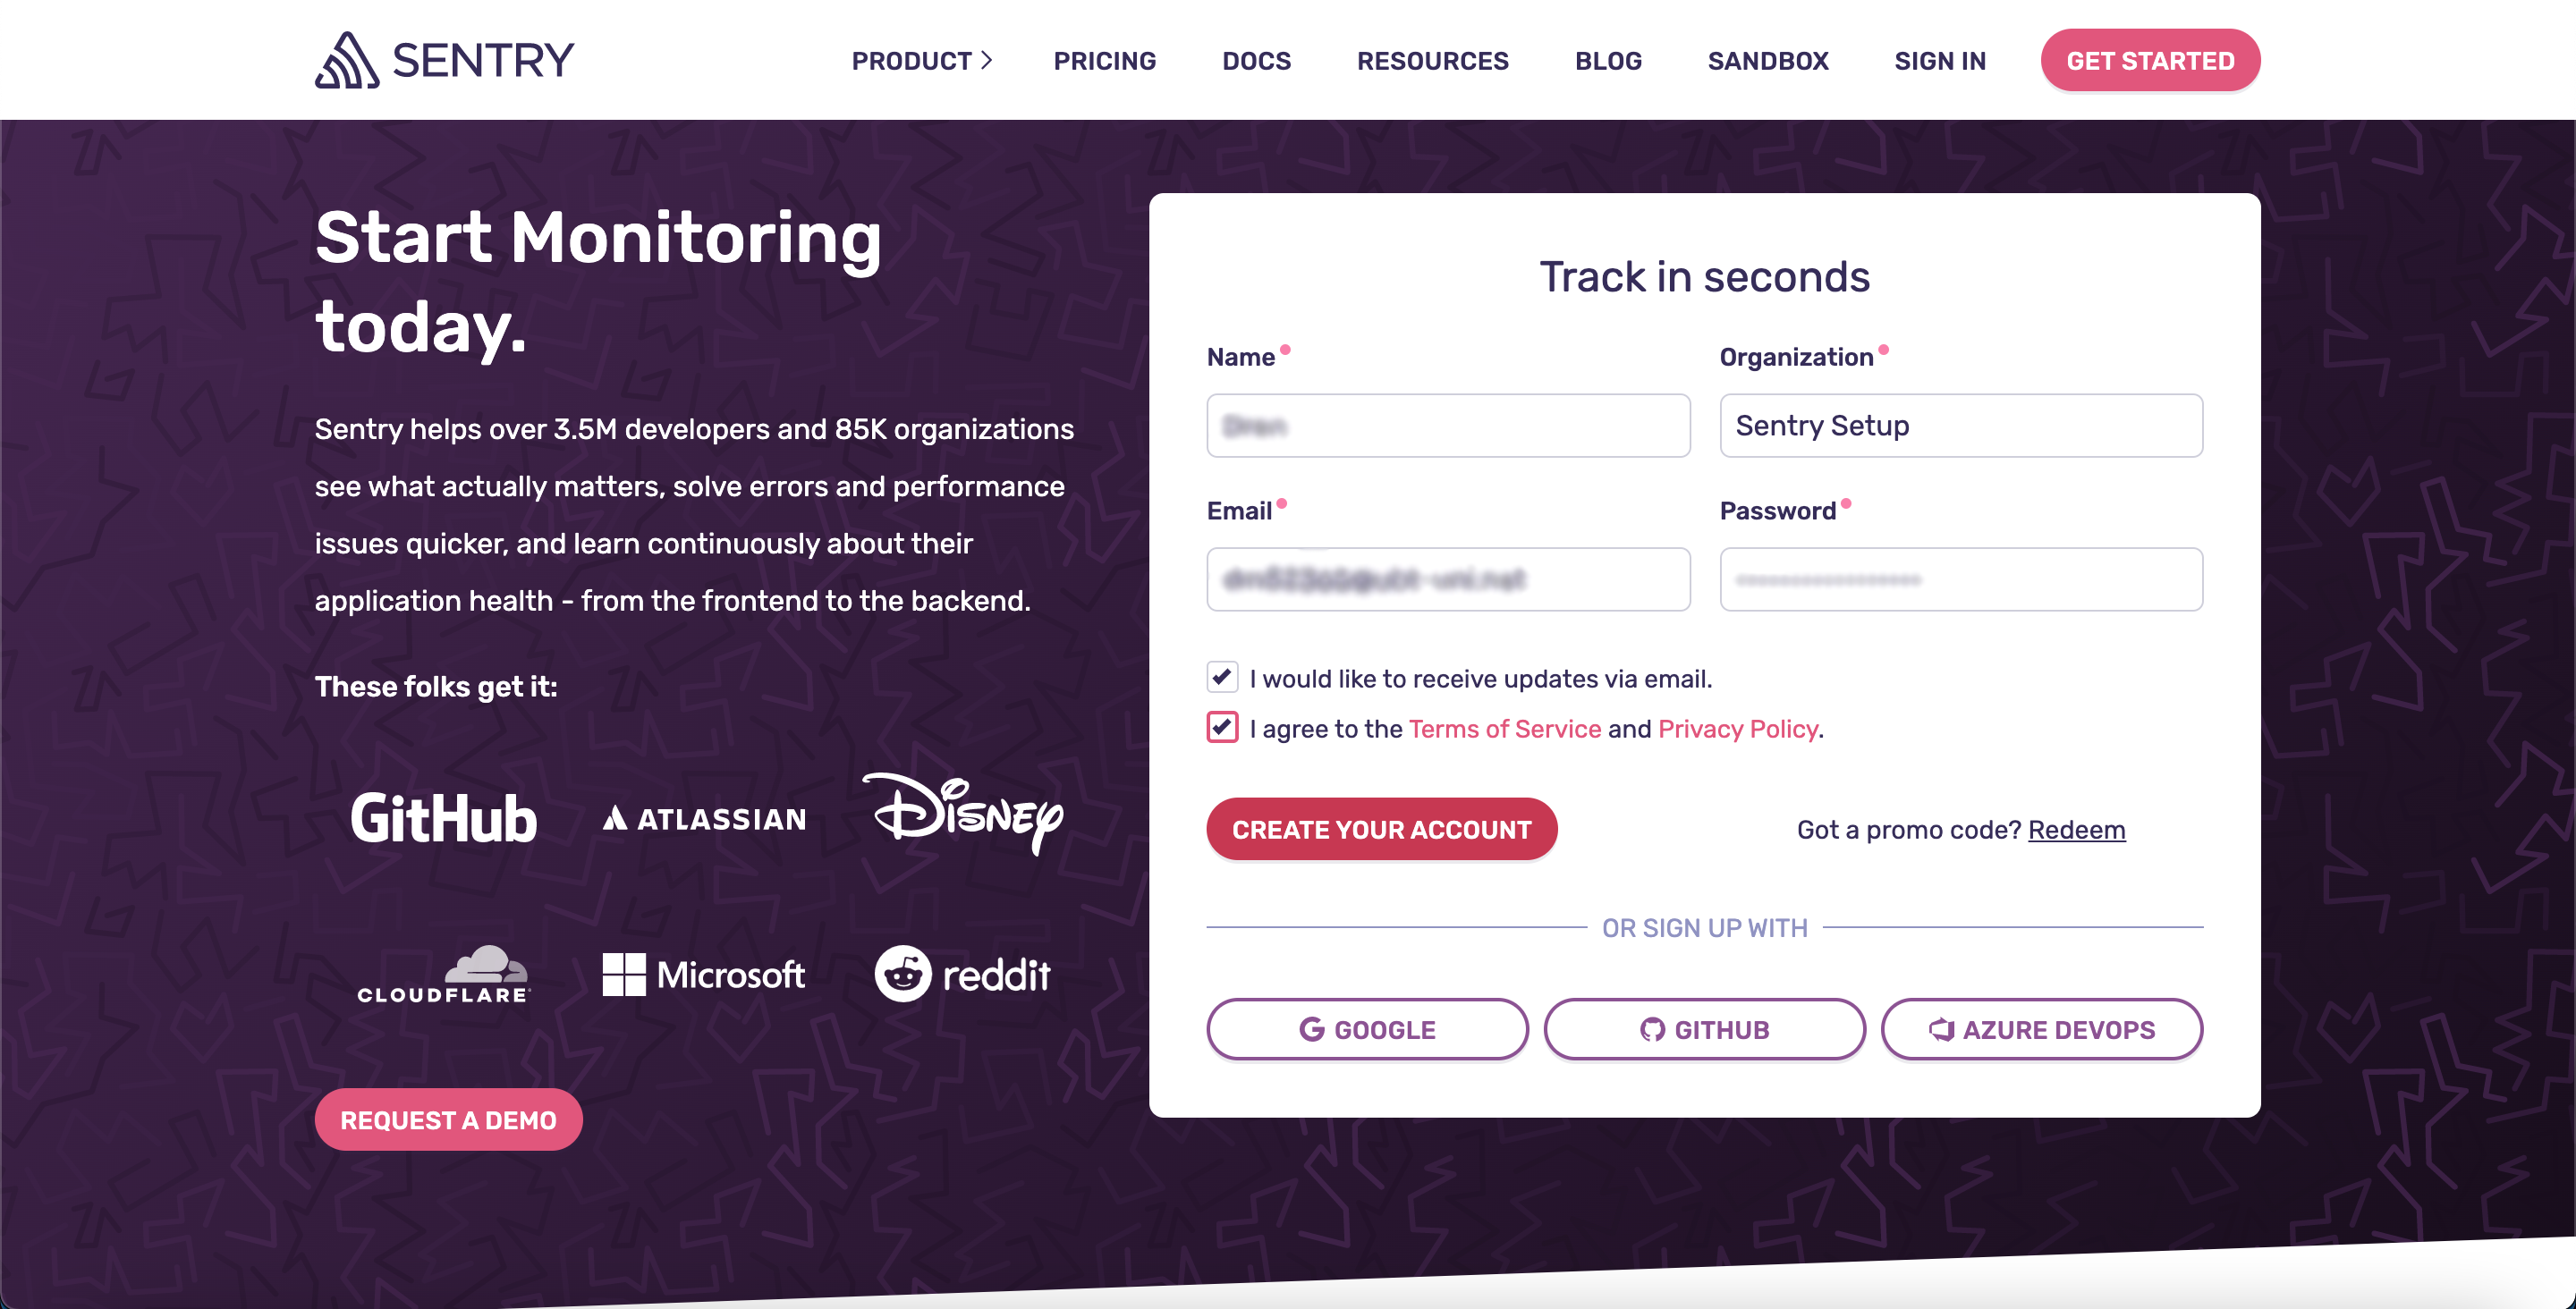
After filling the needed data's we should click on CREATE YOUR ACCOUNT, then ****we will receive an email from Sentry Platform that will be something like the screen below:
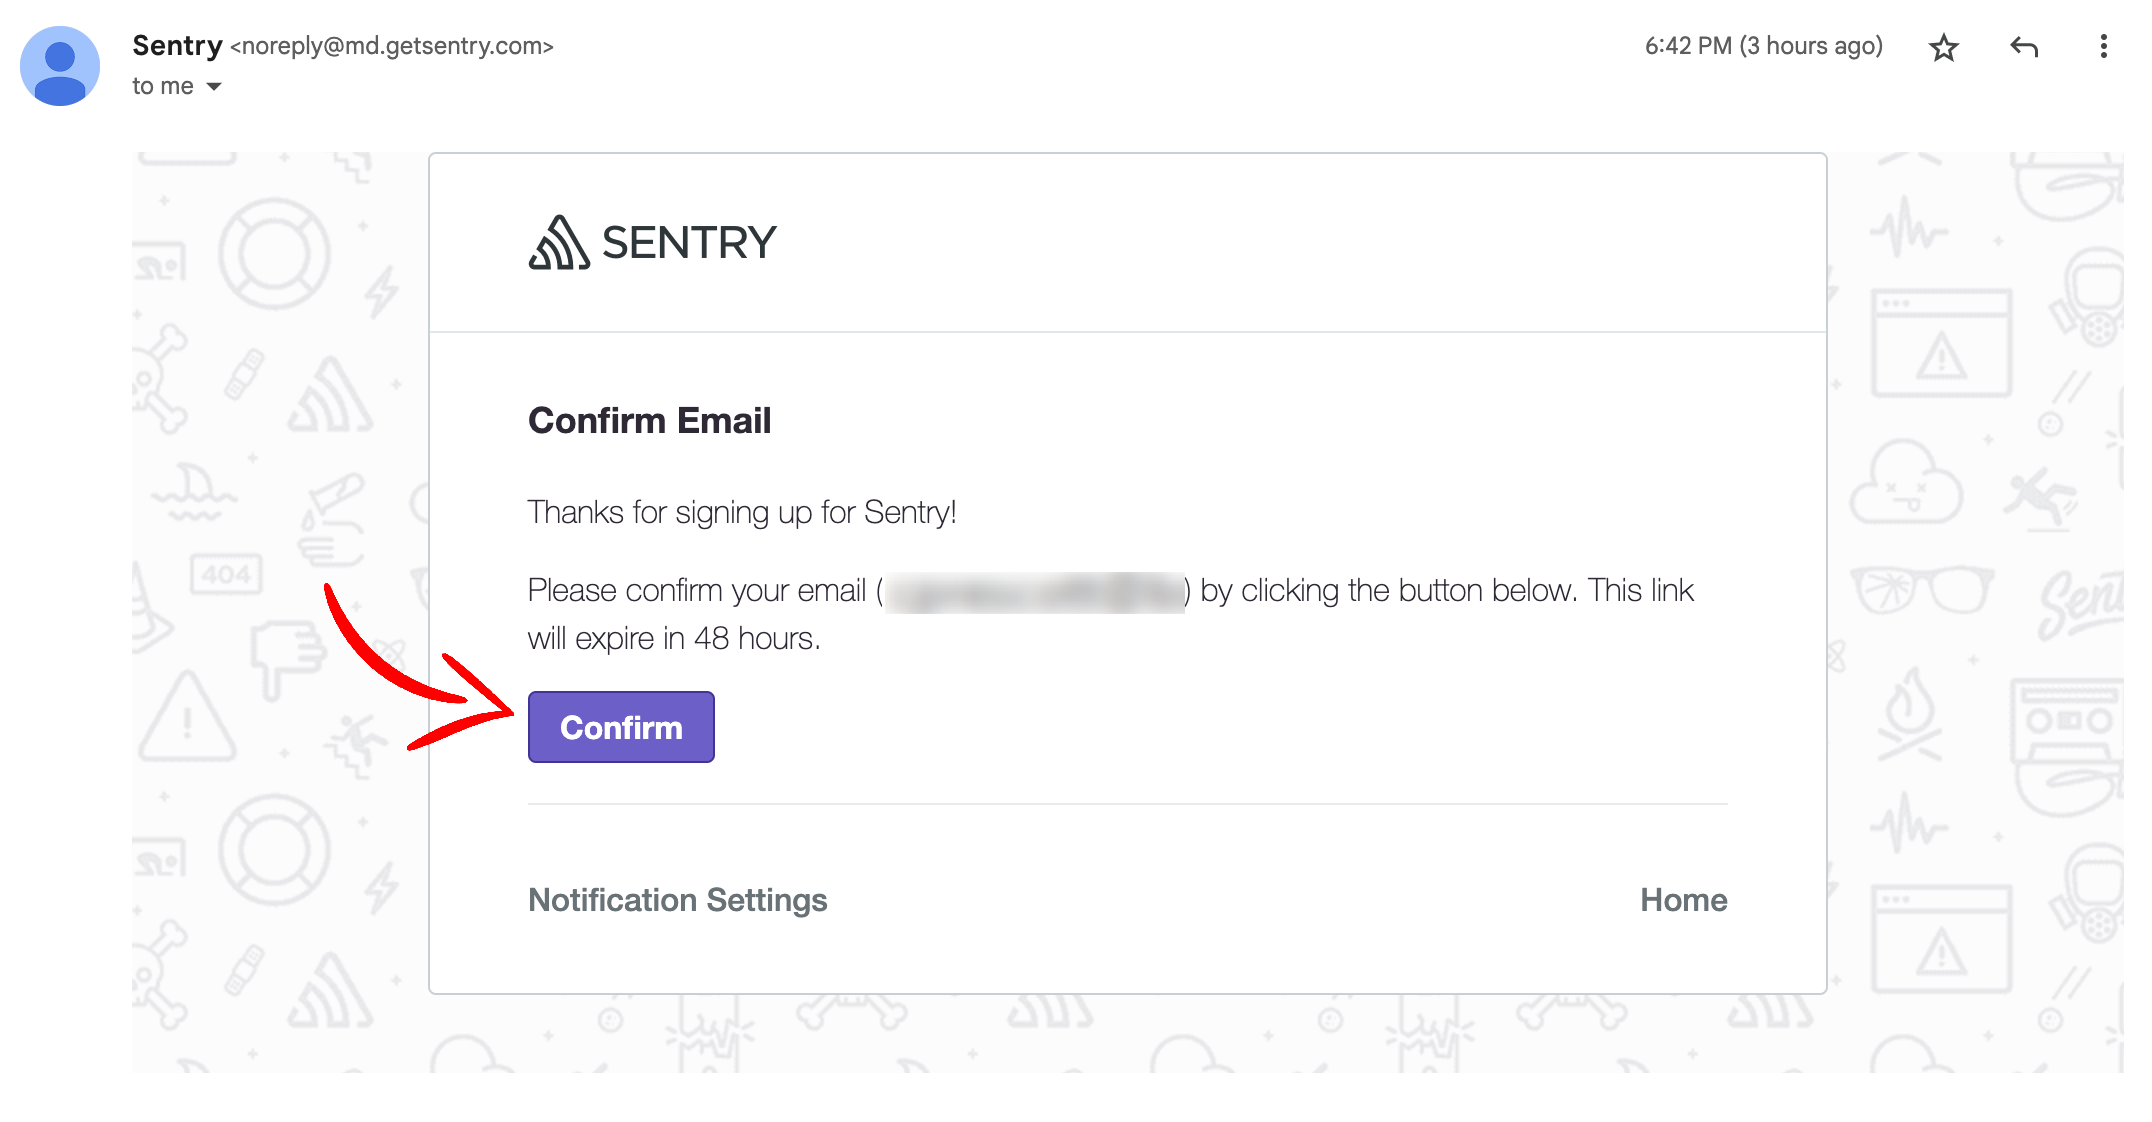
Here we should click on Confirm to confirm our email account that we have settled up on the Sentry Platform.
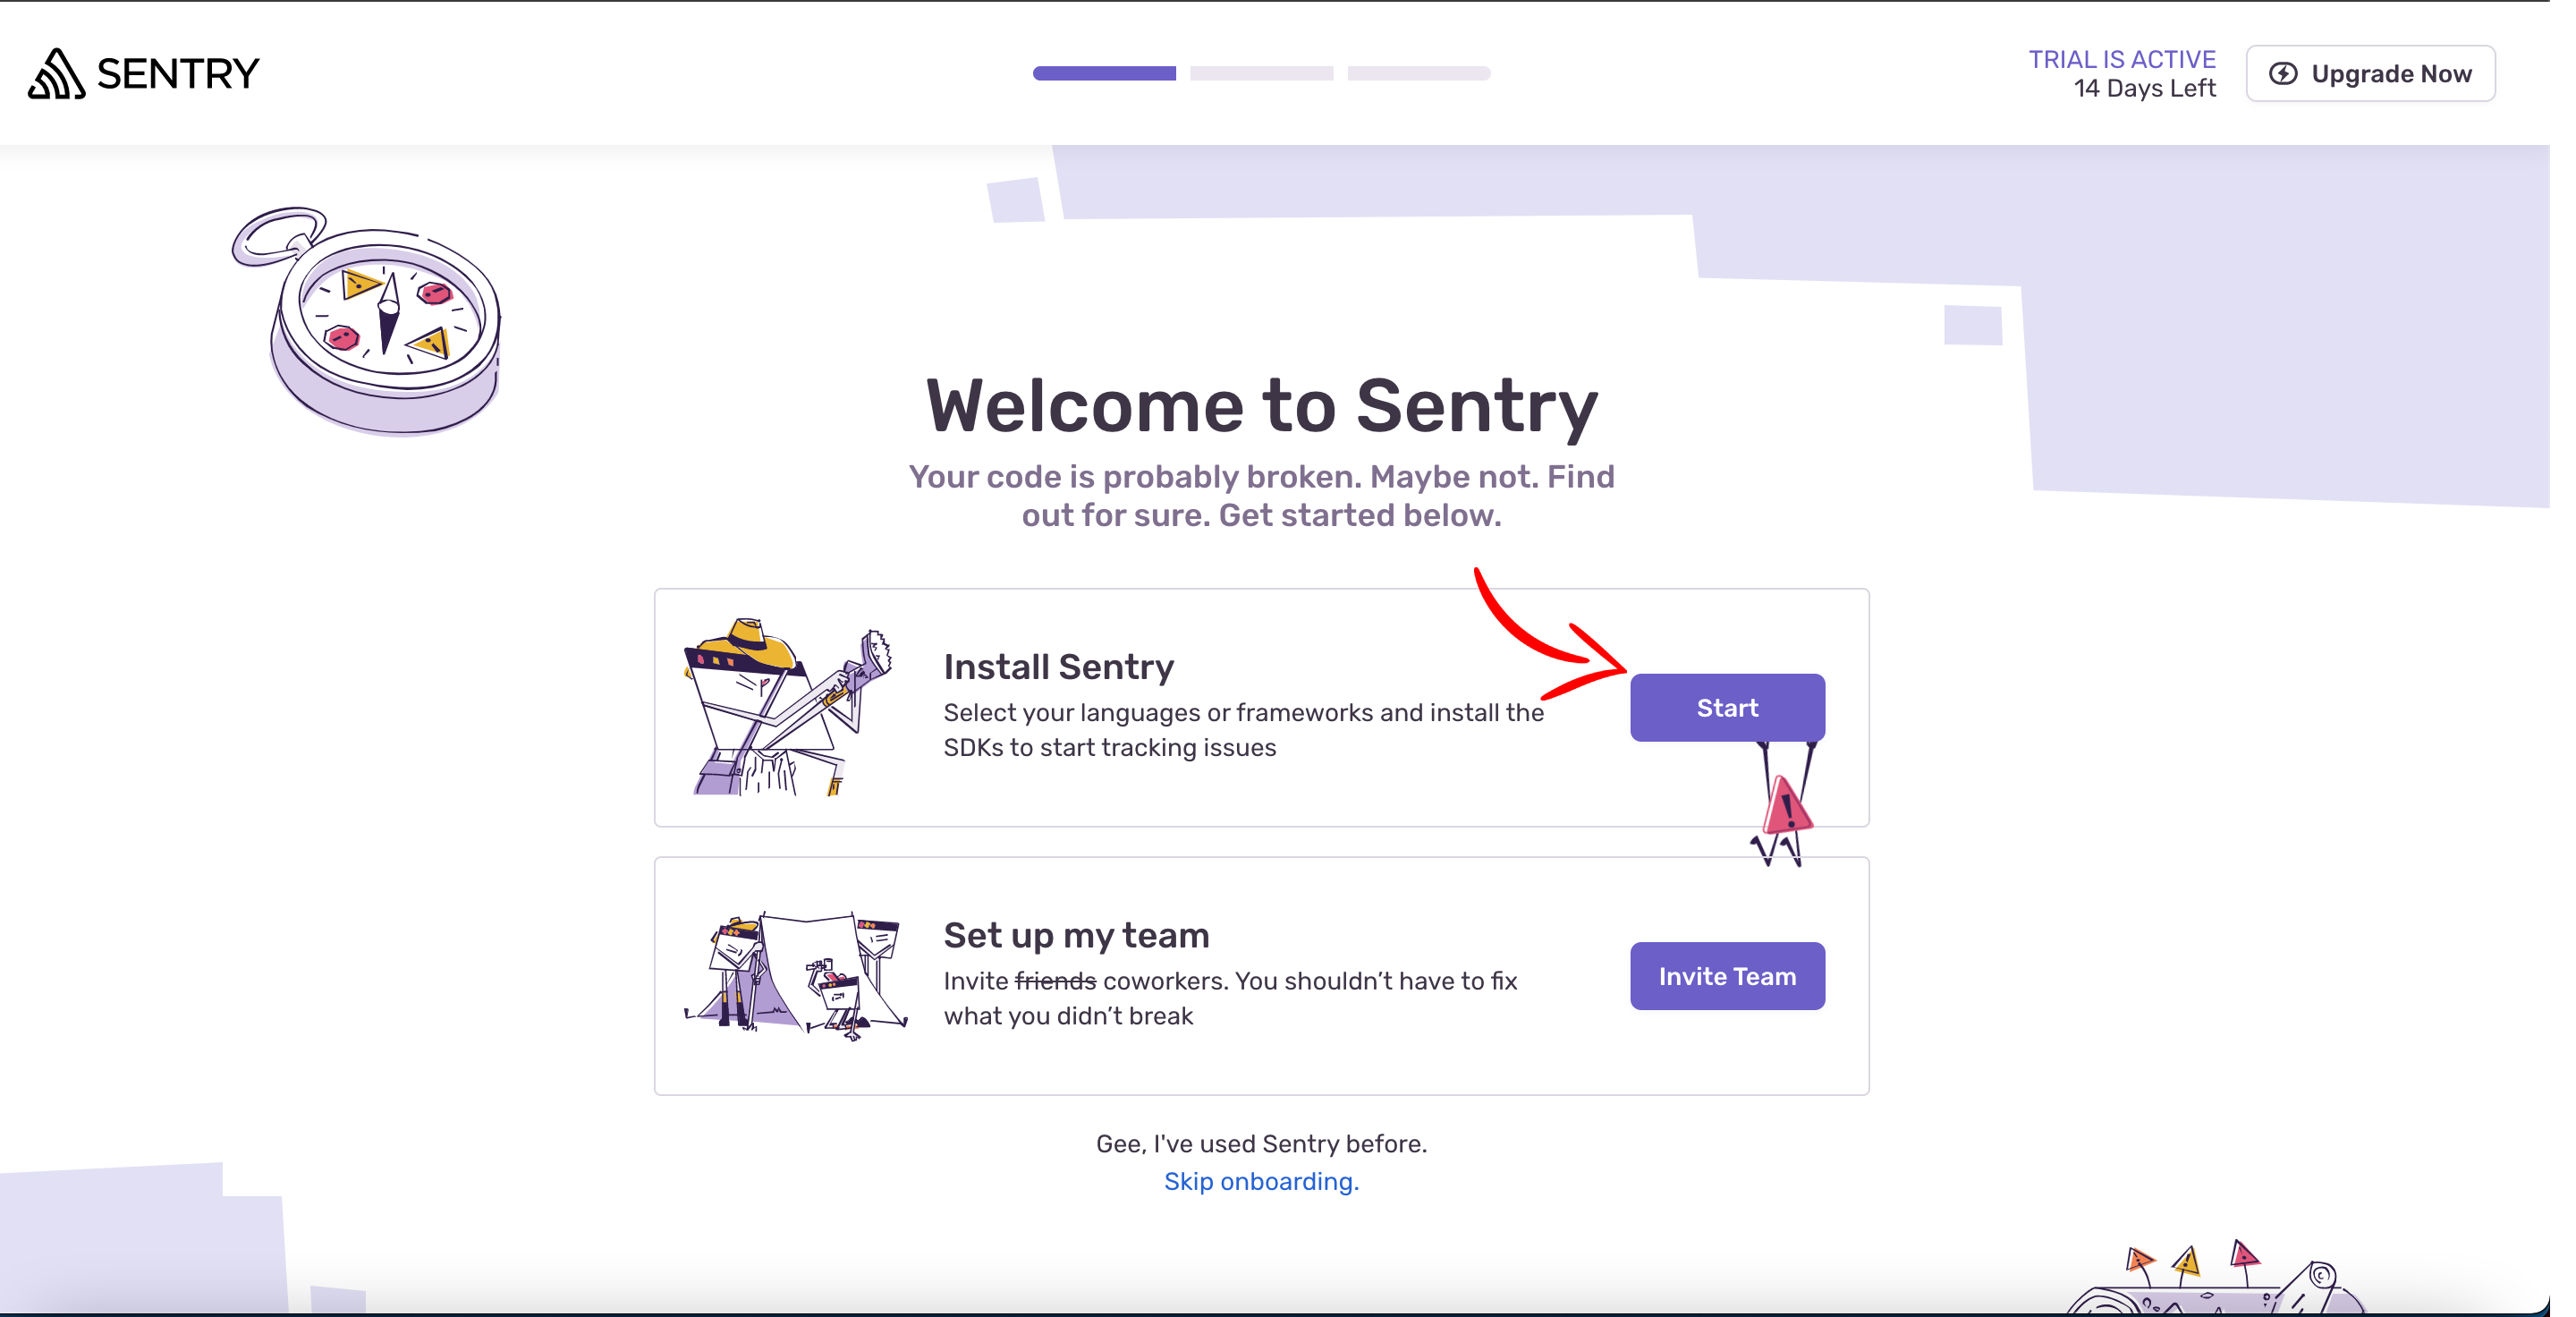
After that we will see that we are going to be automatically navigated to the Sentry Welcome Screen, where we can start the installation process on our React Native App or the second thing that we can do is to invite our team members if we want.
But for now I'm going to start with installation of the Sentry SDK on my React Native App and for doing that please follow steps that I'm going to show below.
Click on the Start button:
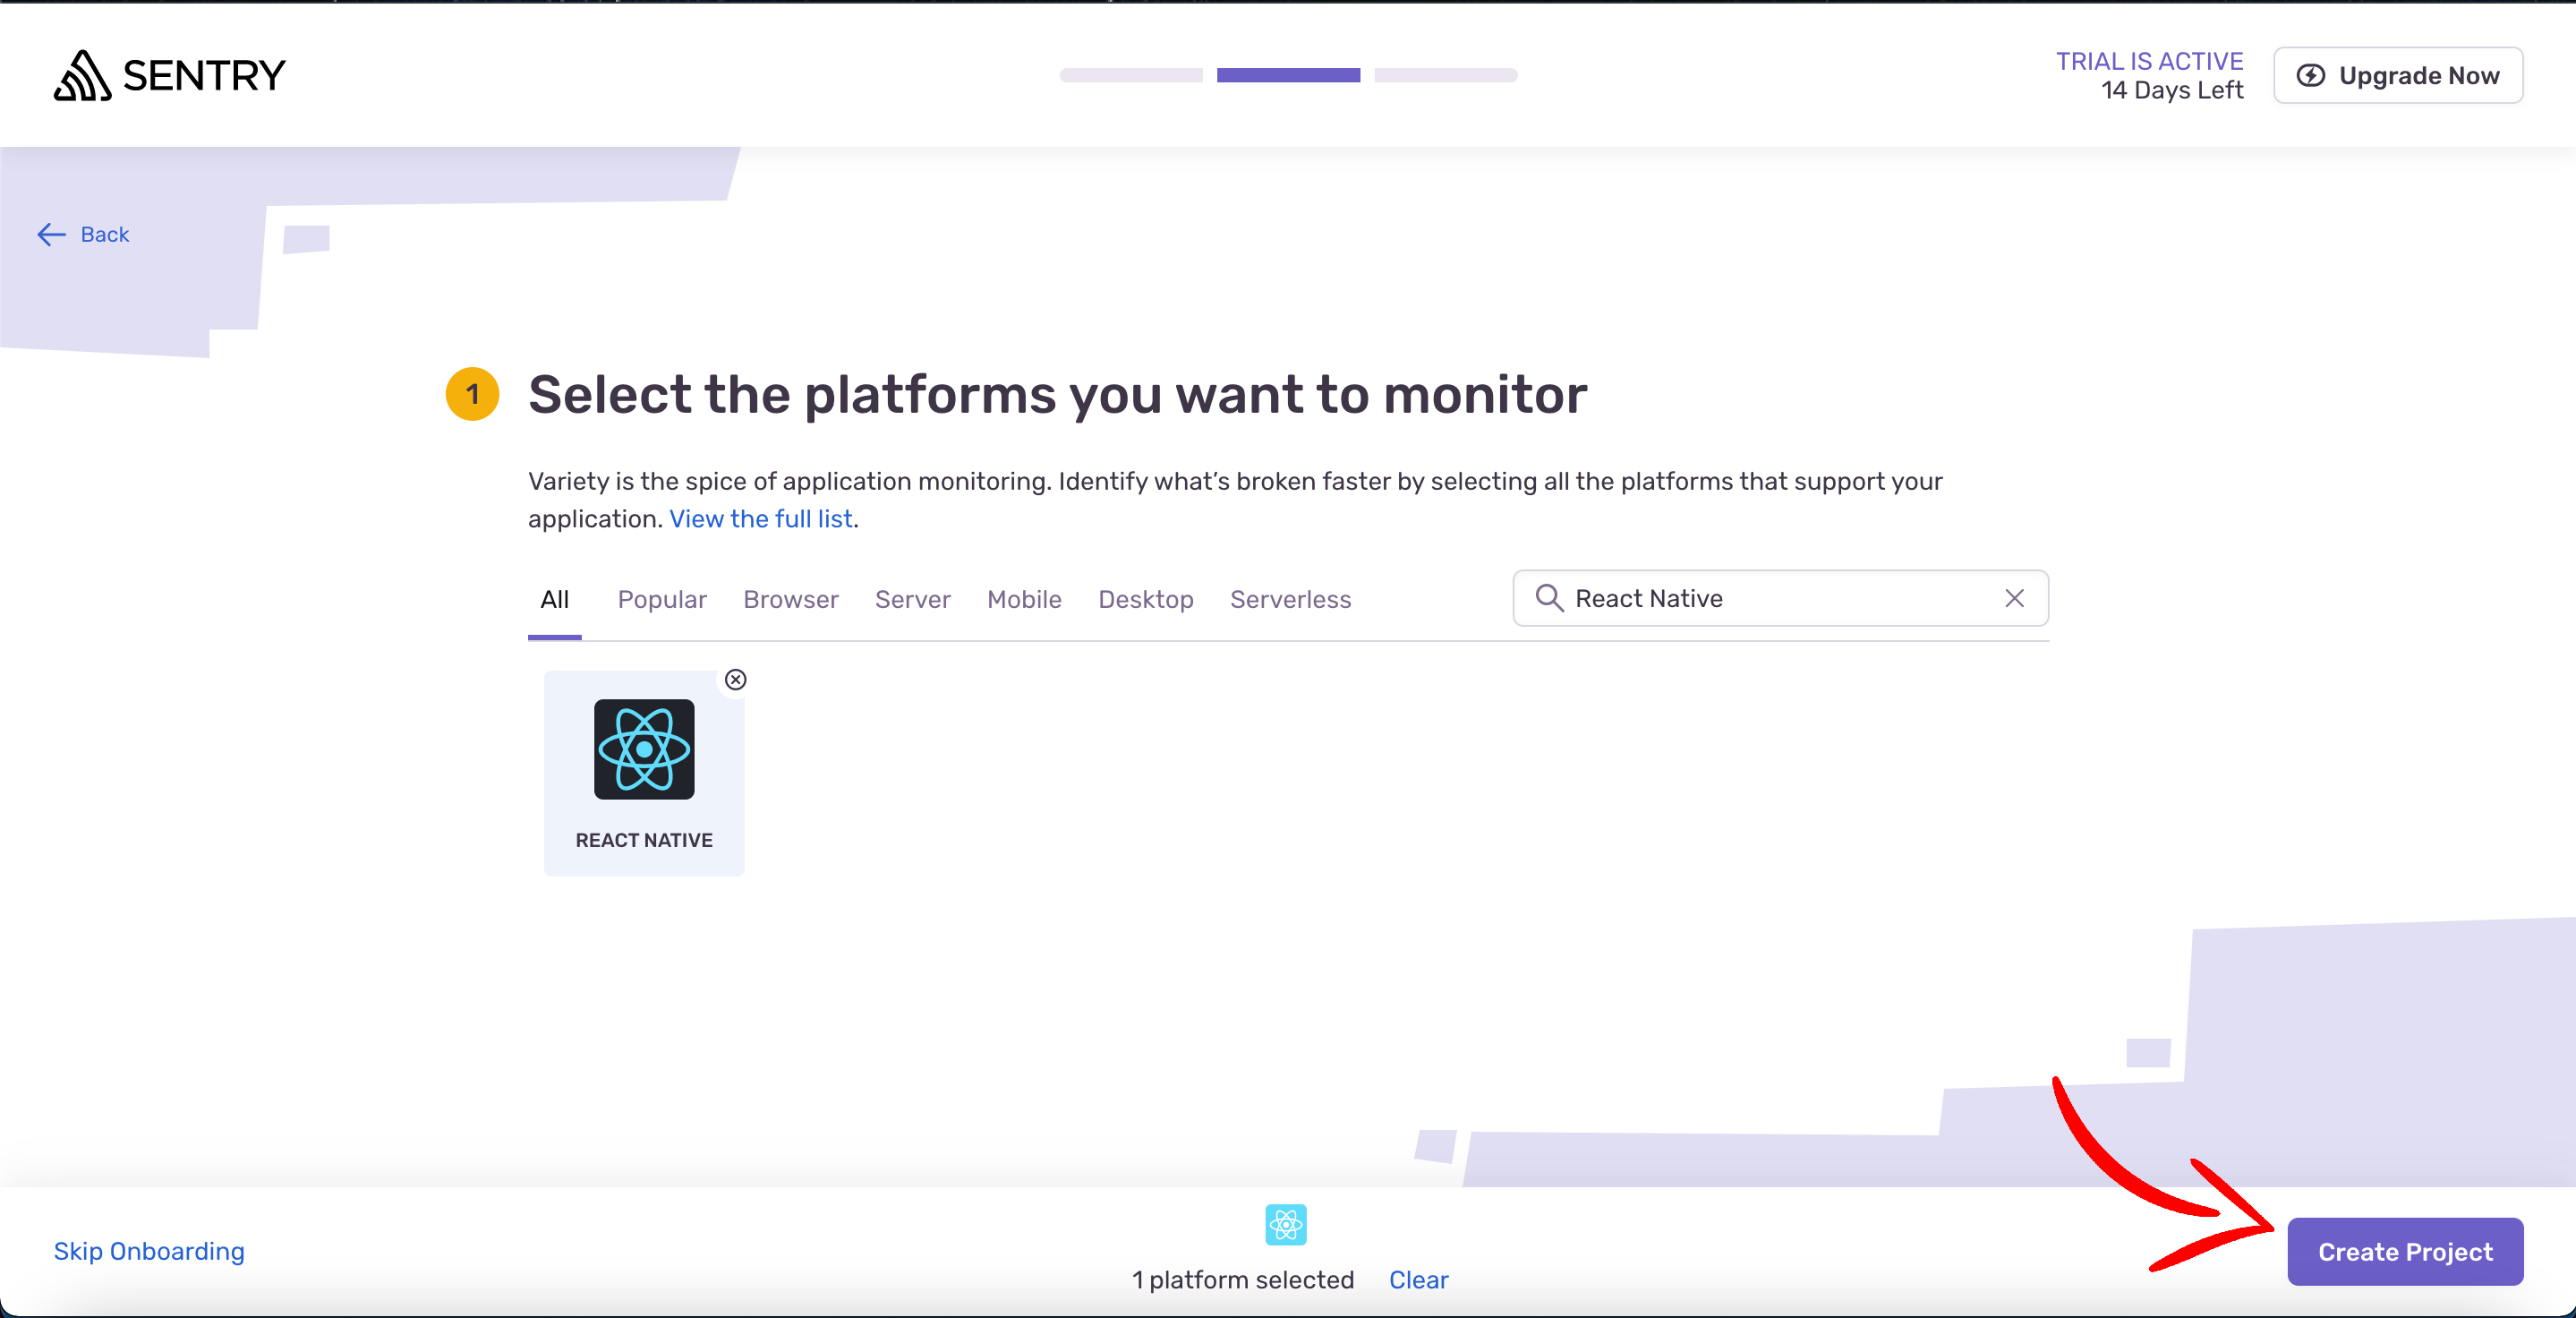
After clicking on the Start Button, we are going to see the next step where we are able to choose the platform that we are using for our project, in my case I will search/pick the React Native Platform and the next step is to click on Create Project.
After clicking on Create Project we will see the screen below where we should start to prepare the React Native App to have the Sentry SDK integrated.
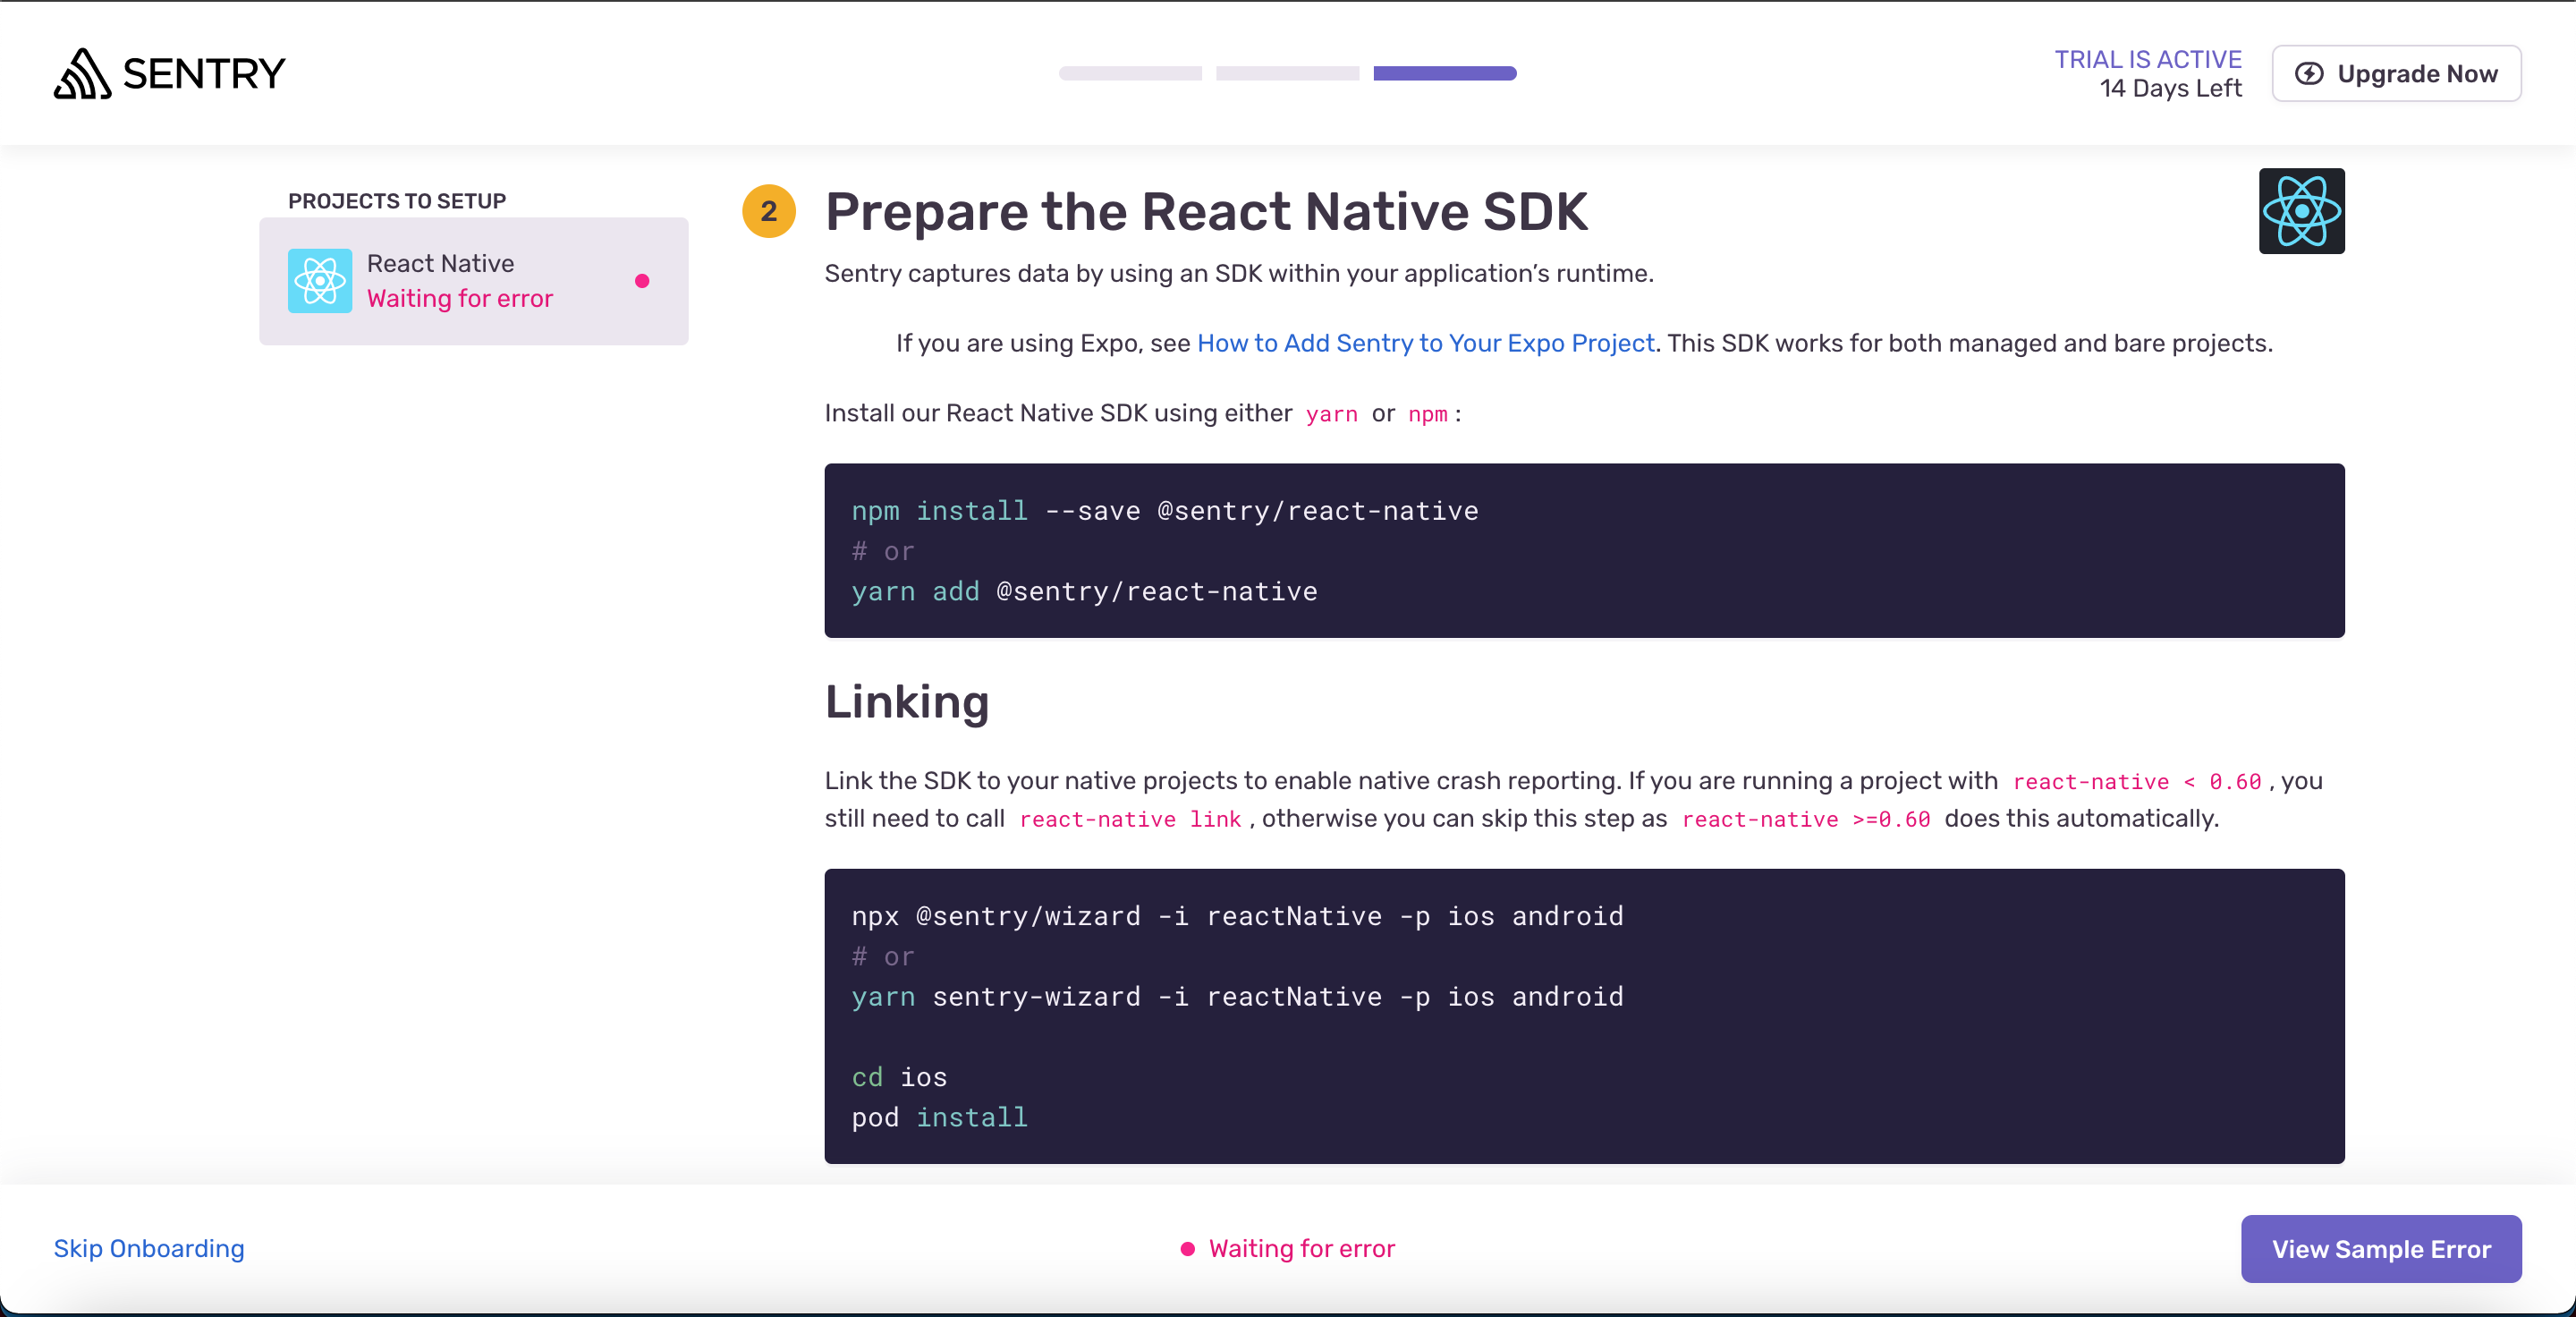
For now I'm going to open my React Native App and I will explain on details every step that we should do.
Below I have opened my React Native App on Visual Studio Code, and after that we should open a terminal where we need to be sure that we are inside of the project folder.
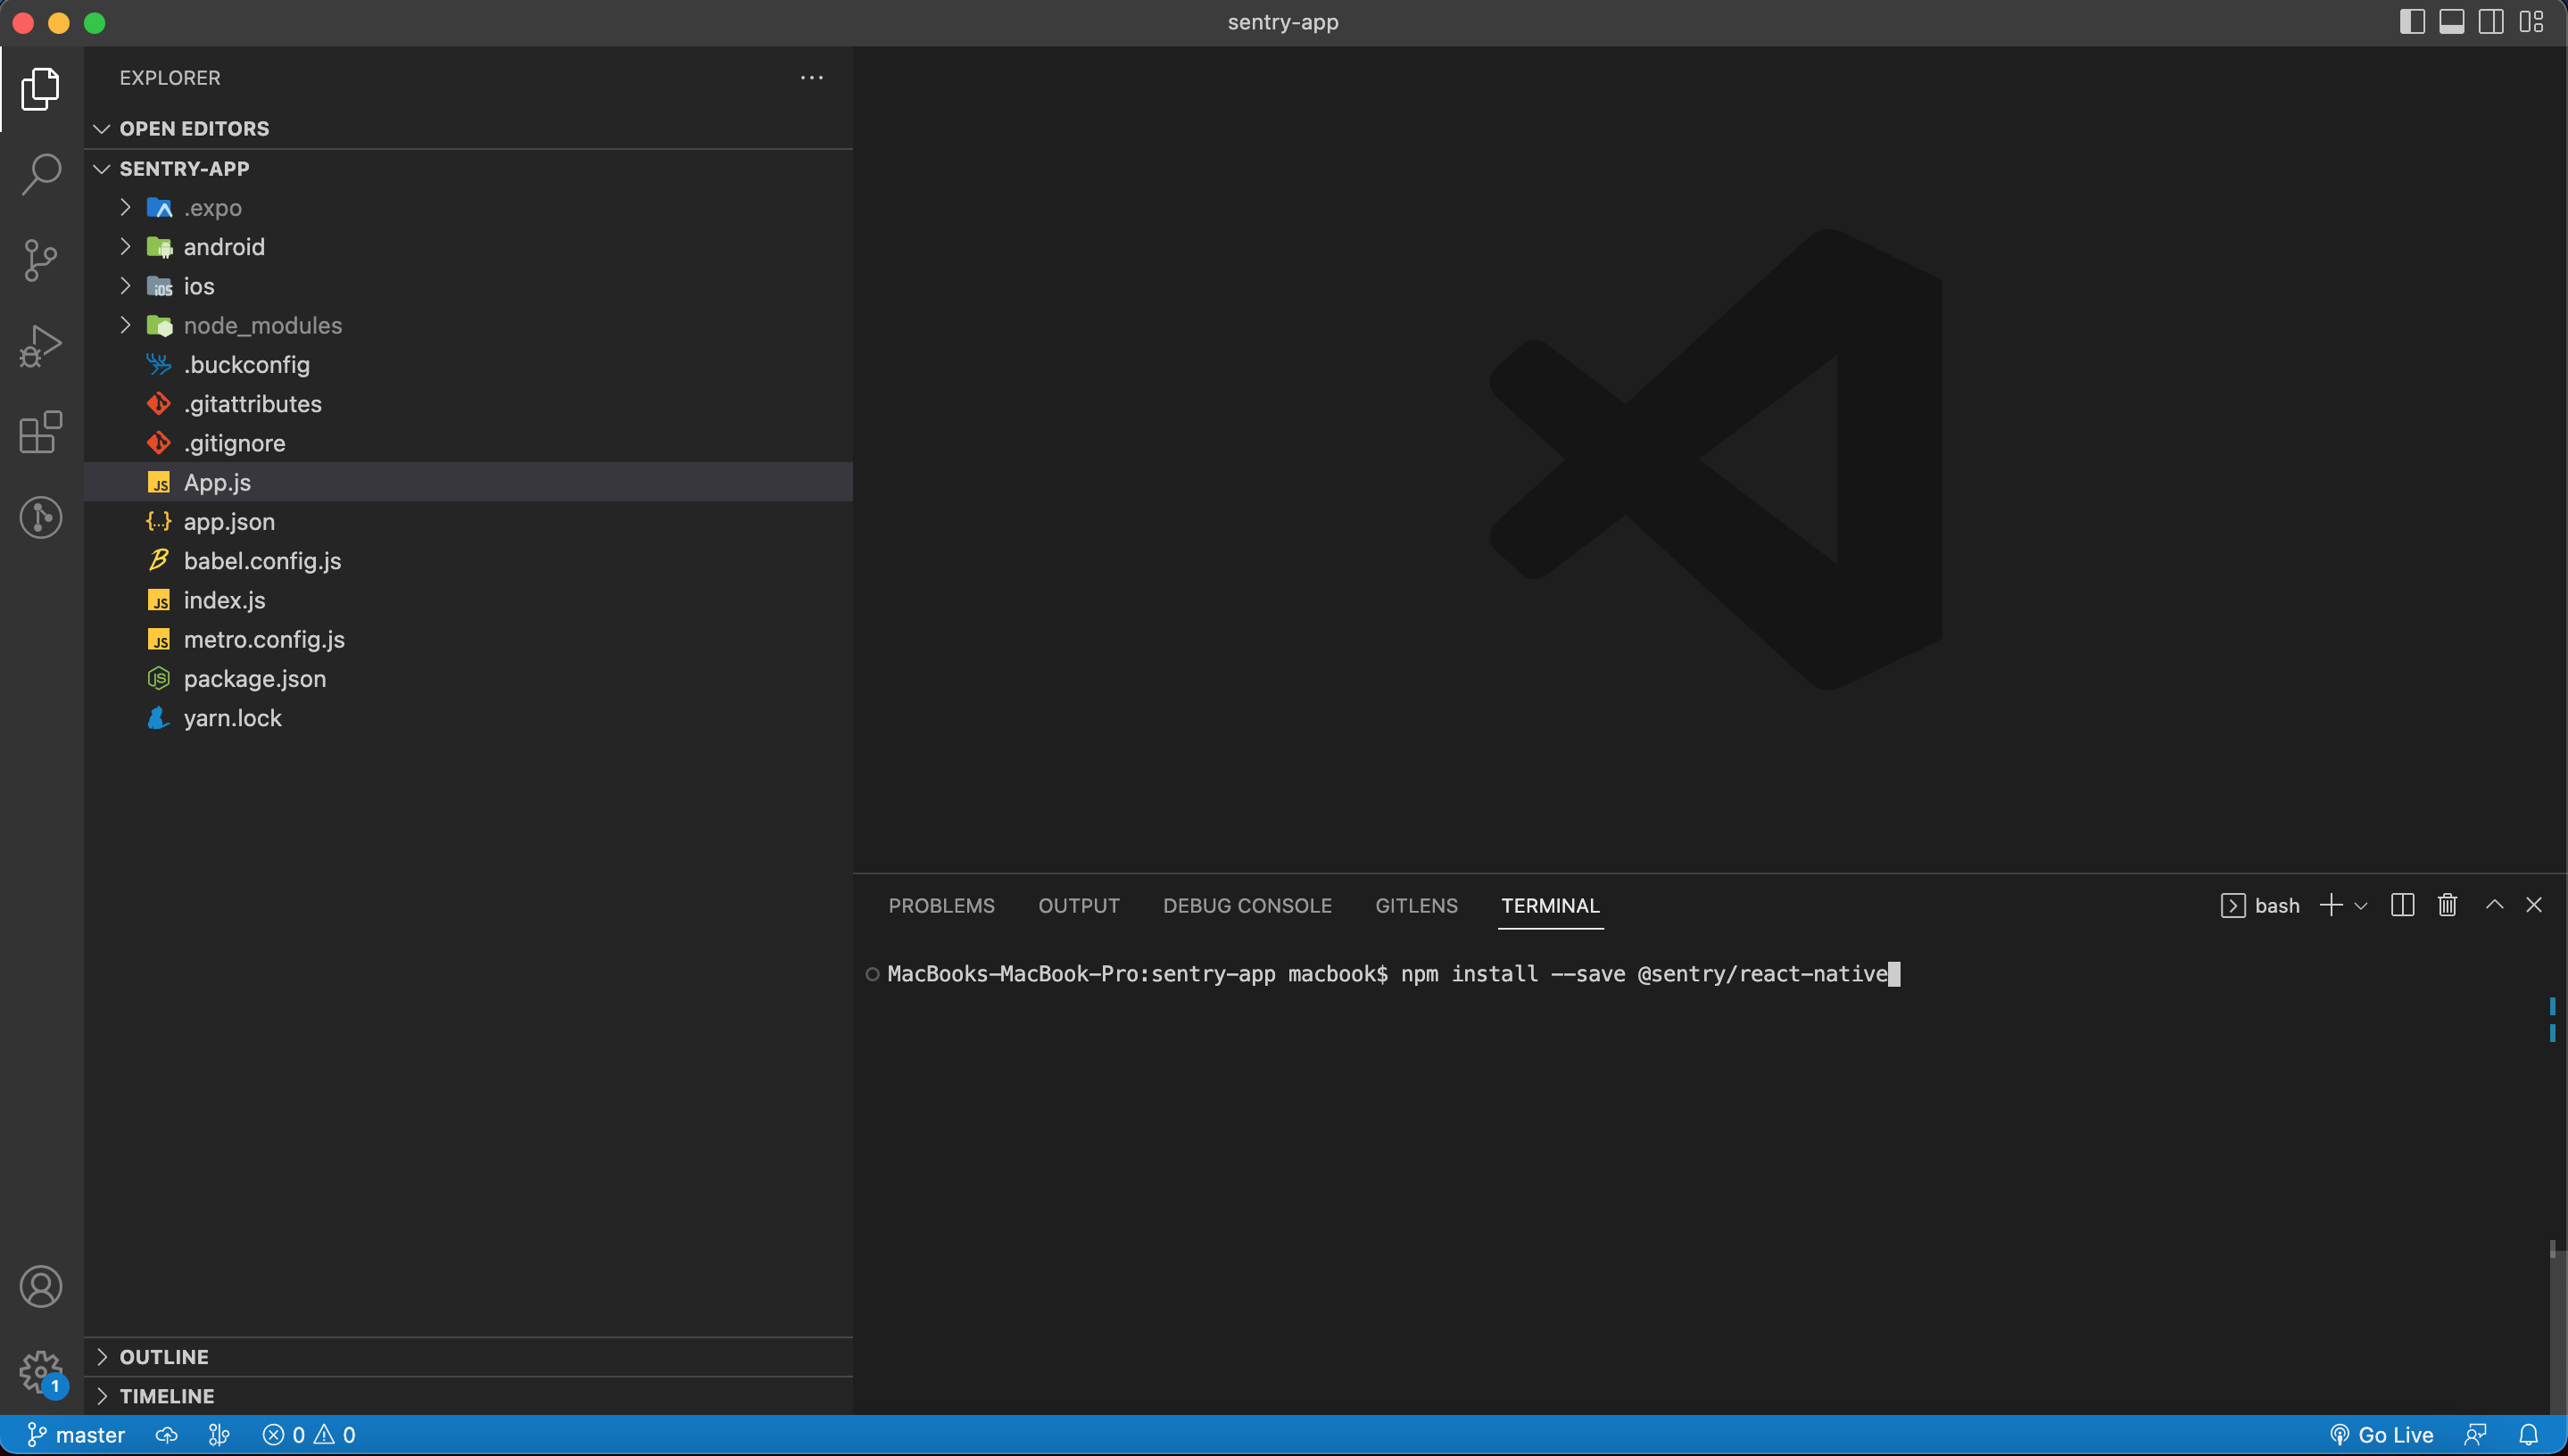
The command that we can use for installing the package of sentry is like below:
//on my case Im using npm
npm install --save @sentry/react-native
//or if you're using yarn, use the command below:
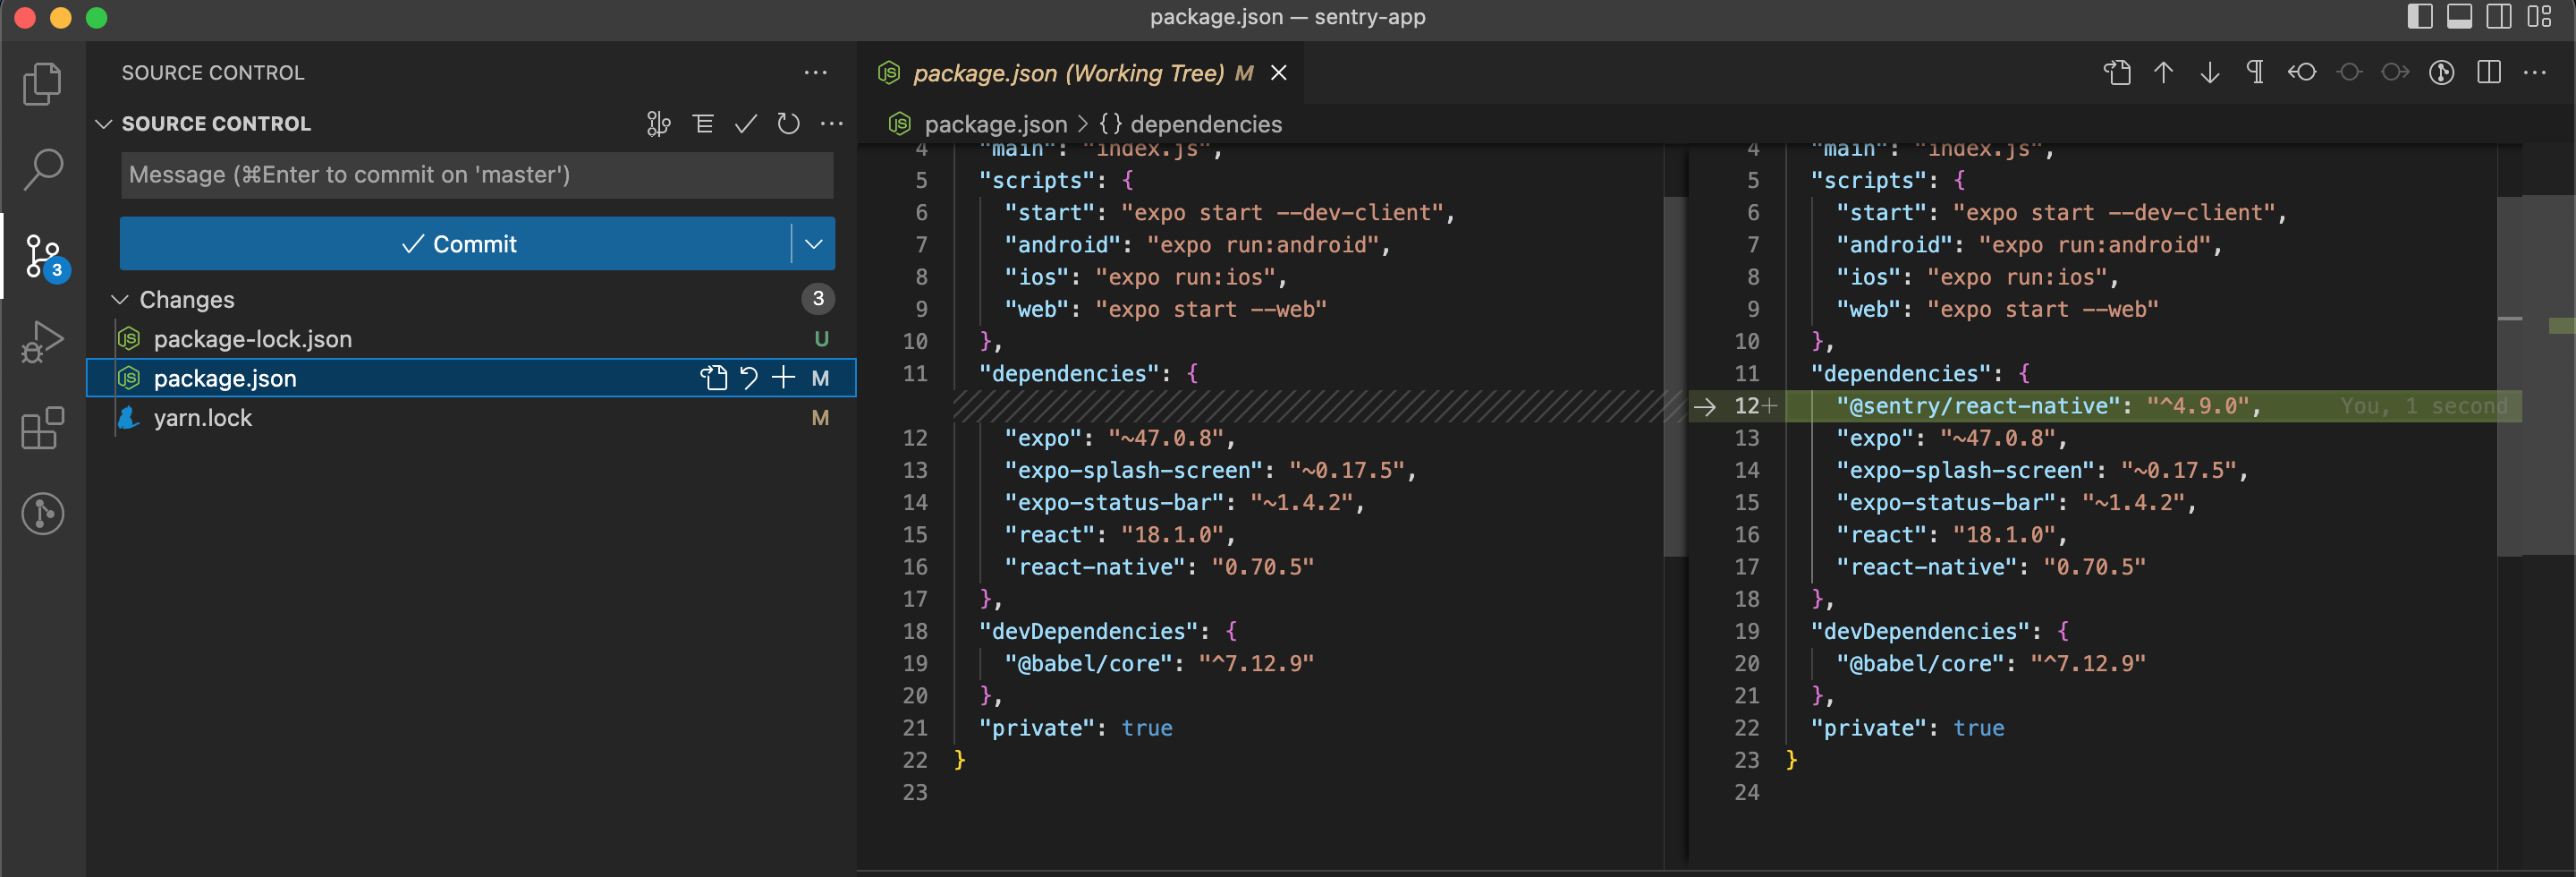
yarn add @sentry/react-nativeAfter being sure that the installation has been finished, we will be able to see 3 of changes that are made on our project at files (package-lock.json, package.json, and yarn.lock). If we click on package.json we can see that at the dependencies we have a new package @sentry/react-native.
Now it's time to start with the linking process.
What is the linking process ?
The linking process is used to link the SDK of Sentry Platform to our React Native App to enable native crash reporting. Things that we need to check before starting to do it is to check the version of the react-native that you're using for running your project. You can check the version of react-native by running this command on the terminal that you have opened before for installing the sentry package:
npm list --depth=0If you're using react-native < 0.60 you should use the command below:
react-native link @sentry/react-nativeAfter running this command on the terminal we will see that some new changes are made for both Platforms iOS and Android.
Files that will be changed are: Podfile (iOS), MainApplication.java and settings.gradle.
On this step we can see that we just need to run commands and the other configurations will be automatically setted up by Sentry SDK which will facilitate our work.
If you're using react-native ≥ 0.60 you can skip the command above because this version of react-native will does this automatically
On my case my react native version is greater than 0.60 so I'm going to use the following commands:
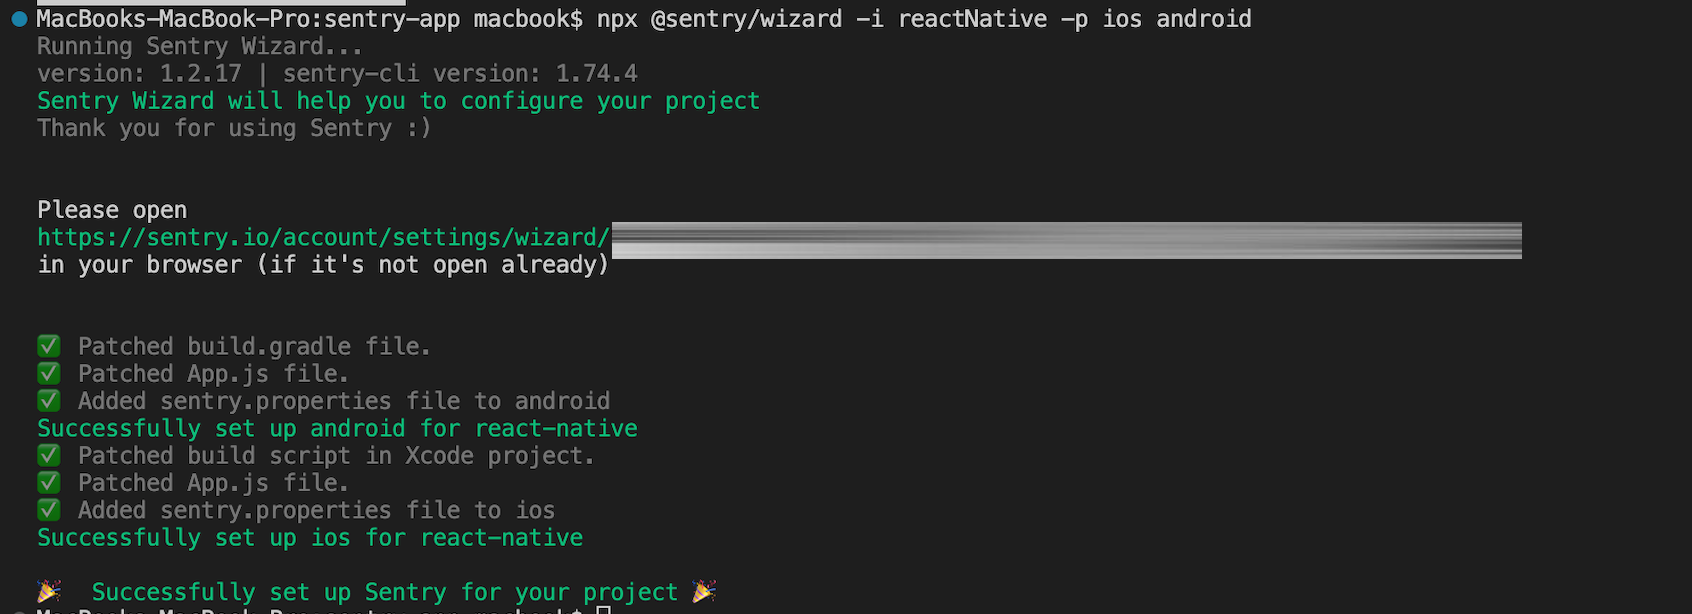
npx @sentry/wizard -i reactNative -p ios androidWith this command we will call to Sentry Wizard which will help us to configure the Sentry SDK with our react-native app
On this case we can open our project on the browser to check the integration.
The call to Sentry Wizard on our React Native app will do the needed configurations and changes that I have explained below:
Successfully set up android for react-native
- Patched build.gradle file
- Patched App.js file
- Added sentry properties file to android
Successfully set up iOS for react-native
- Patched build script in Xcode project
- Patched App.js file
- Added sentry properties file to ios
iOS Specifics in short points:
When we use the Xcode, you can hook directly into the build process to upload debug symbols and source maps. However, if you are using bitcode, you will need to disable the “Upload Debug Symbols to Sentry” build phase and then separately upload debug symbols from iTunes Connect to Sentry.
Android Specifics in short points:
After running the command react-native link into the terminal of our React Native project the Gradle files of android will be automatically updated and if we want to create a new release by running ./gradlew assembleRelease or ./gradlew bundleRelease source maps will be automatically build and uploaded to the Sentry Dashboard, at the Releases section on the side bar.
Now we can see that some changes are made on the App.js file after the call to Sentry Wizard.
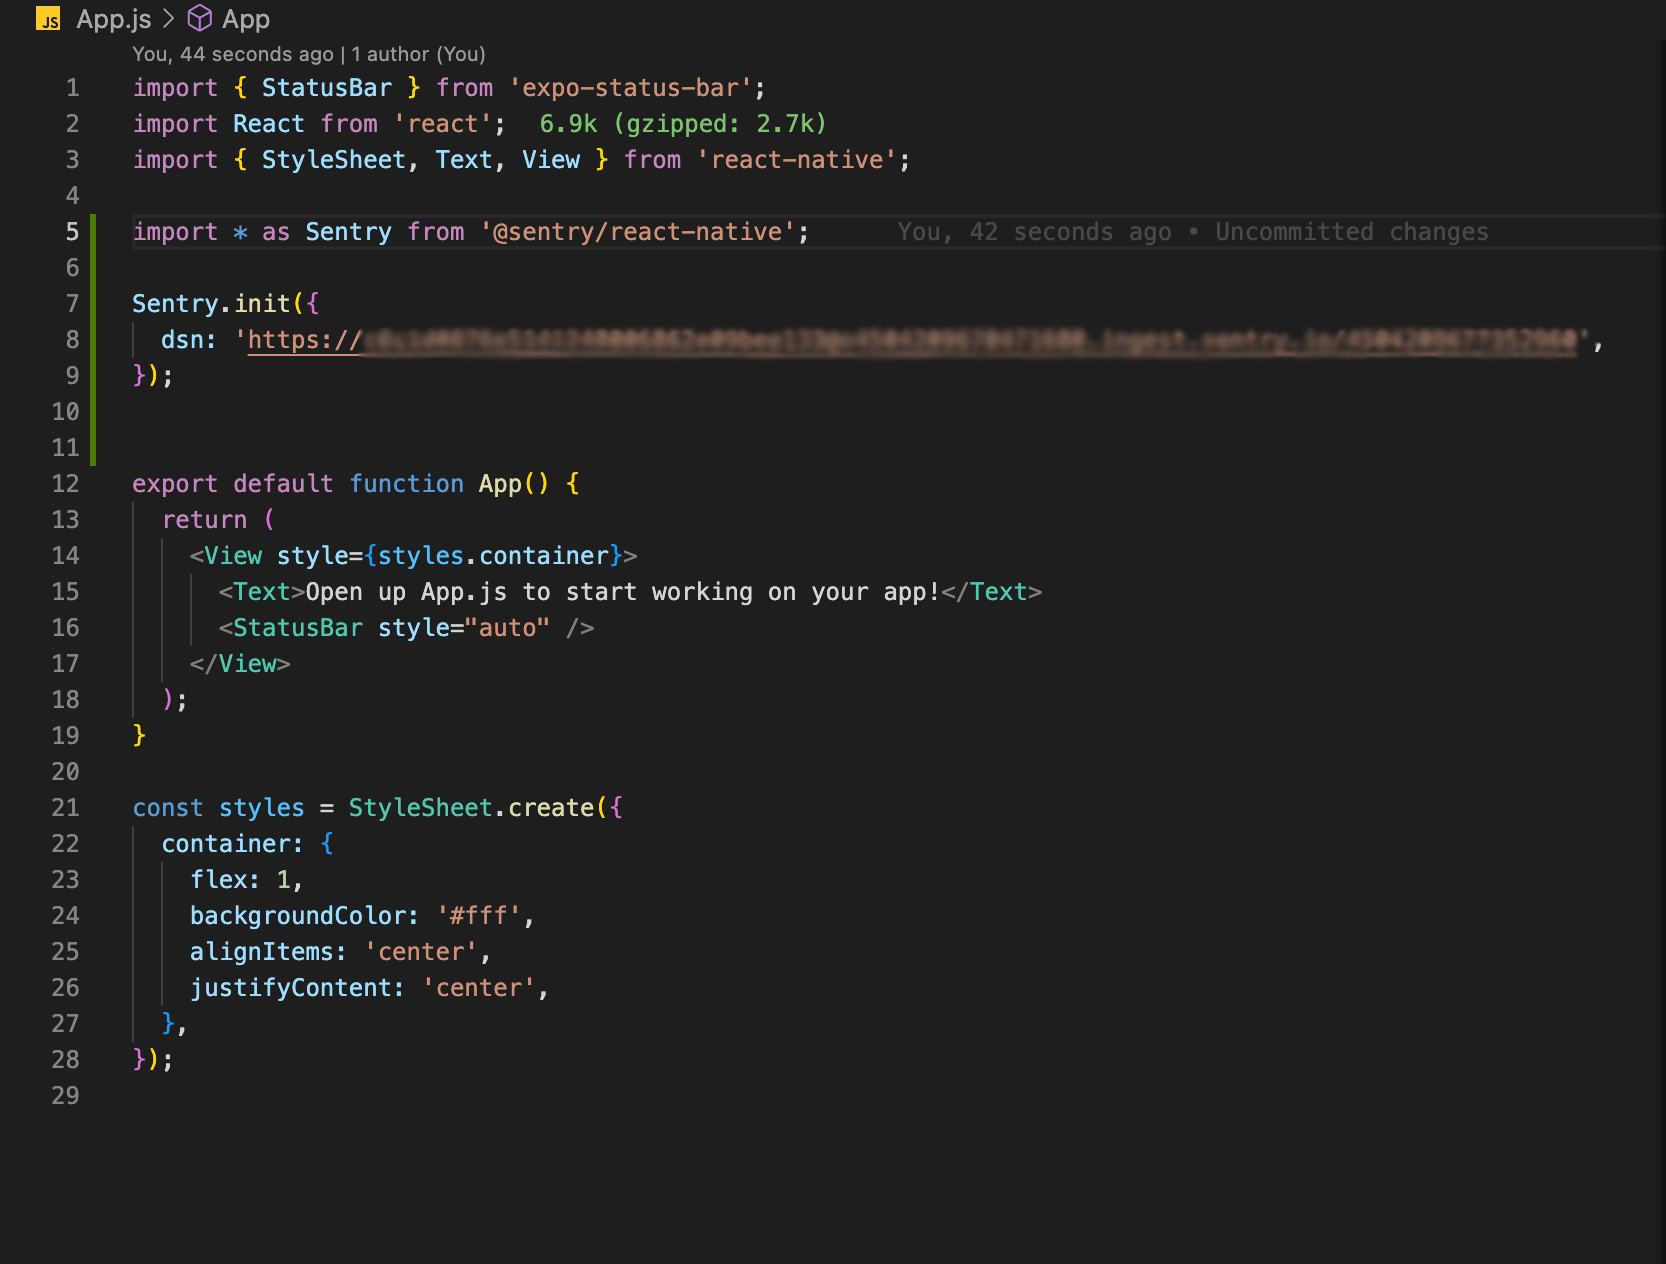
The initialization is done by default and on this step we need to wrap our app with the Sentry.
Wrap the app with Sentry:
export default Sentry.wrap(App);After wrapping the App we are automatically able capture on real time every touch event tracking and to see performance monitoring.
Now it's time to start to test the integration, but firstly be sure that your app is running on iOS or Android simulator.
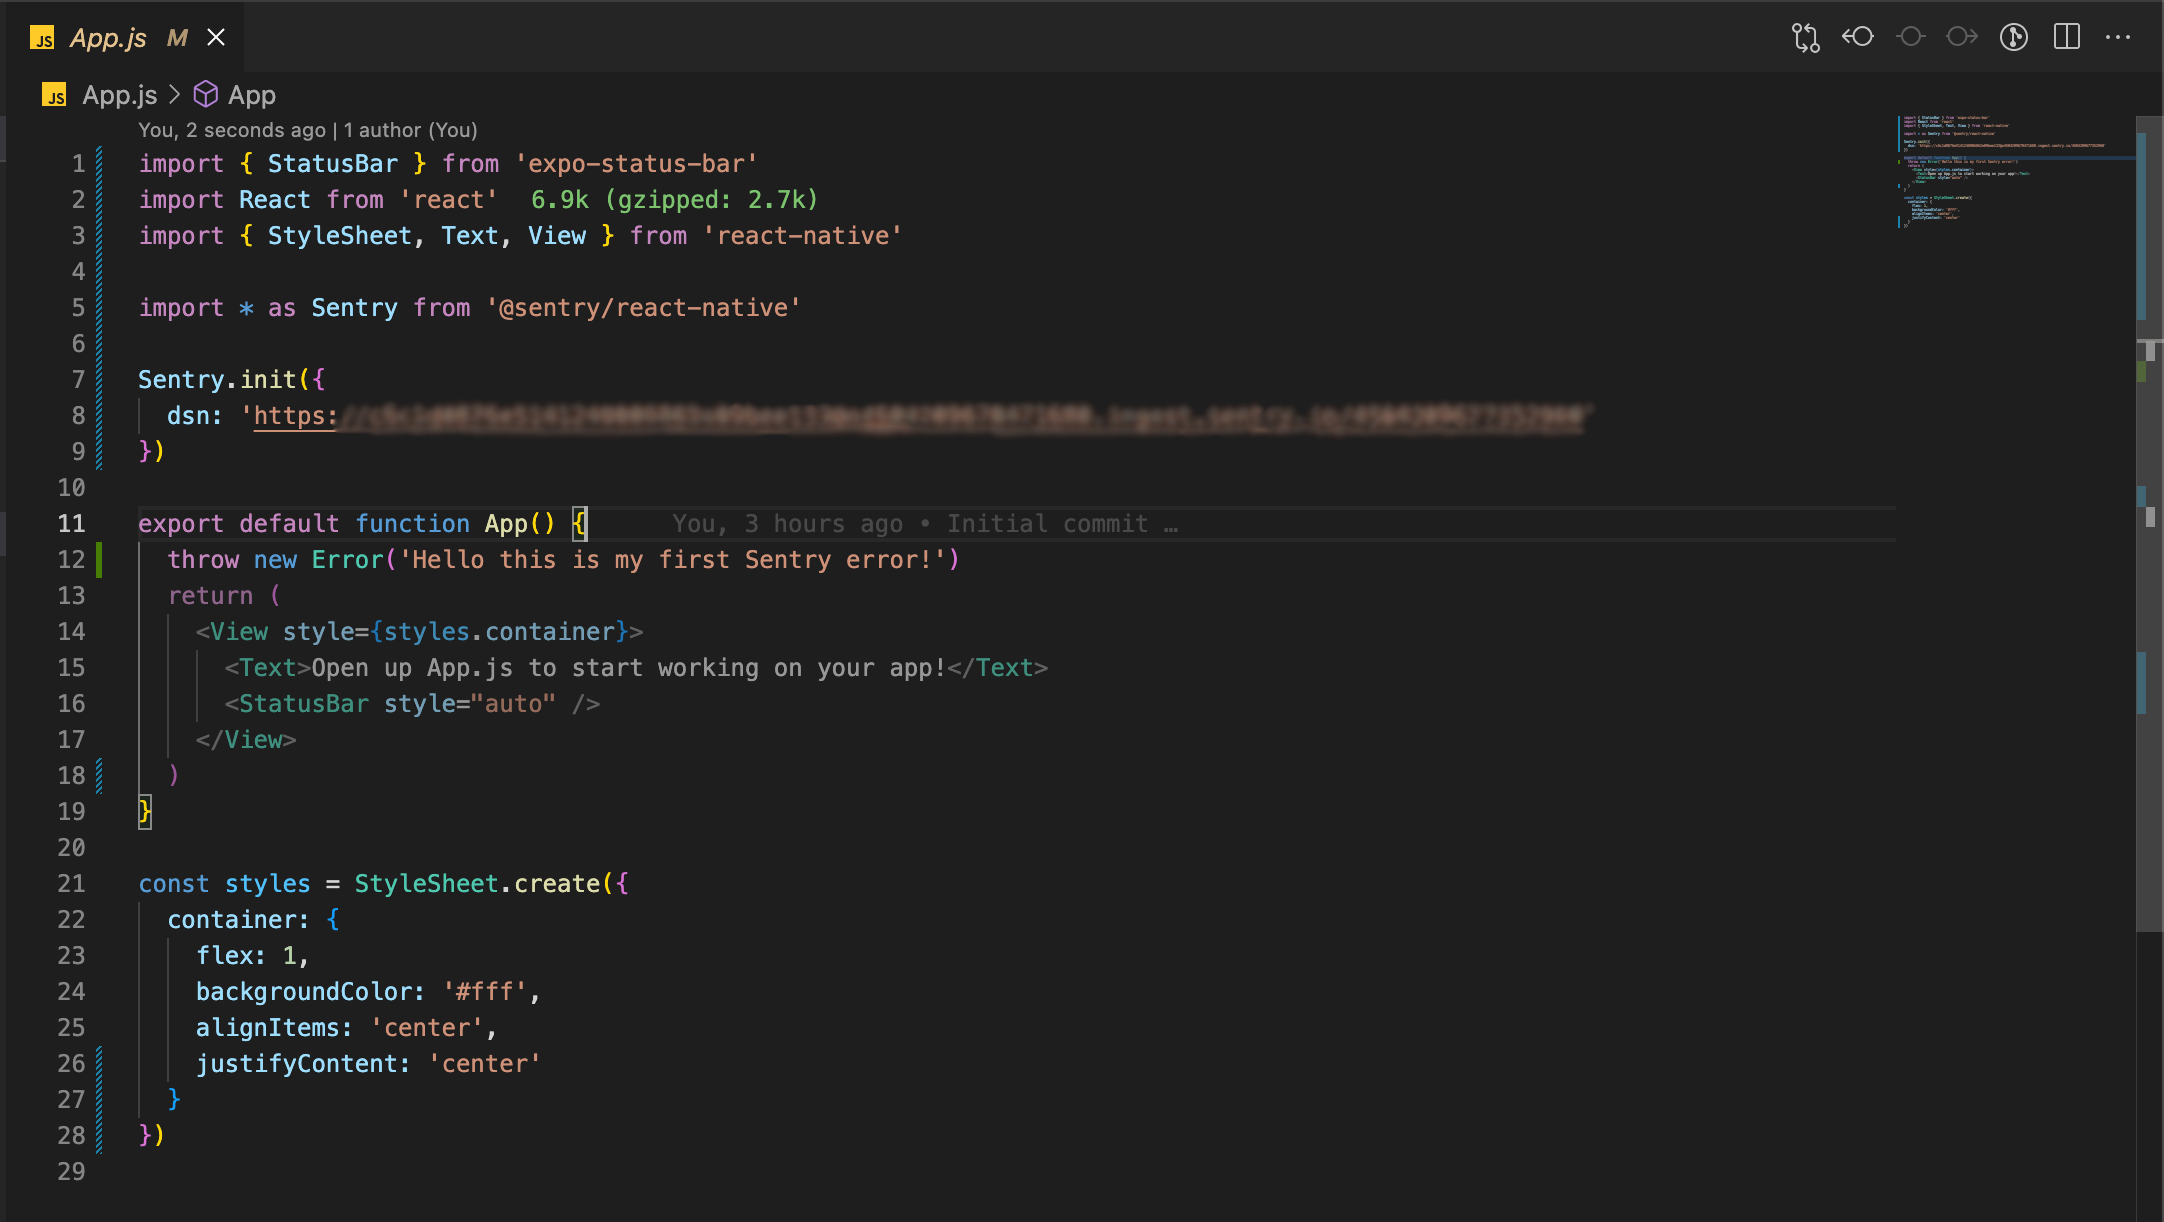
Verify that everything is configured correctly:
For doing that we can use the code below:
throw new Error("Hello this is my first Sentry error!")
or
Sentry.nativeCrash();
On my case I will use the first error just to check if it is going to be displayed as an issue on the Sentry Dashboard.
After that you can open your browser where you have created the project for your app.
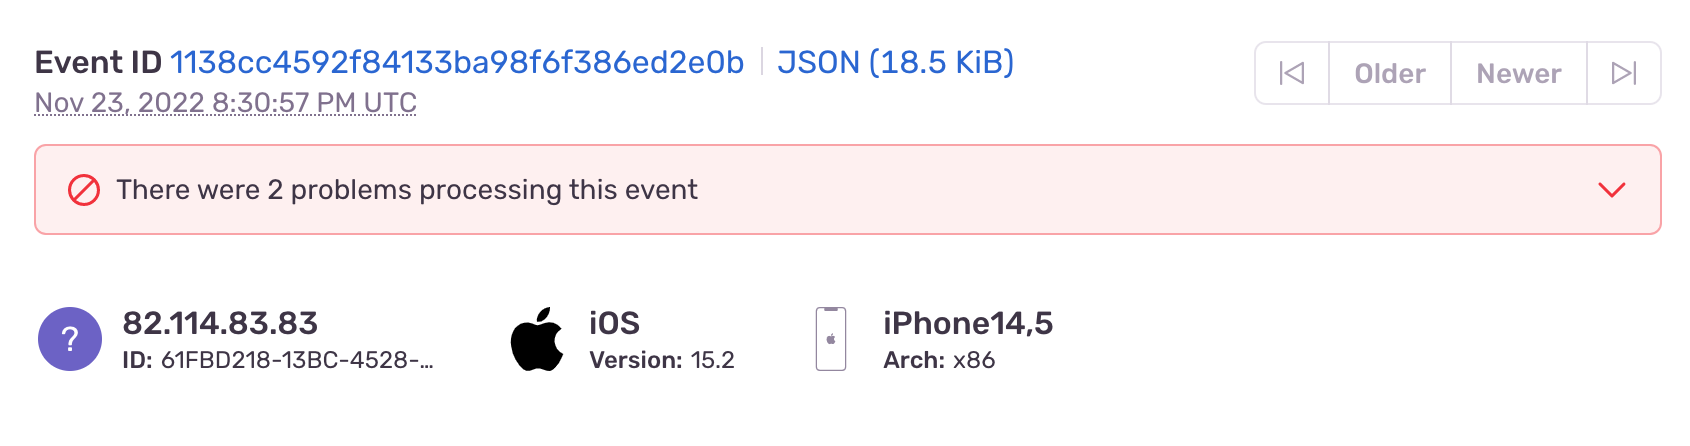
At the sidebar click on Issues, and you will see the error that is showed below:
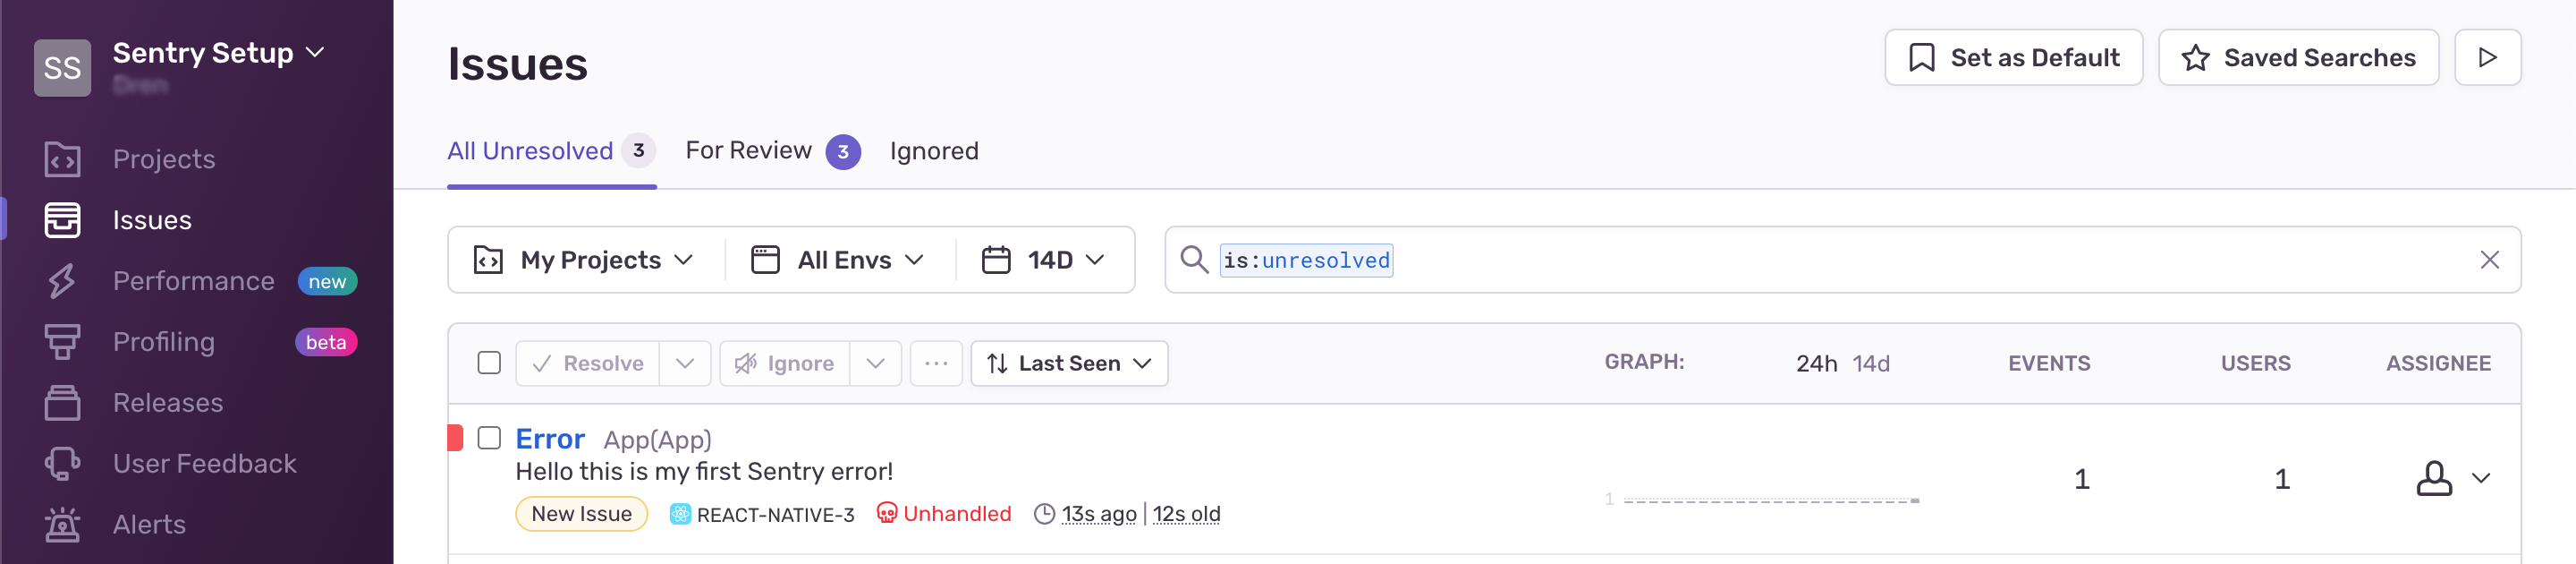
Sentry offers the details for every Error or Exception from the begining where it is caused which will make our work for fixing these issues easier.
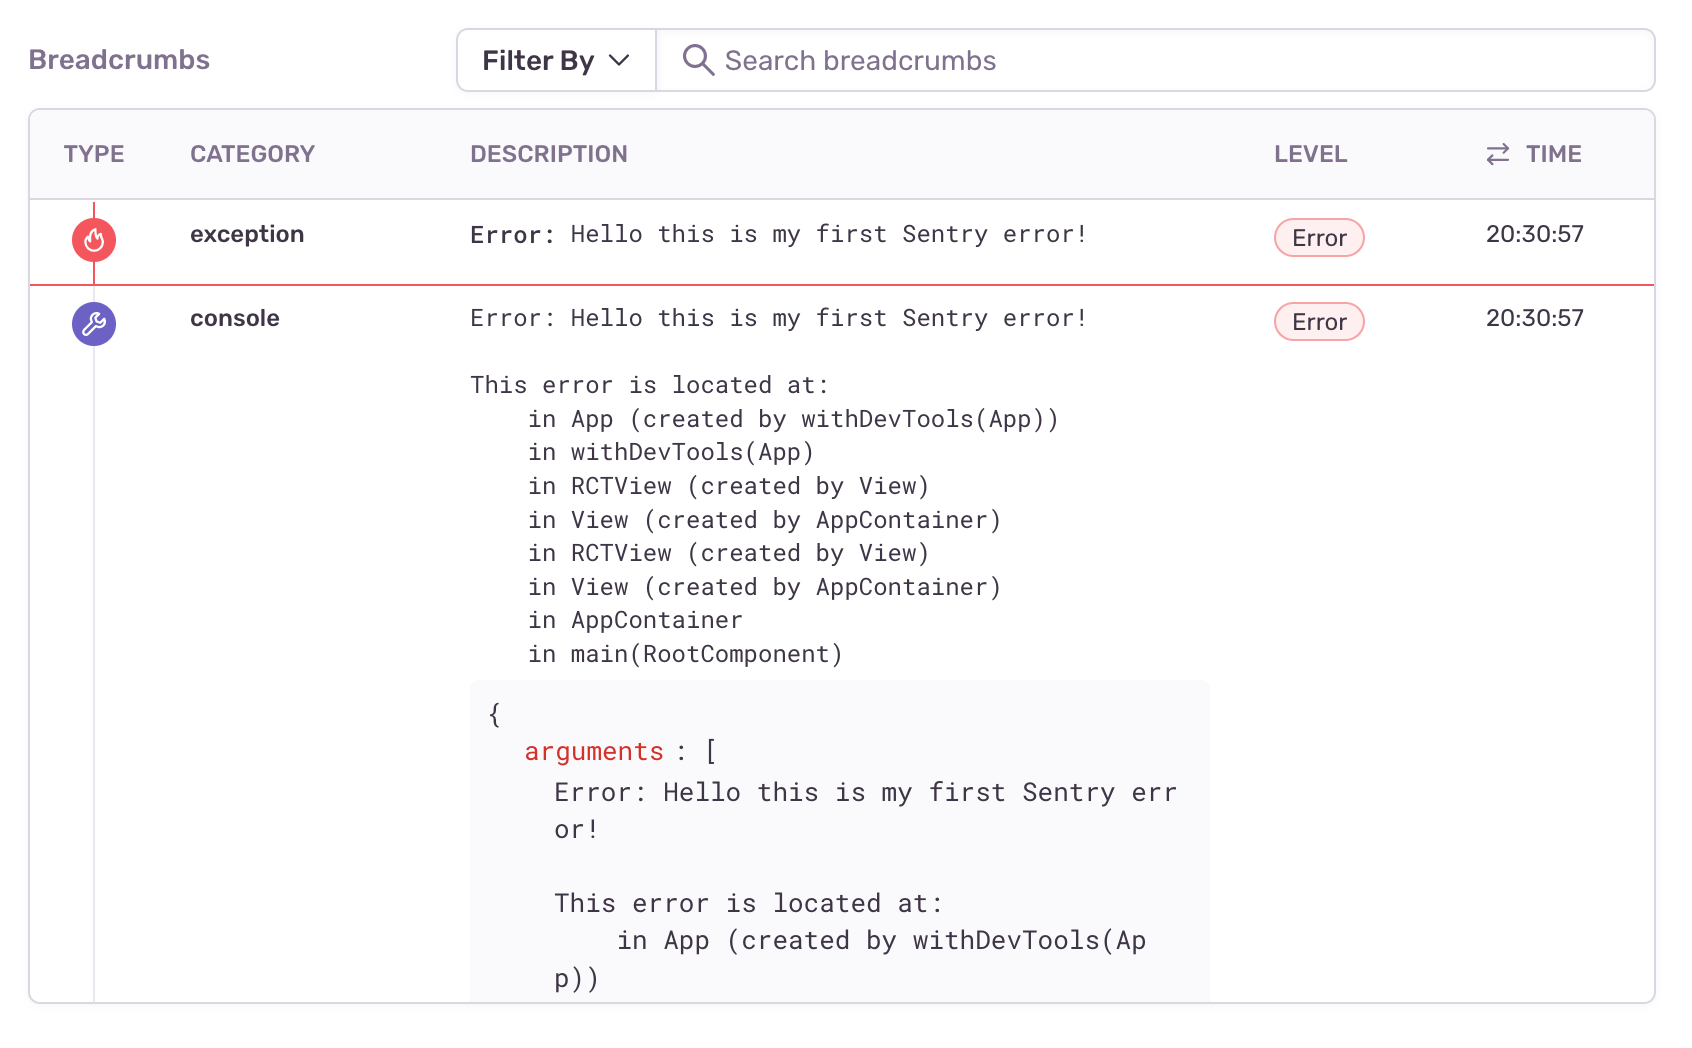
Also we are able to check on which kind of device the error or exception was caused.
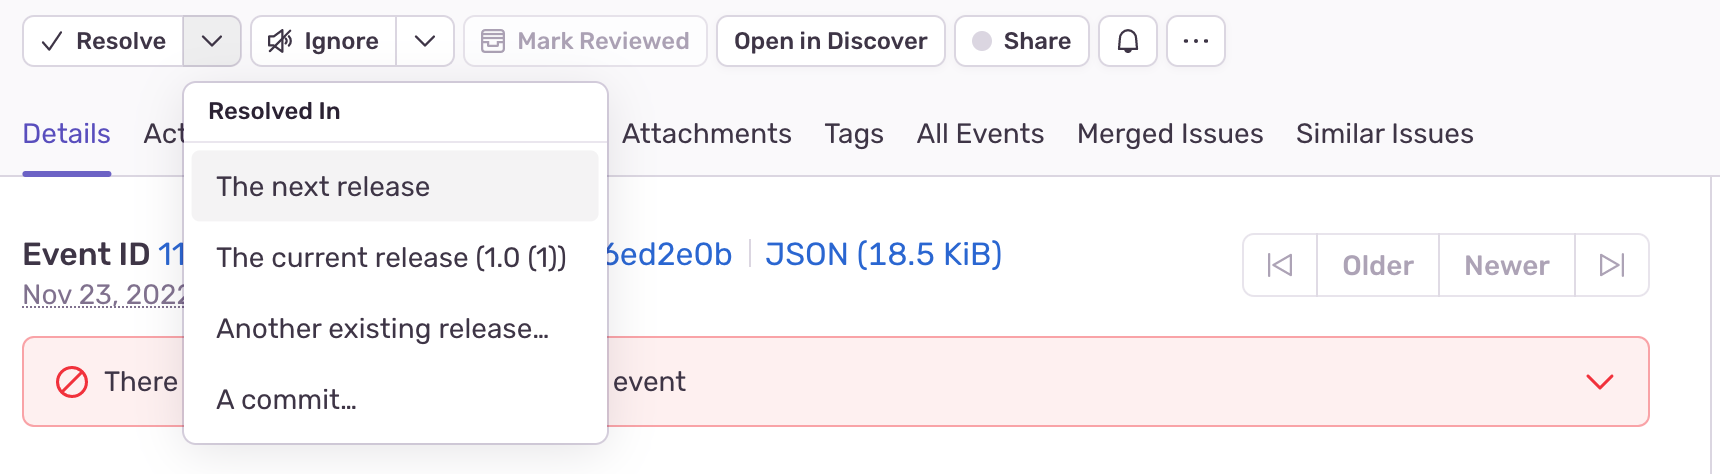
After being sure that we have fixed the issue we can mark it as resolved and it will not be showed on the list of issues anymore.
All of these things can be used for free, but if you want to increase the number of opportunities by using Sentry you can choose a plan of paying on this link: https://sentry.io/pricing/.
For every new release on iOS or android, the release is going to be added automatically to the dashboard of Sentry, and you can view it by clicking on the sidebar menu (Releases). Also you can track your app based on different env for example the app that is deployed on staging or prod.
Conclusion
Serious applications should definitely have a tool like Sentry SDK integrated in, that is used for error monitoring and performance tracking. To do this, the best way is to choose the Sentry SDK integration as a simpler and faster way for your project. I can tell you that after implementing the Sentry SDK integration in my application, my work as a programmer has been greatly facilitated because now I am able to know in detail the reasons for every crashes or errors that may occur with the releases that are deployed in TestFlight , App Store or Google Play Console. In addition, we will be able to improve the performance of our application based on the data that the Sentry Platform provides us, which will improve the user experience.


 Service


