Remote push notifications are really useful feature of React Native that allow you to push notifications from a server directly to a user's device, even when the app is not in the foreground. With the right implementation and configuration, remote push notifications can enhance the user experience by providing relevant and useful information, improving engagement and retention. Overall, remote push notifications are an effective way to keep users engaged and informed, and can greatly enhance the functionality and user experience of your React Native application.
Remote push notifications are really useful feature of React Native that allow you to push notifications from a server directly to a user's device, even when the app is not in the foreground.
With the right implementation and configuration, remote push notifications can enhance the user experience by providing relevant and useful information, improving engagement and retention. Overall, remote push notifications are an effective way to keep users engaged and informed, and can greatly enhance the functionality and user experience of your React Native application.
In this blog post, we'll explore how to set up remote push notifications in React Native.
Before we begin, it's important to note that remote push notifications require a server-side component to send notifications. We won't cover the server-side implementation in this blog post, but we'll assume you have a basic understanding of how to send push notifications from a server.
Firebase project setup (iOS)
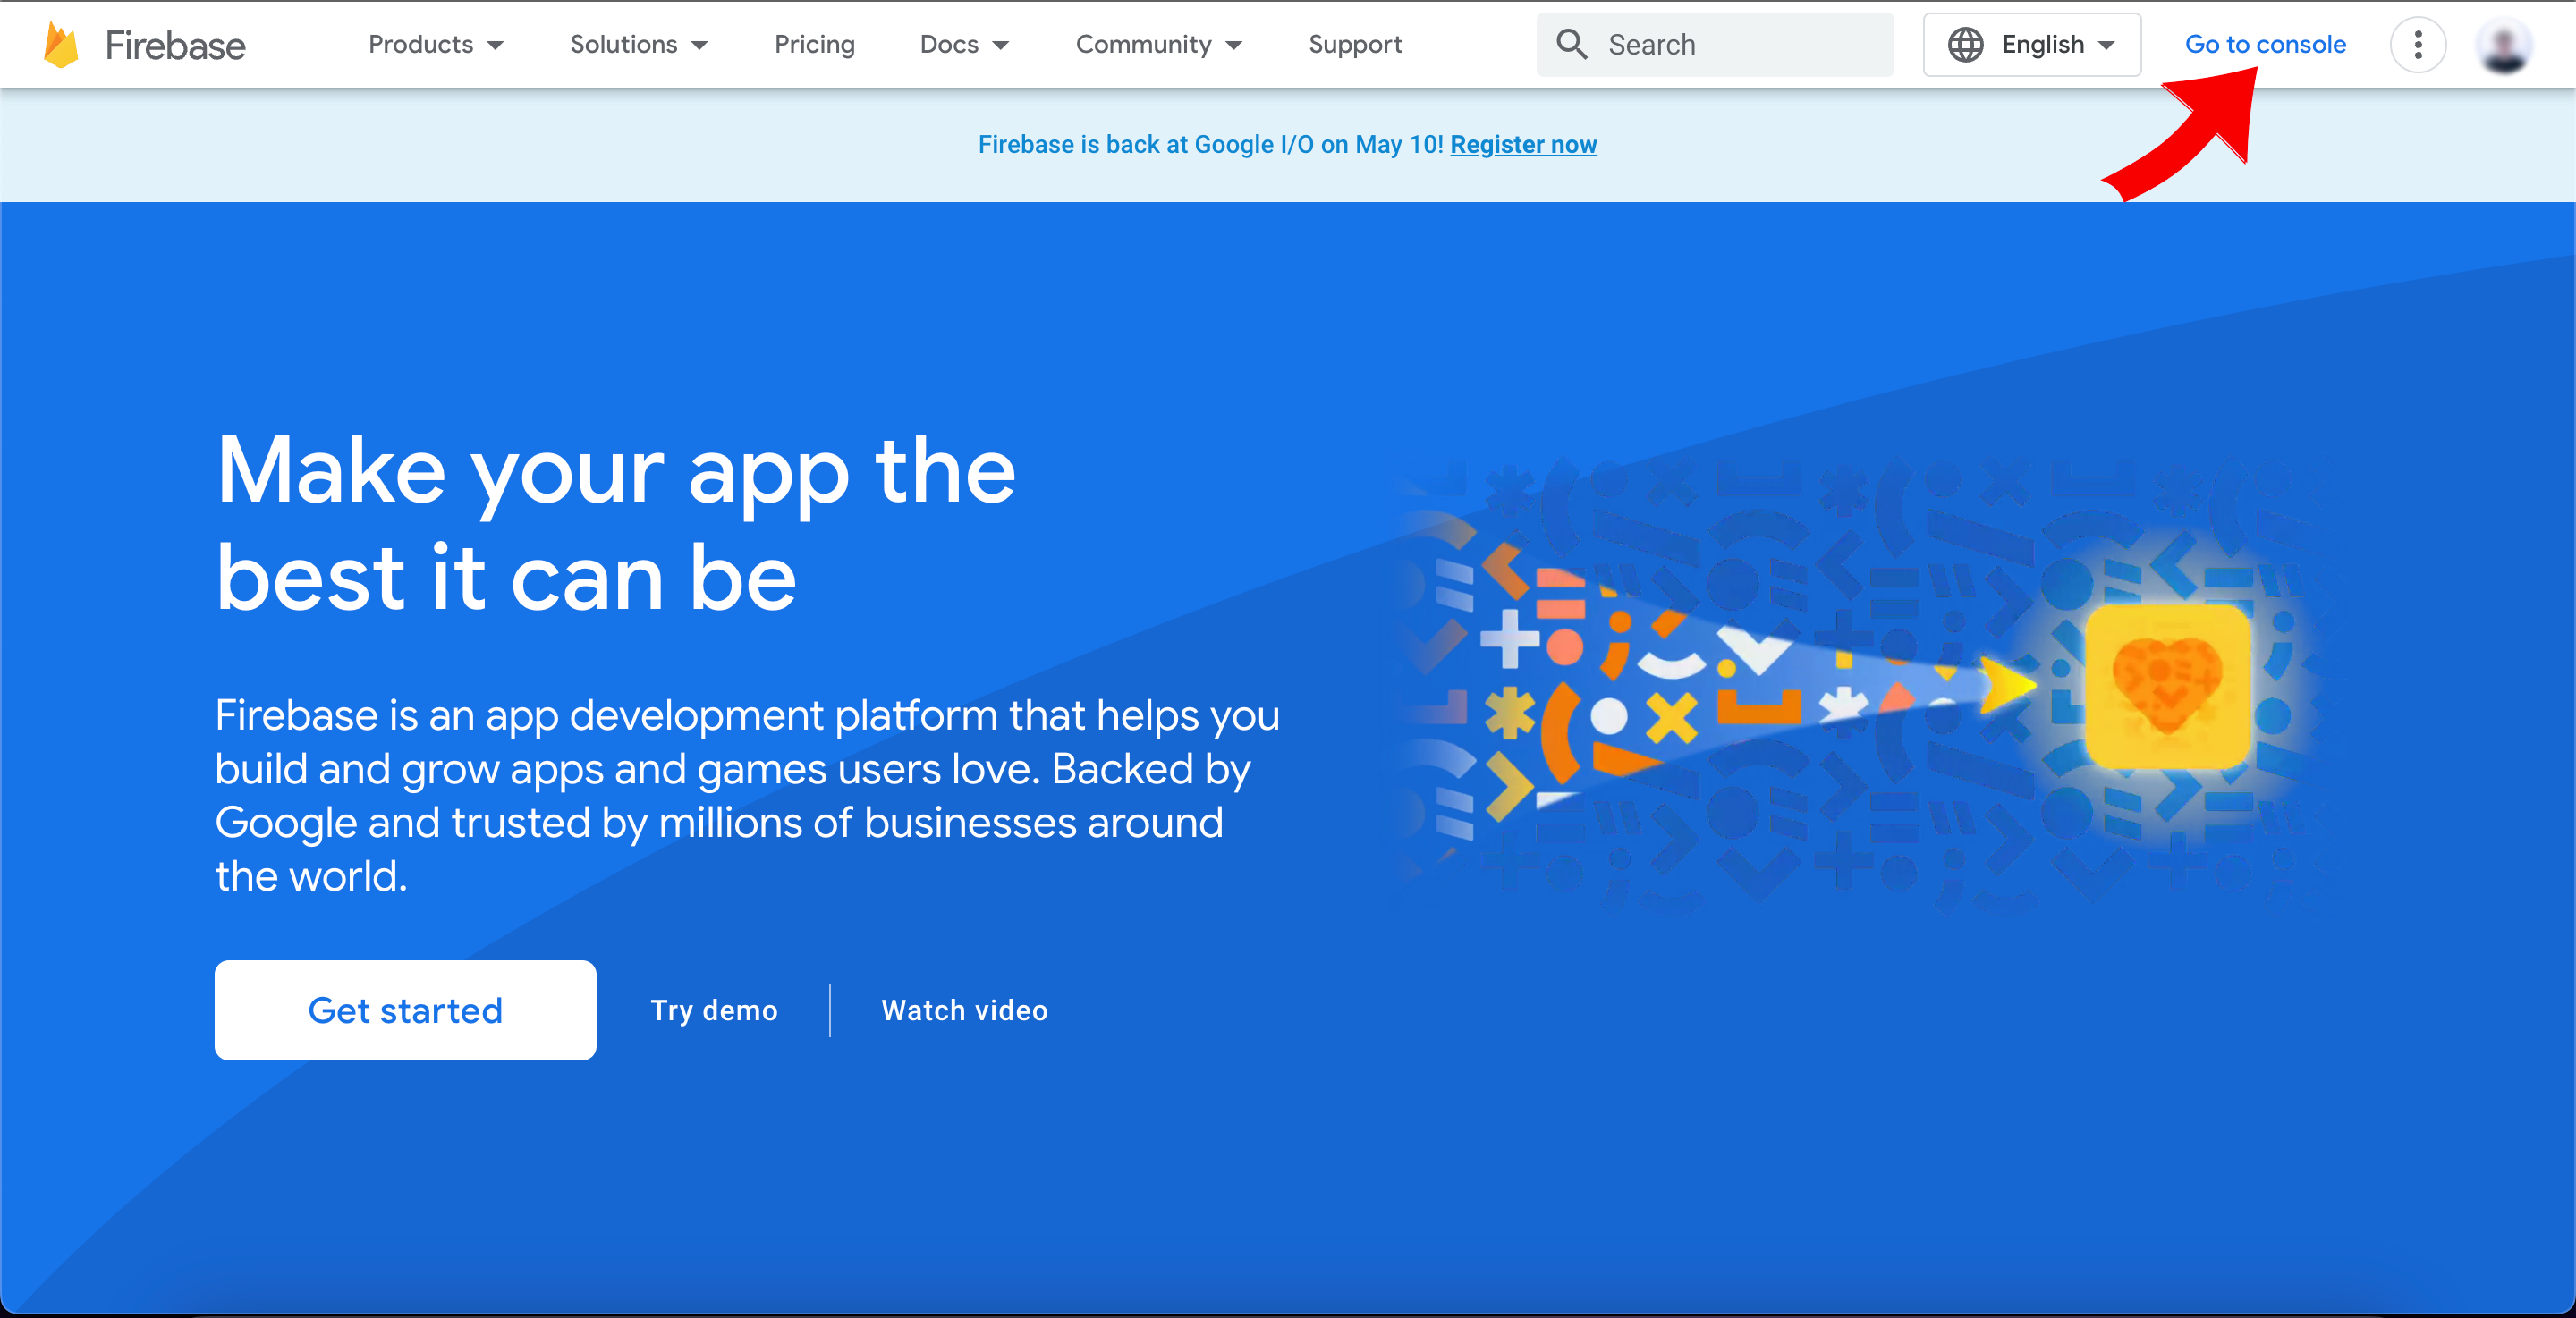
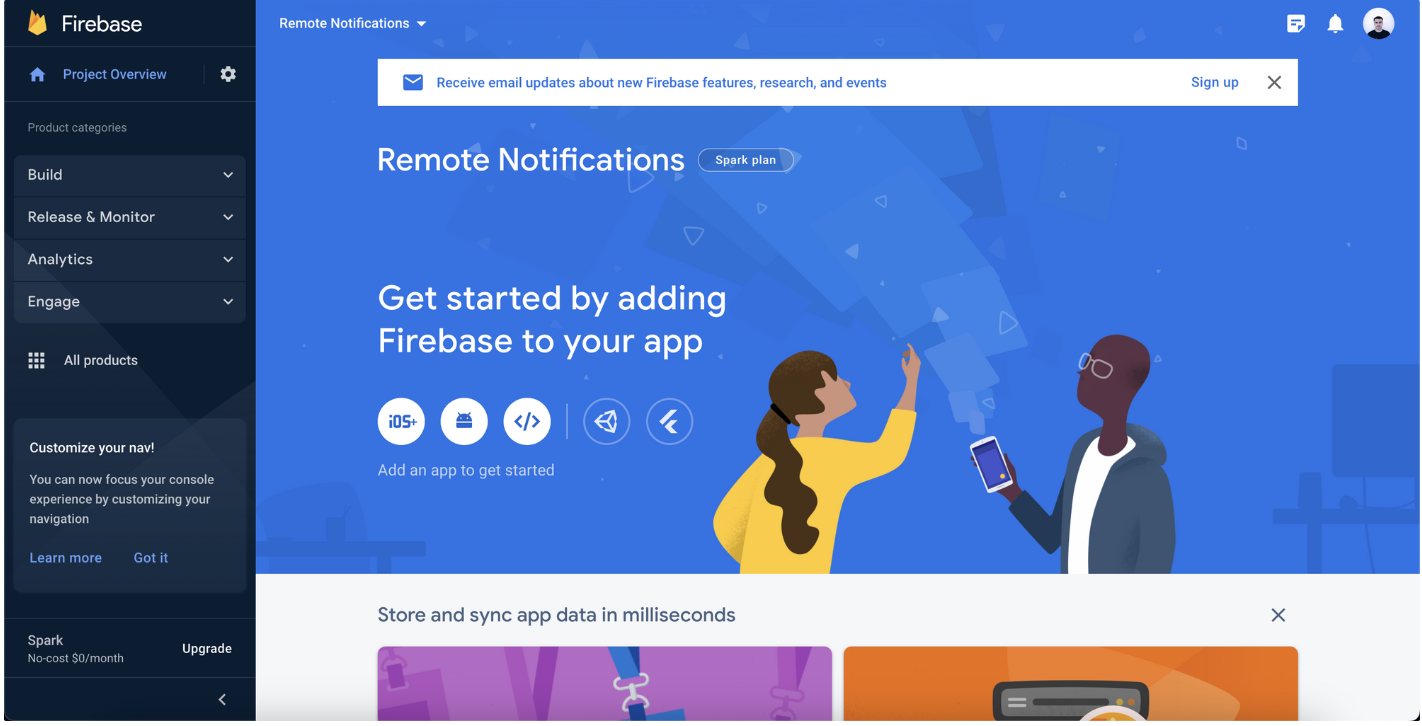
The first step that we should do is to click on this link https://firebase.google.com/. Then we will see a website like the screenshot below
After clicking on Go to console we will see a part of firebase console like below where we can create our own project:
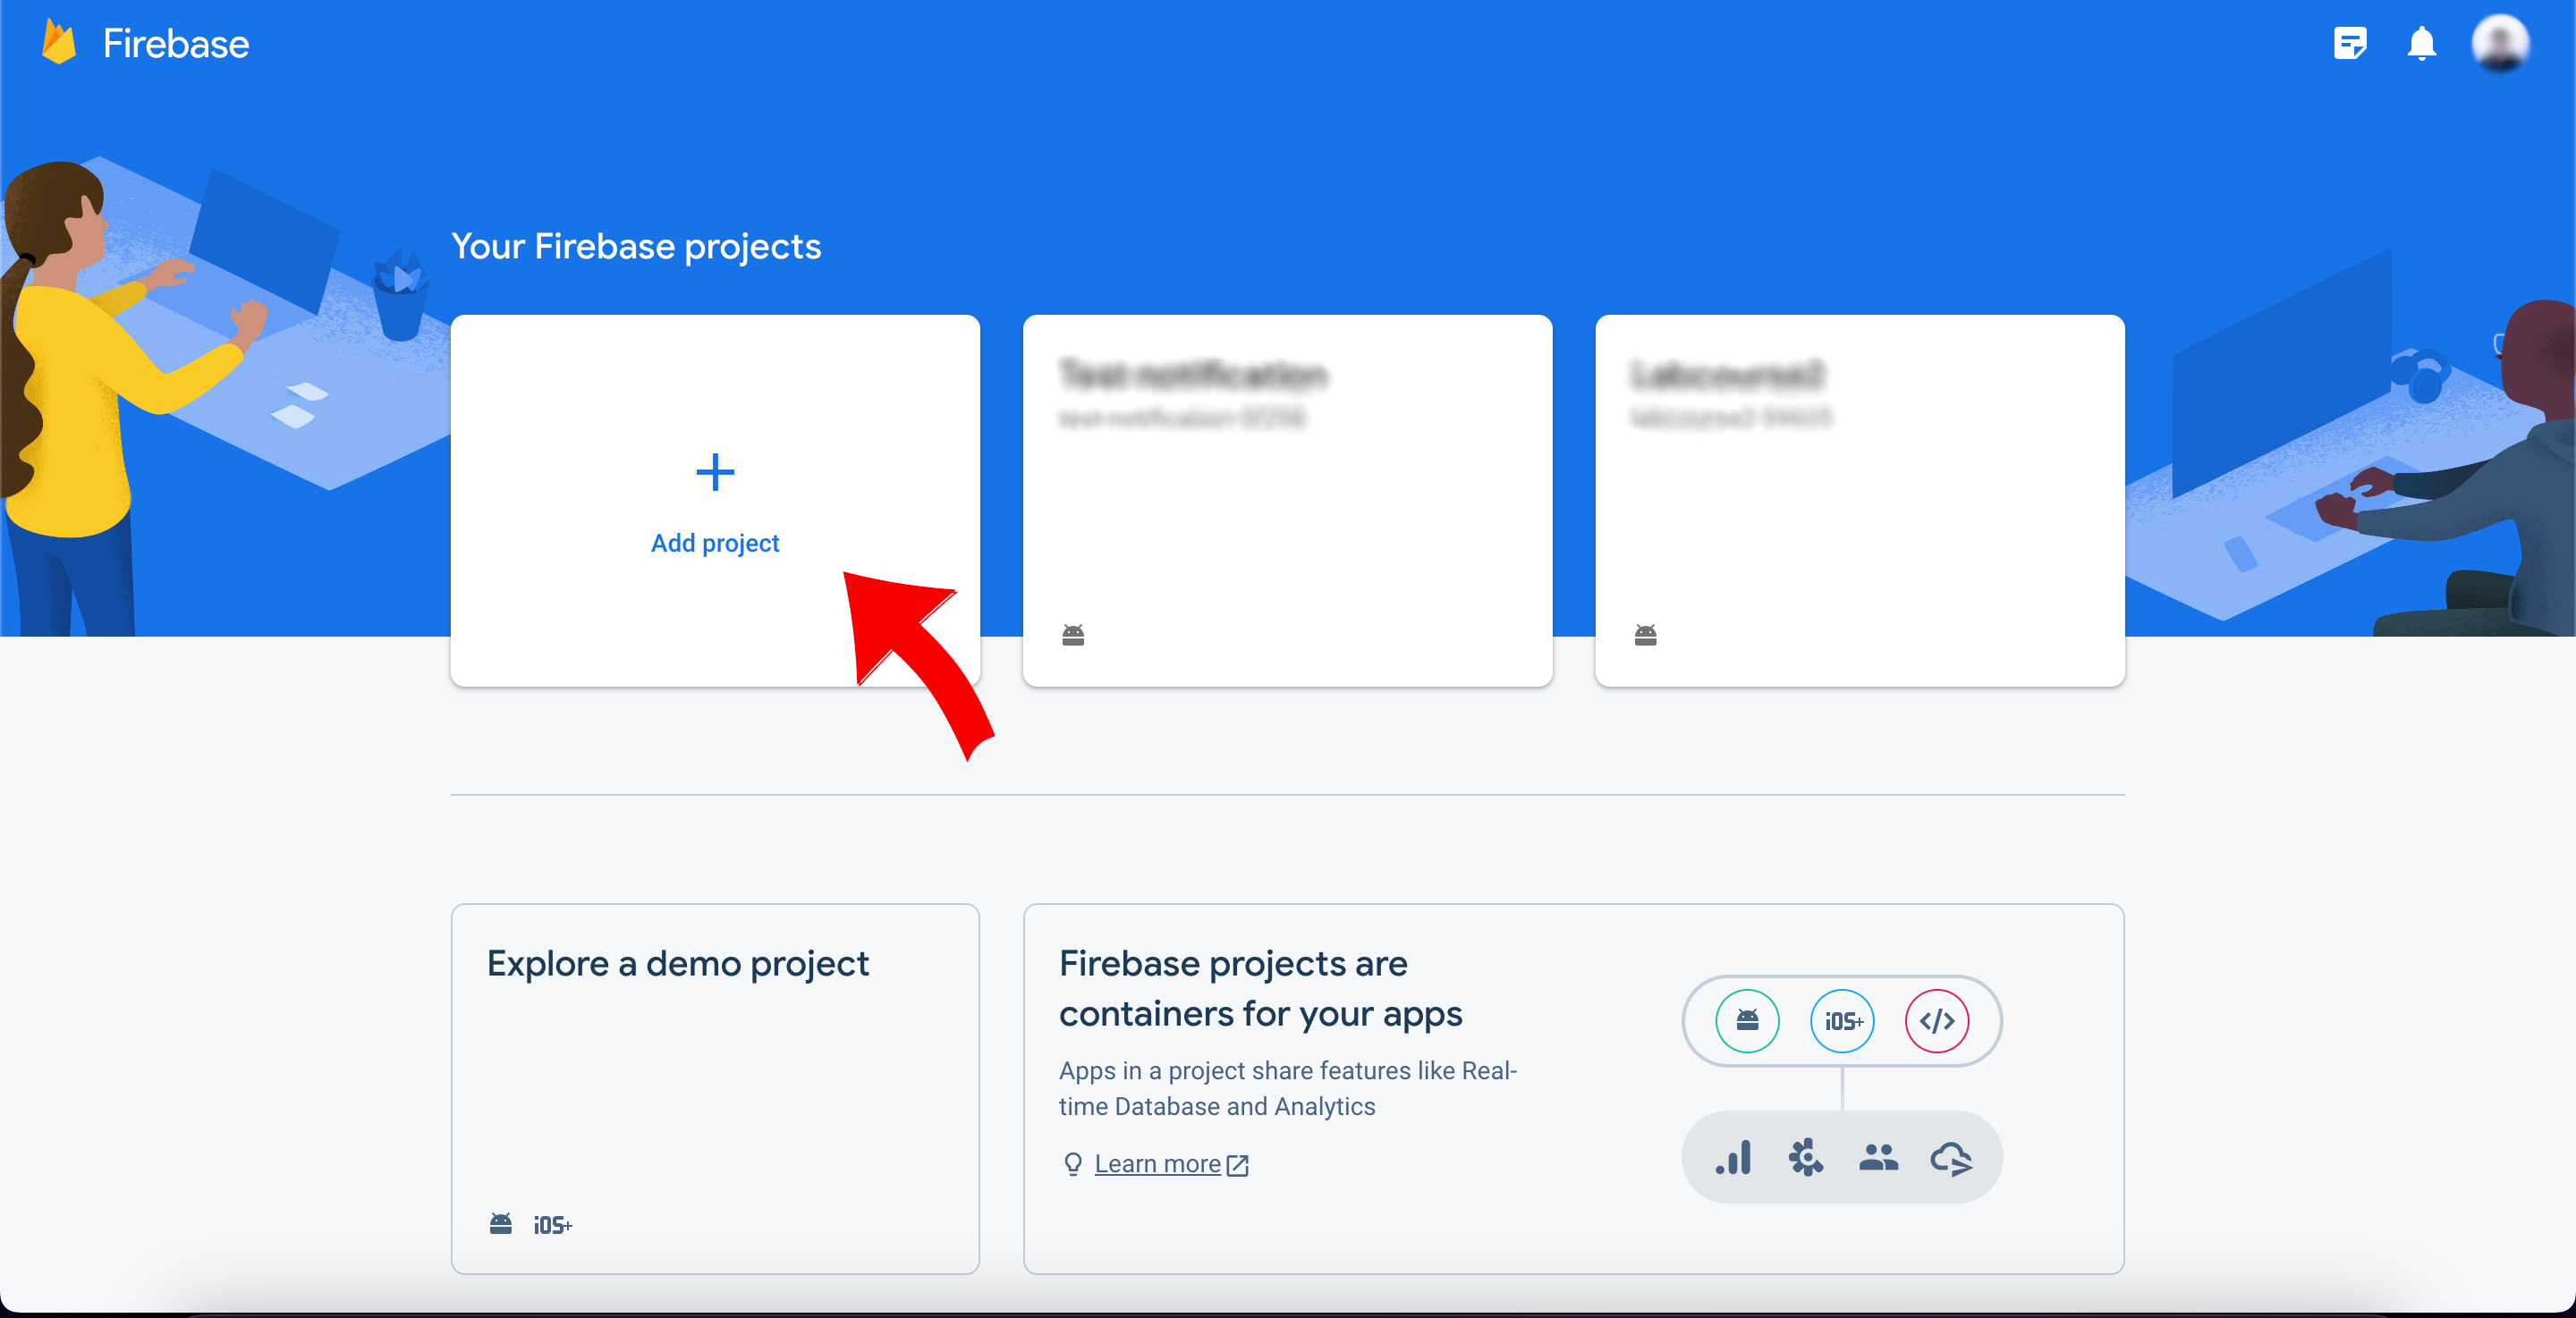
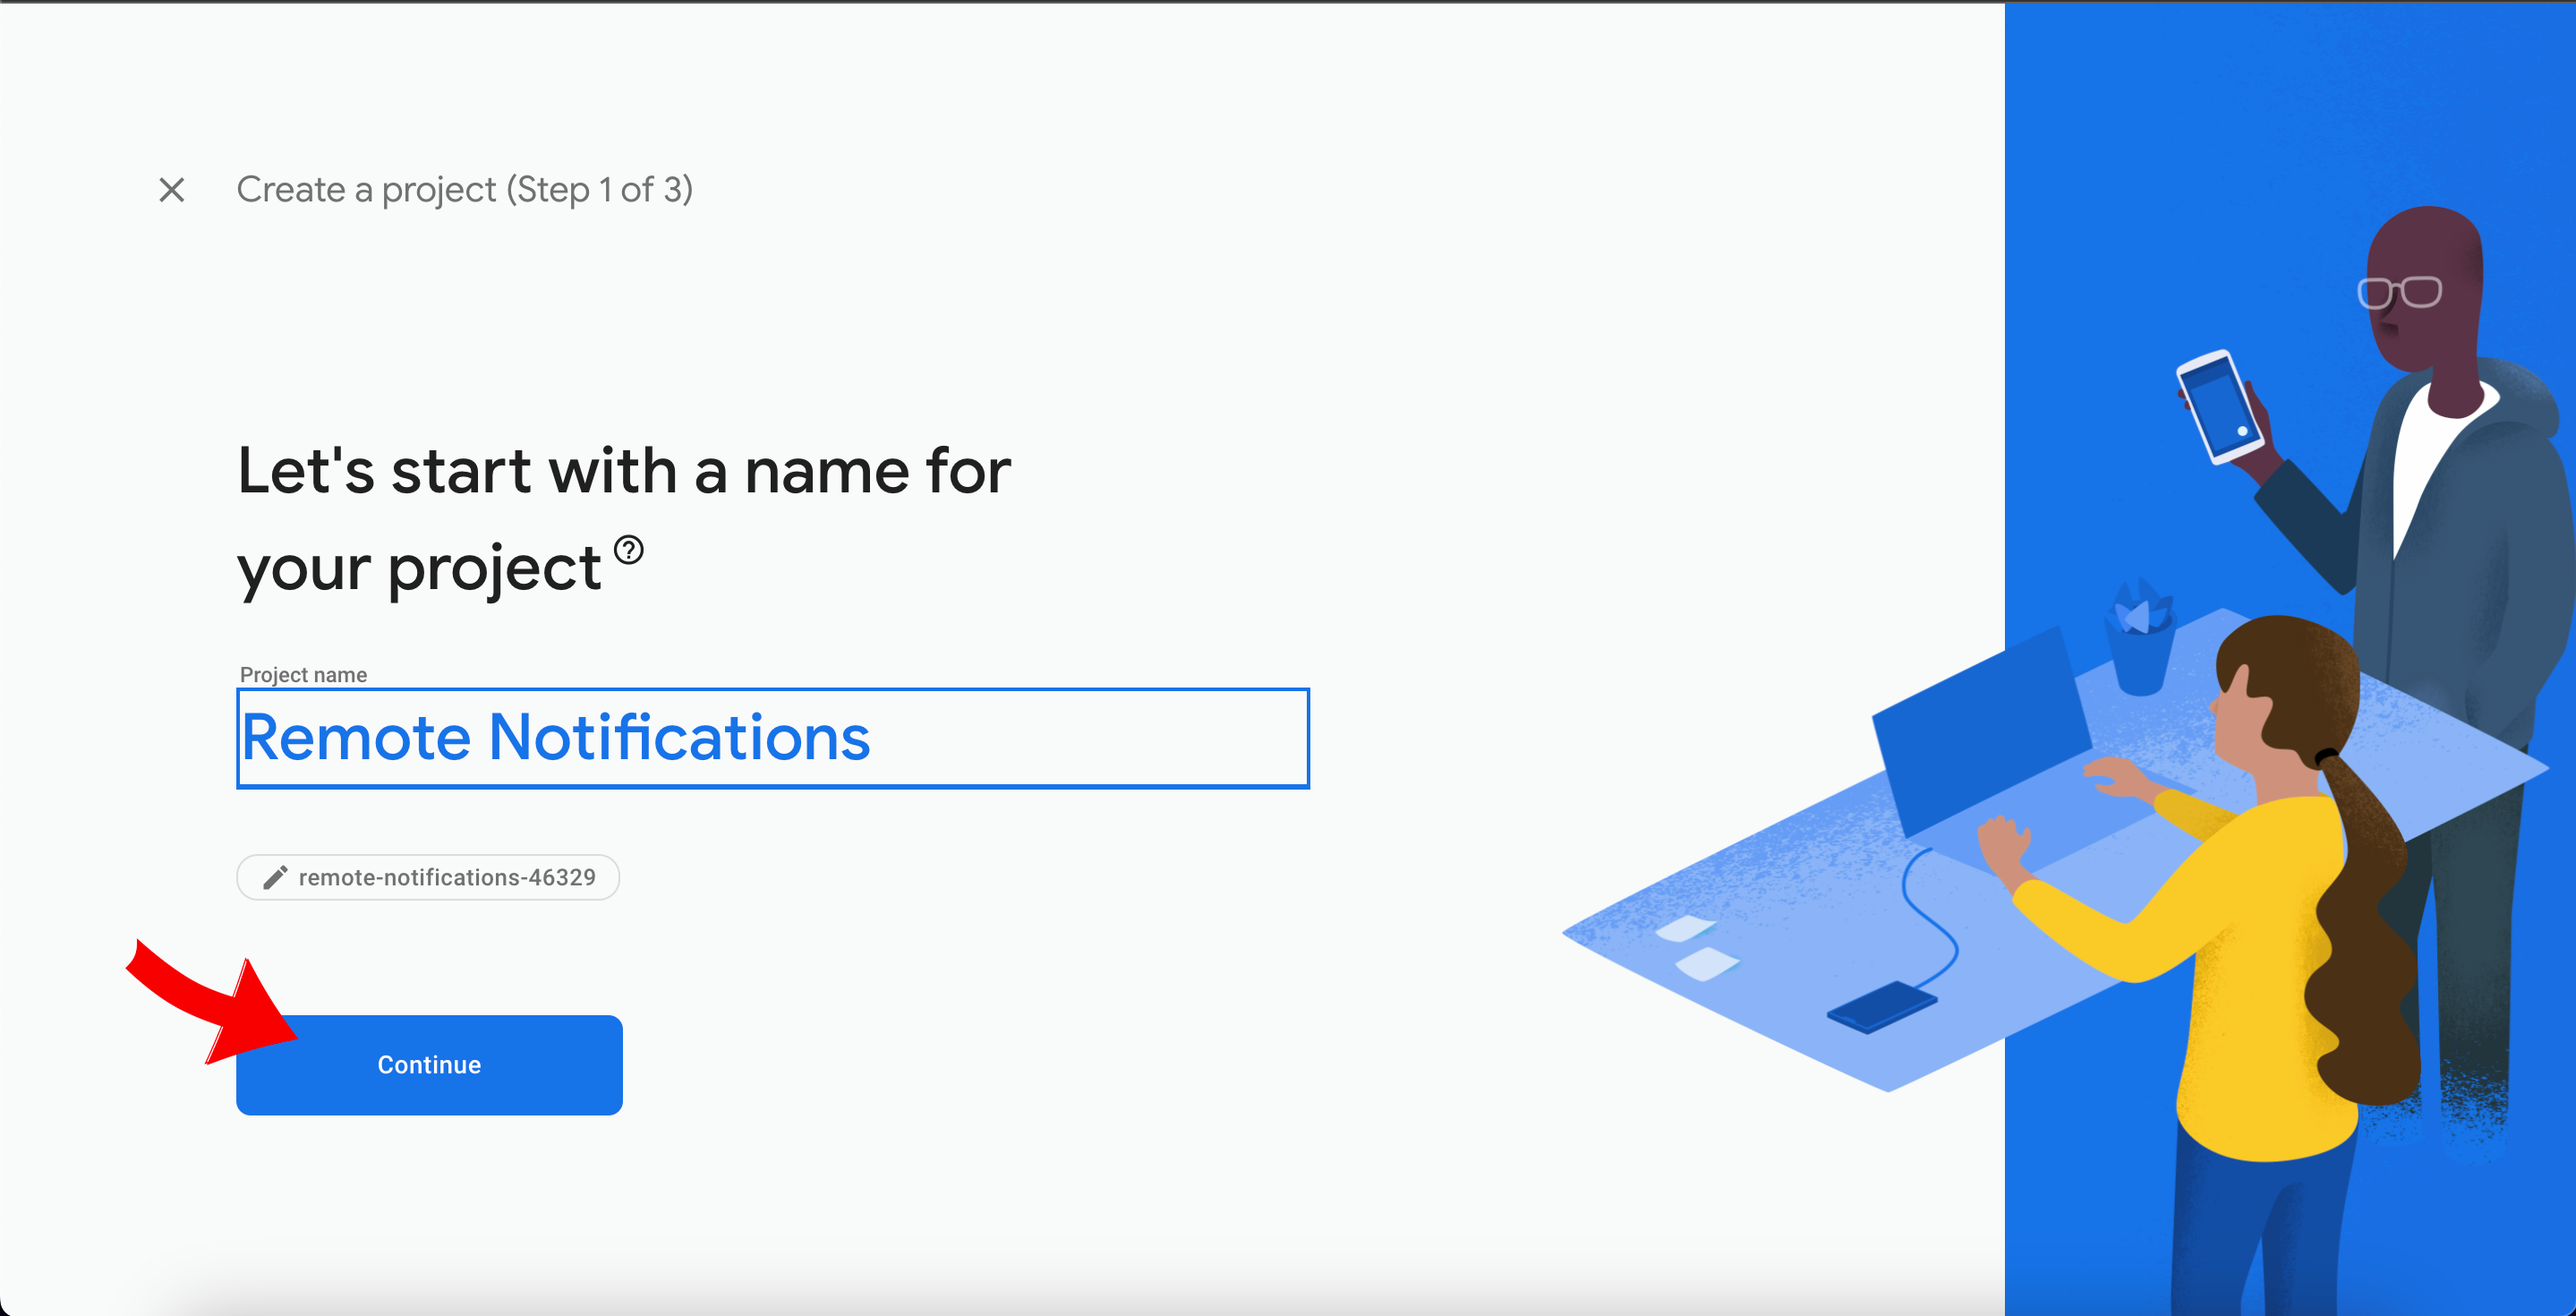
Click on Add project > then we will need to write the project name that we want to configure, you can provide a name that you want. For my project I will let it “Remote Notifications”, then we click on Continue button.
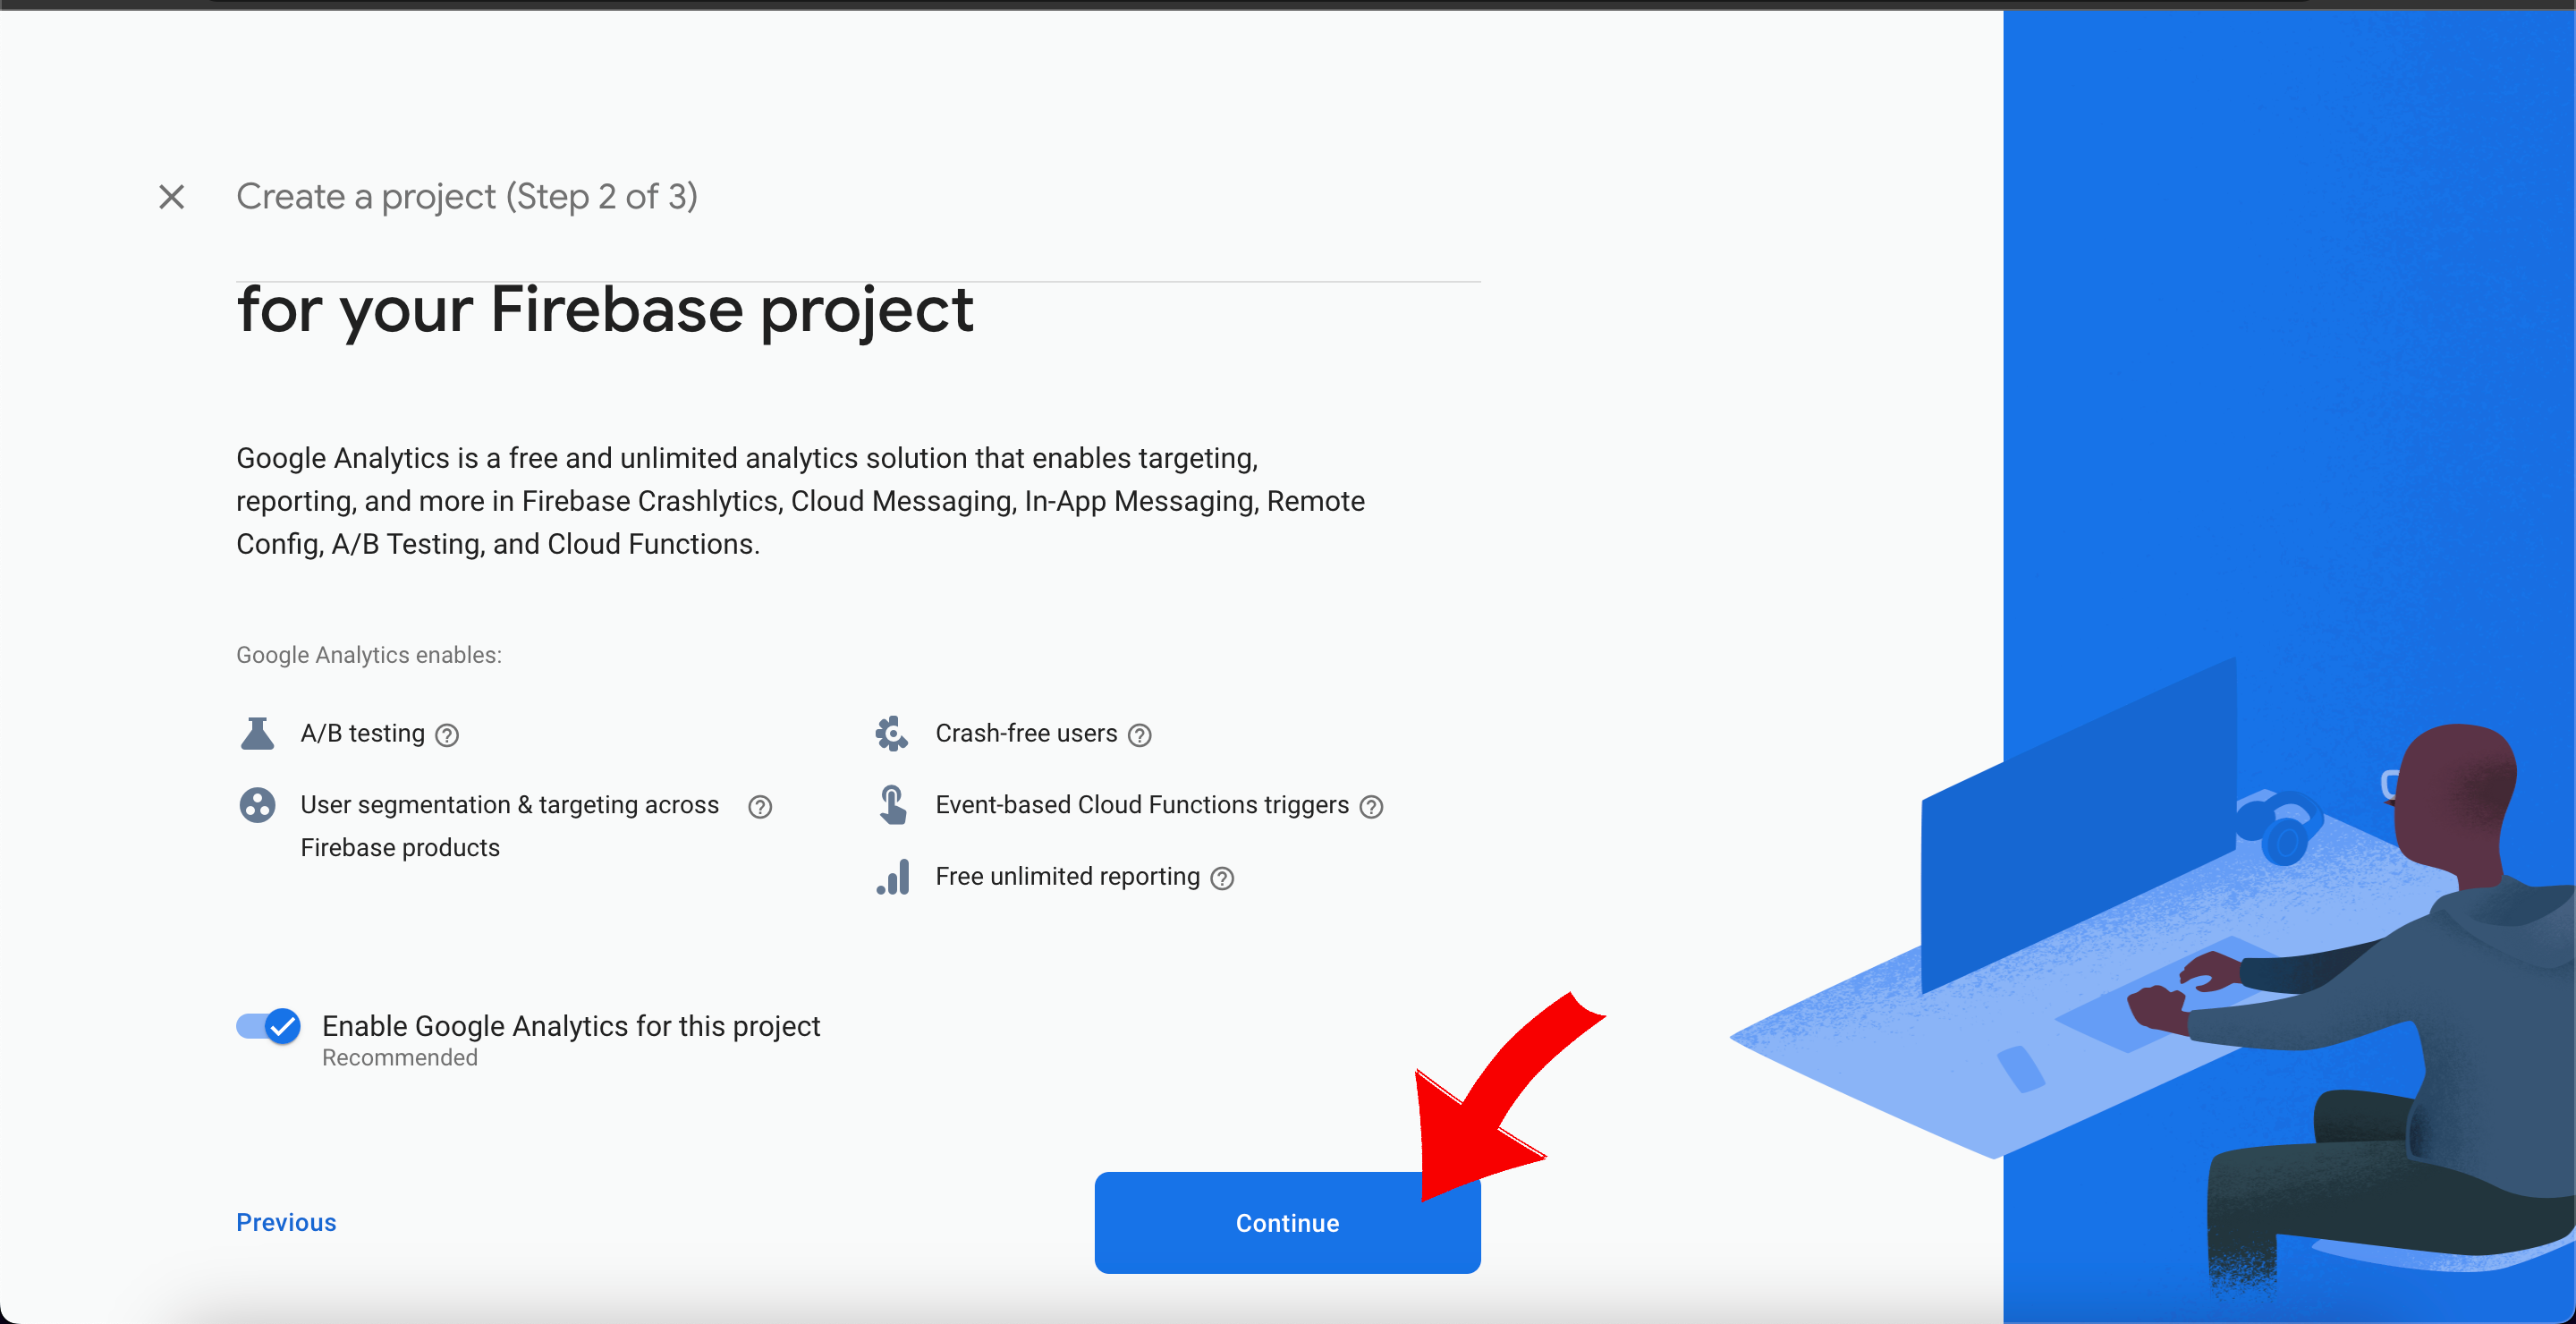
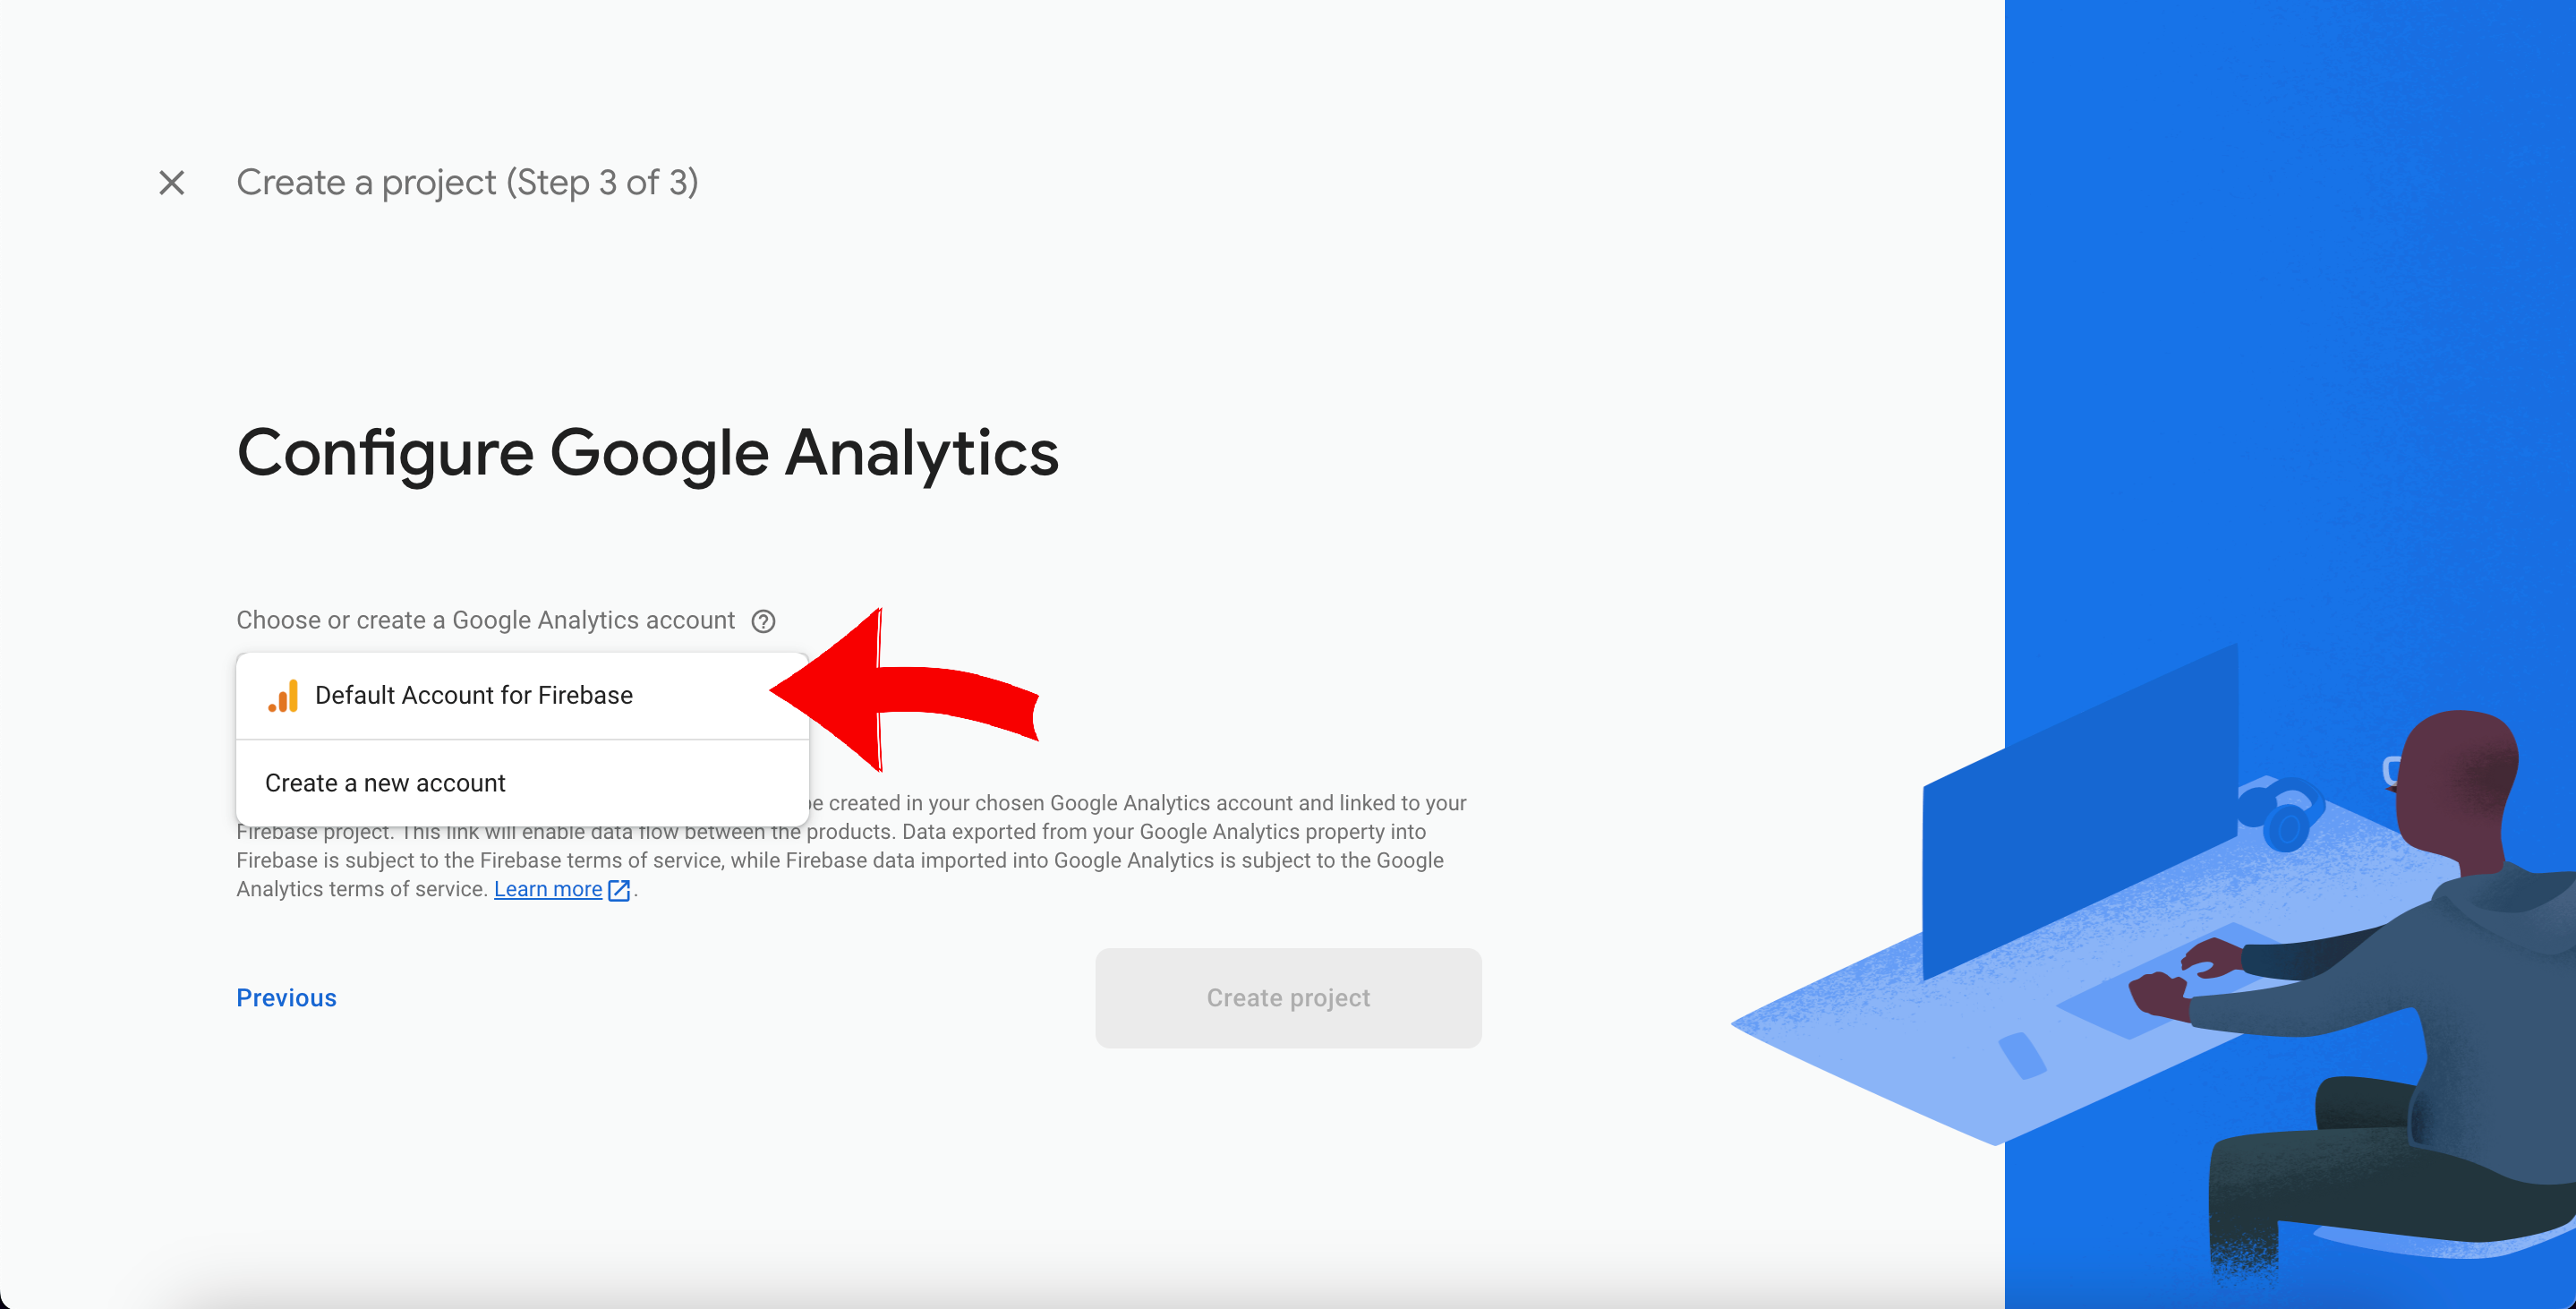
Then click again on the continue button. The next screen that we will see is the Configure Google Analytics.
On this step we should pick the Default Account for Firebase, like below:
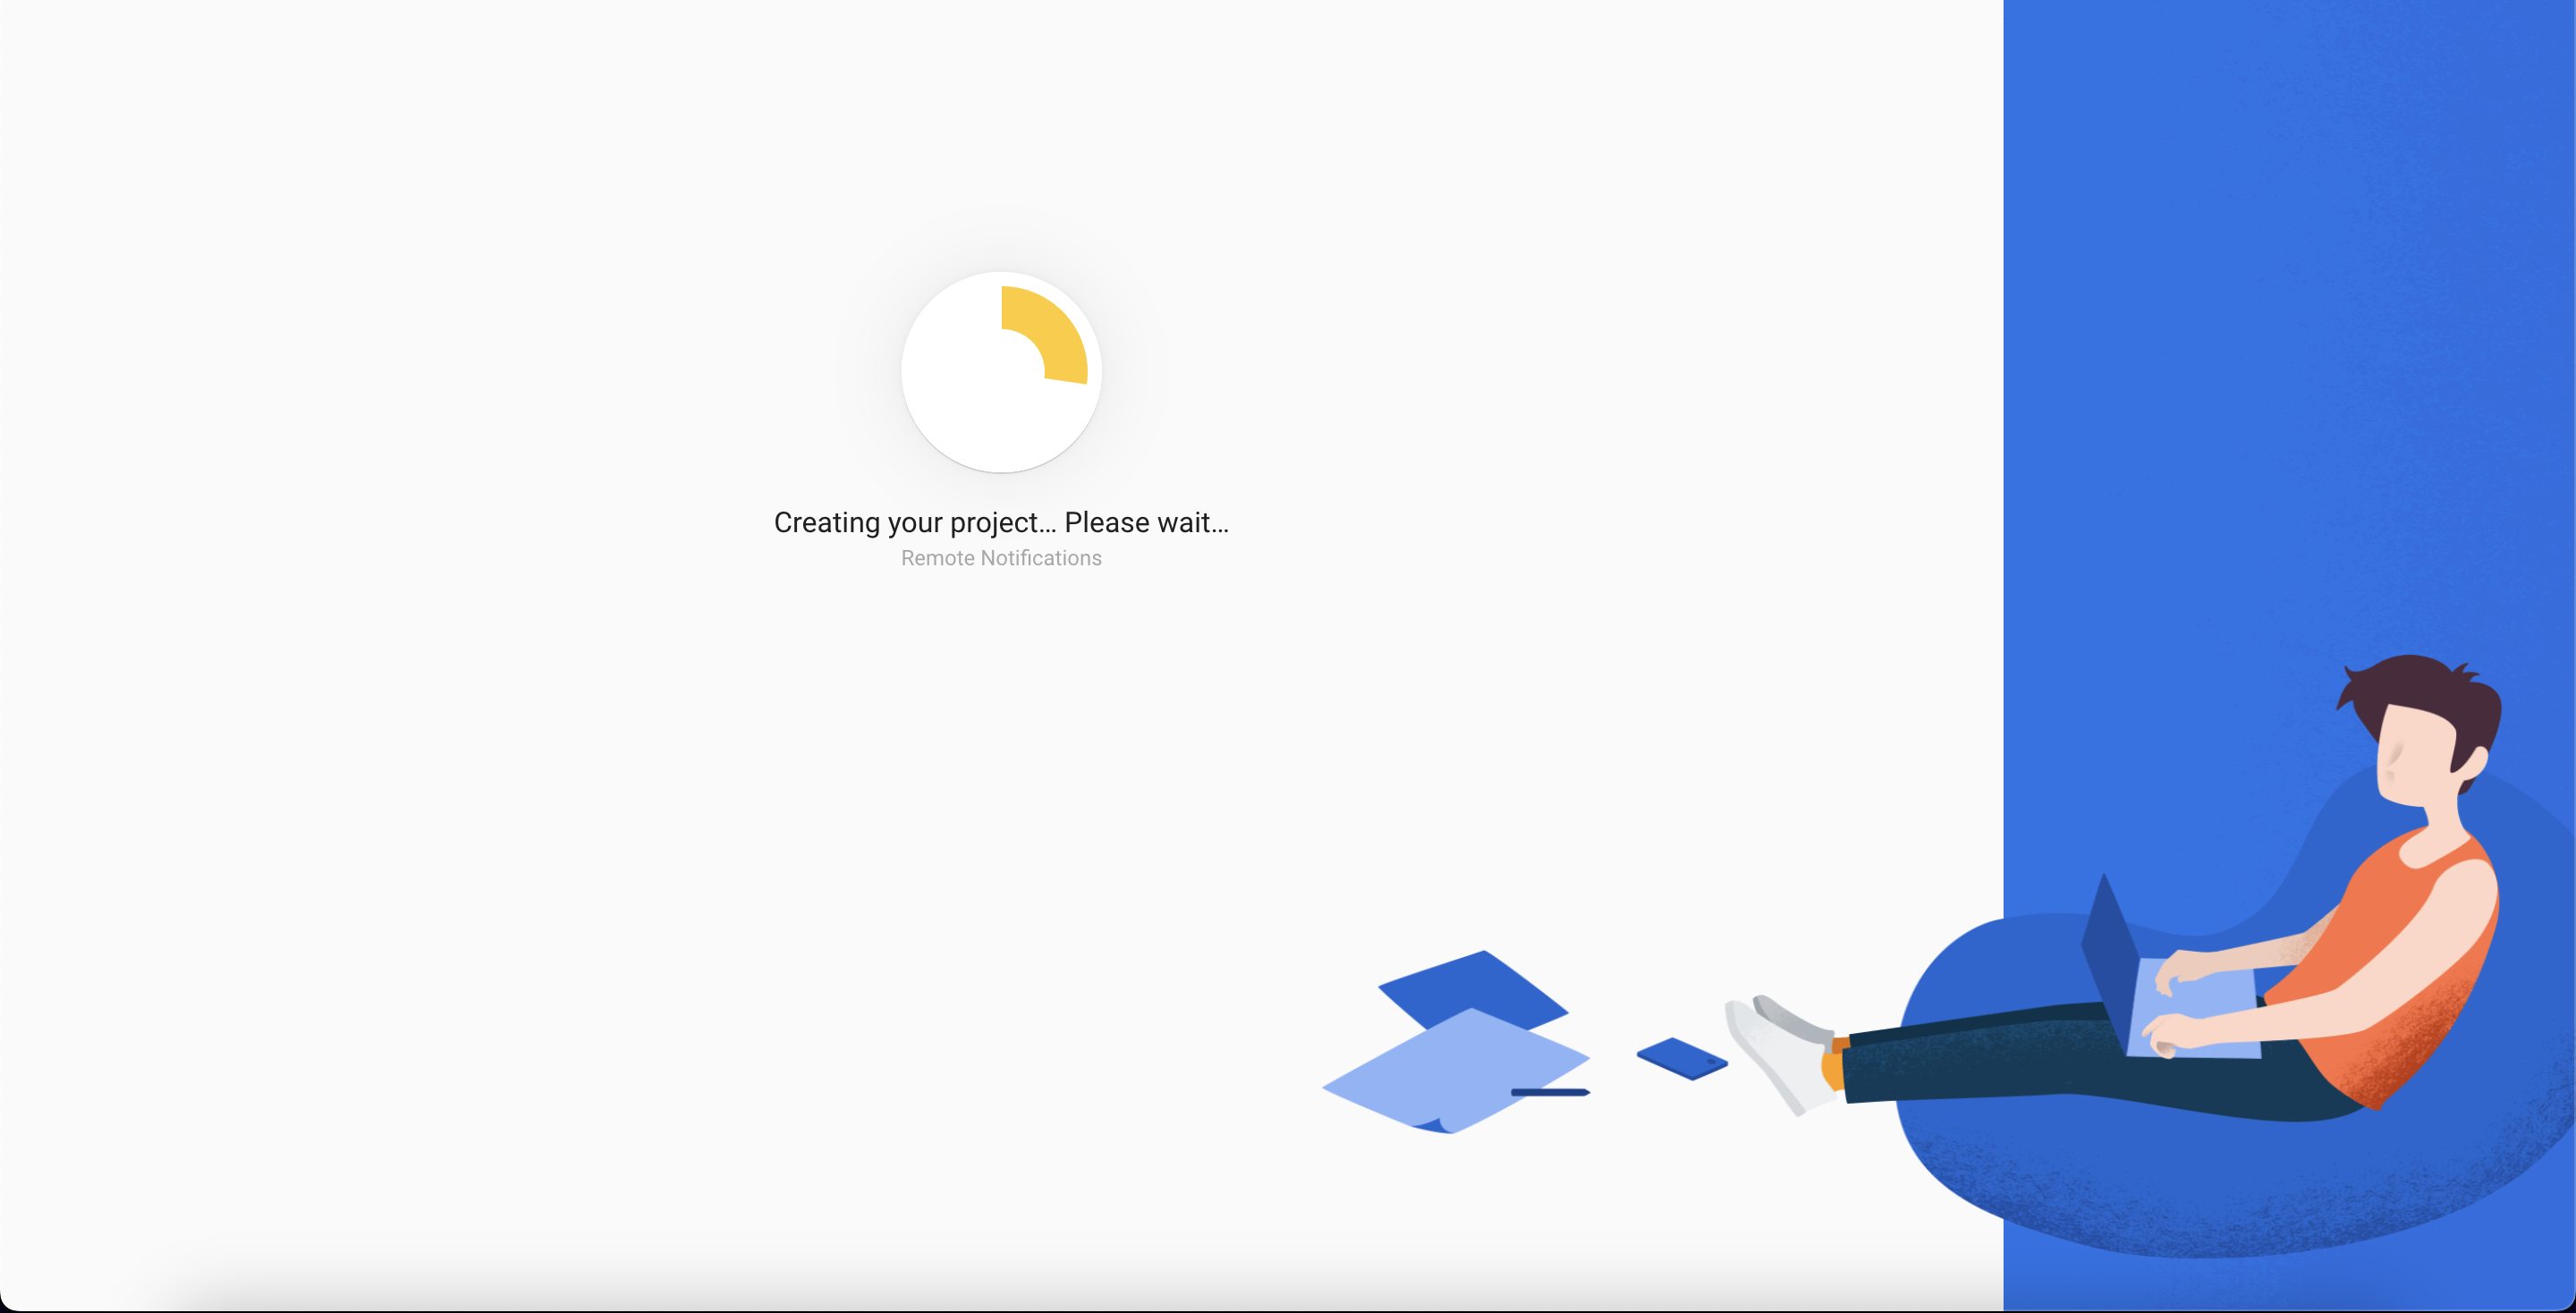
After picking a Default Account for Firebase we will be able to continue the process of configuring our project to the firebase console, just click on the button Create project. The next steps are just to tell us that we should wait for the creation of the firebase project.
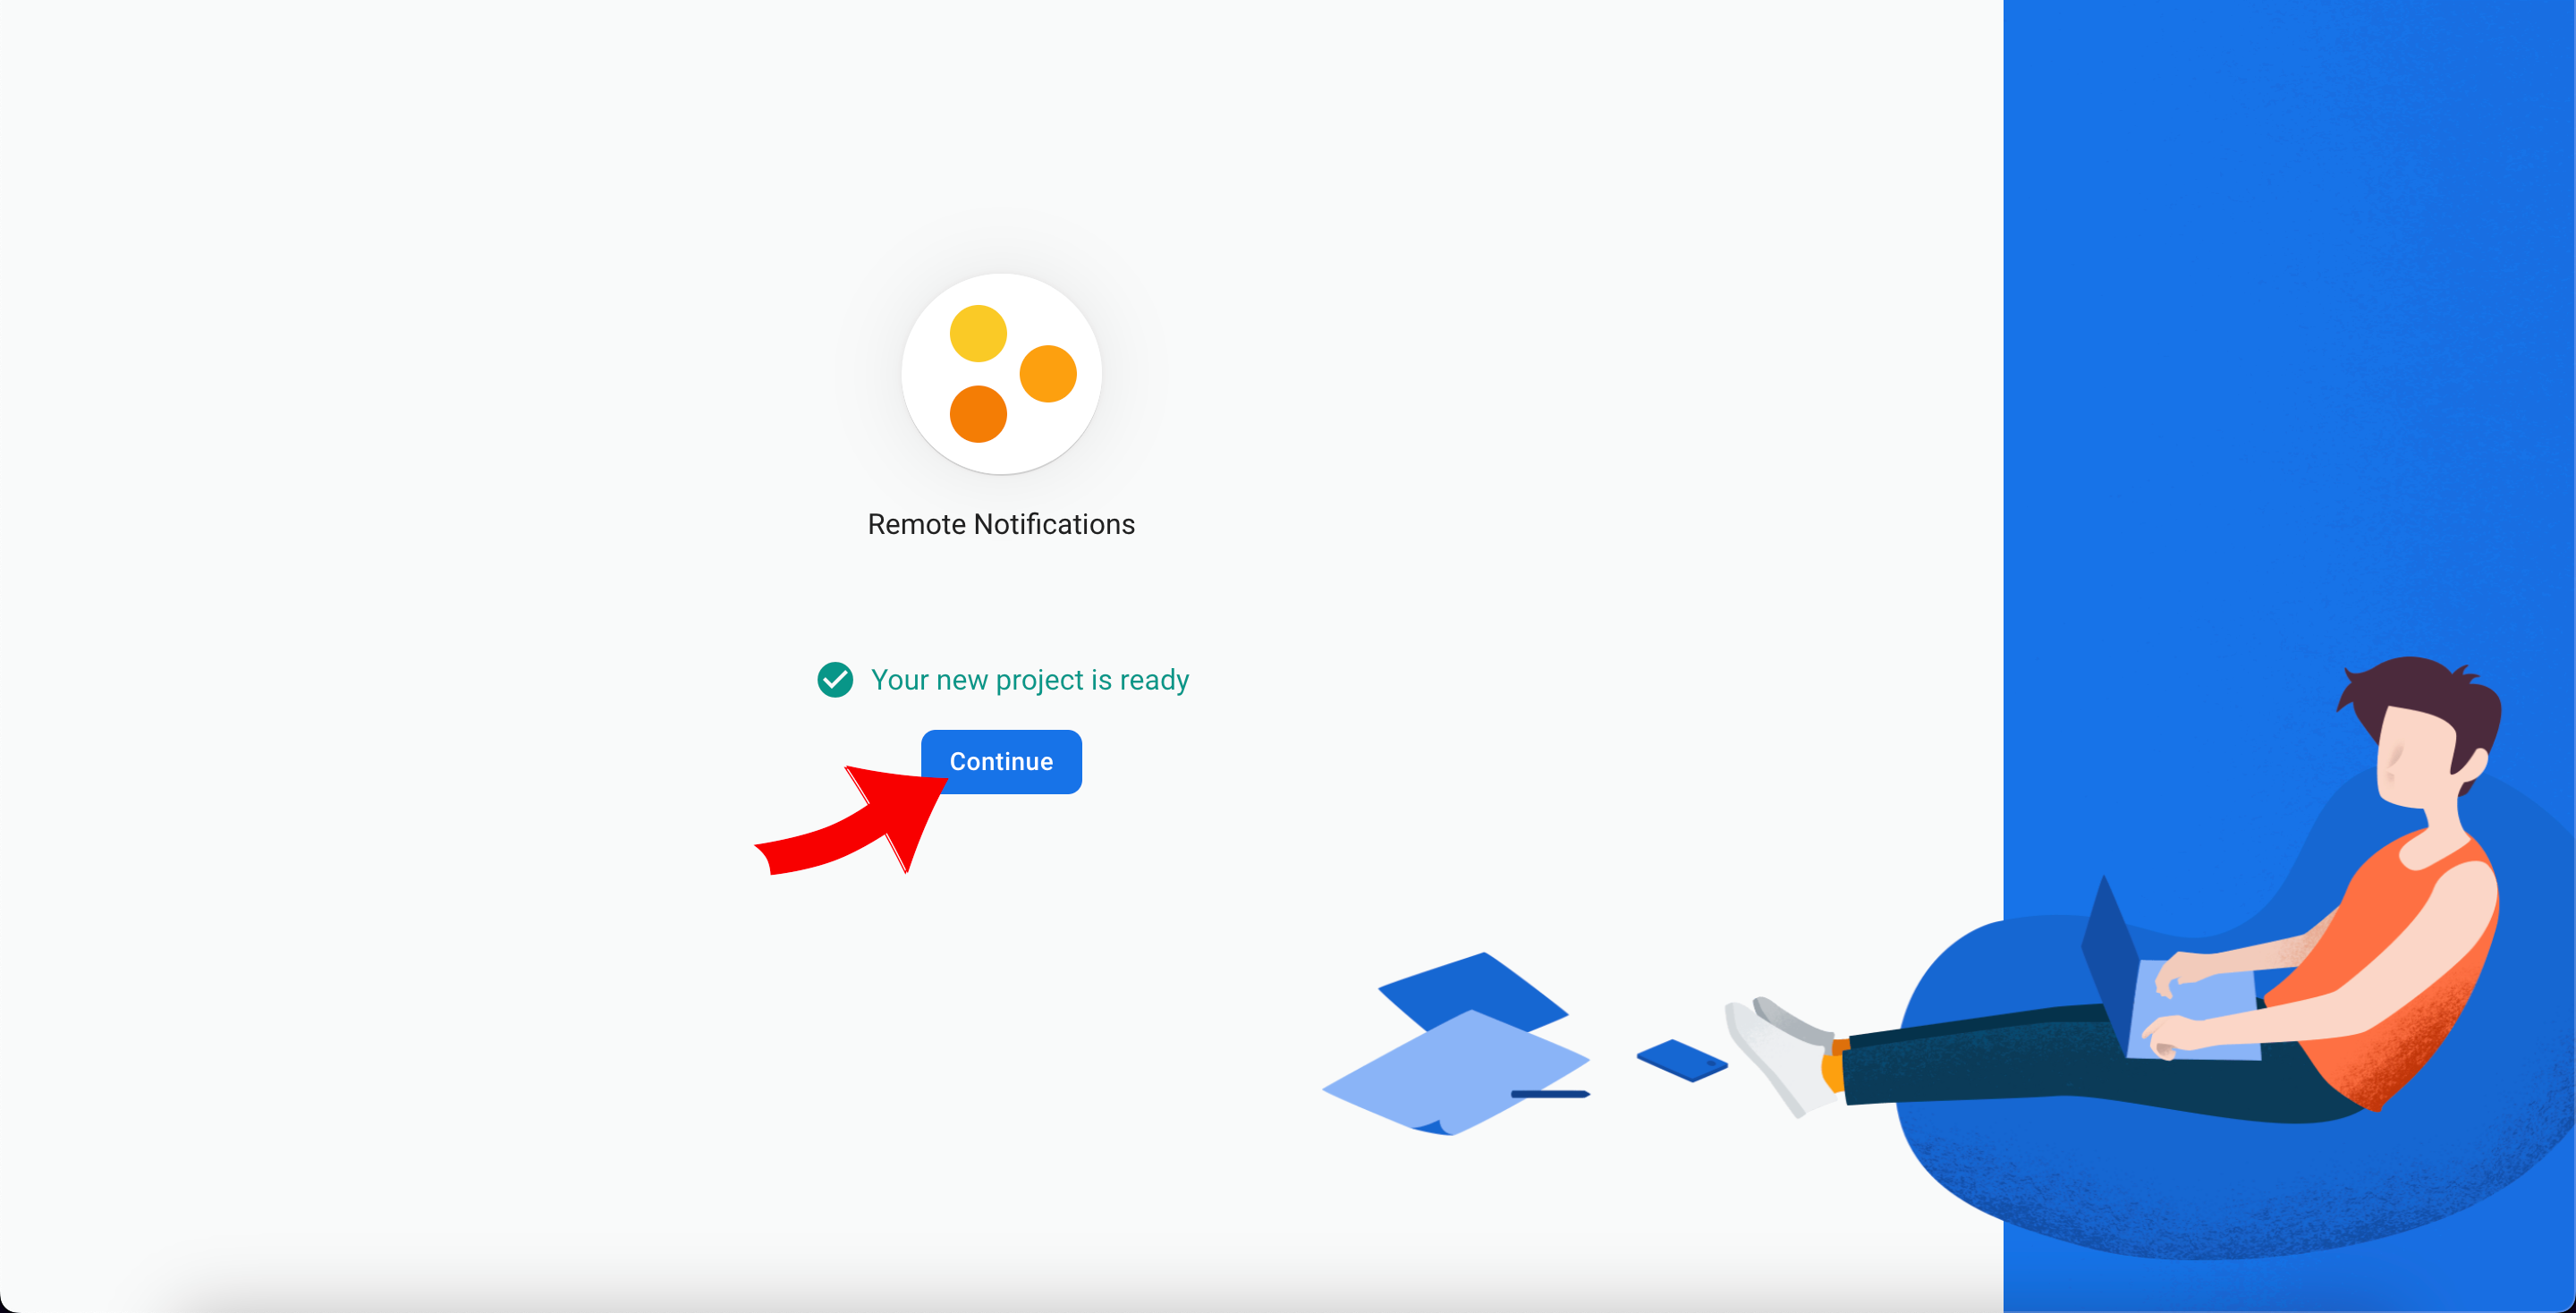
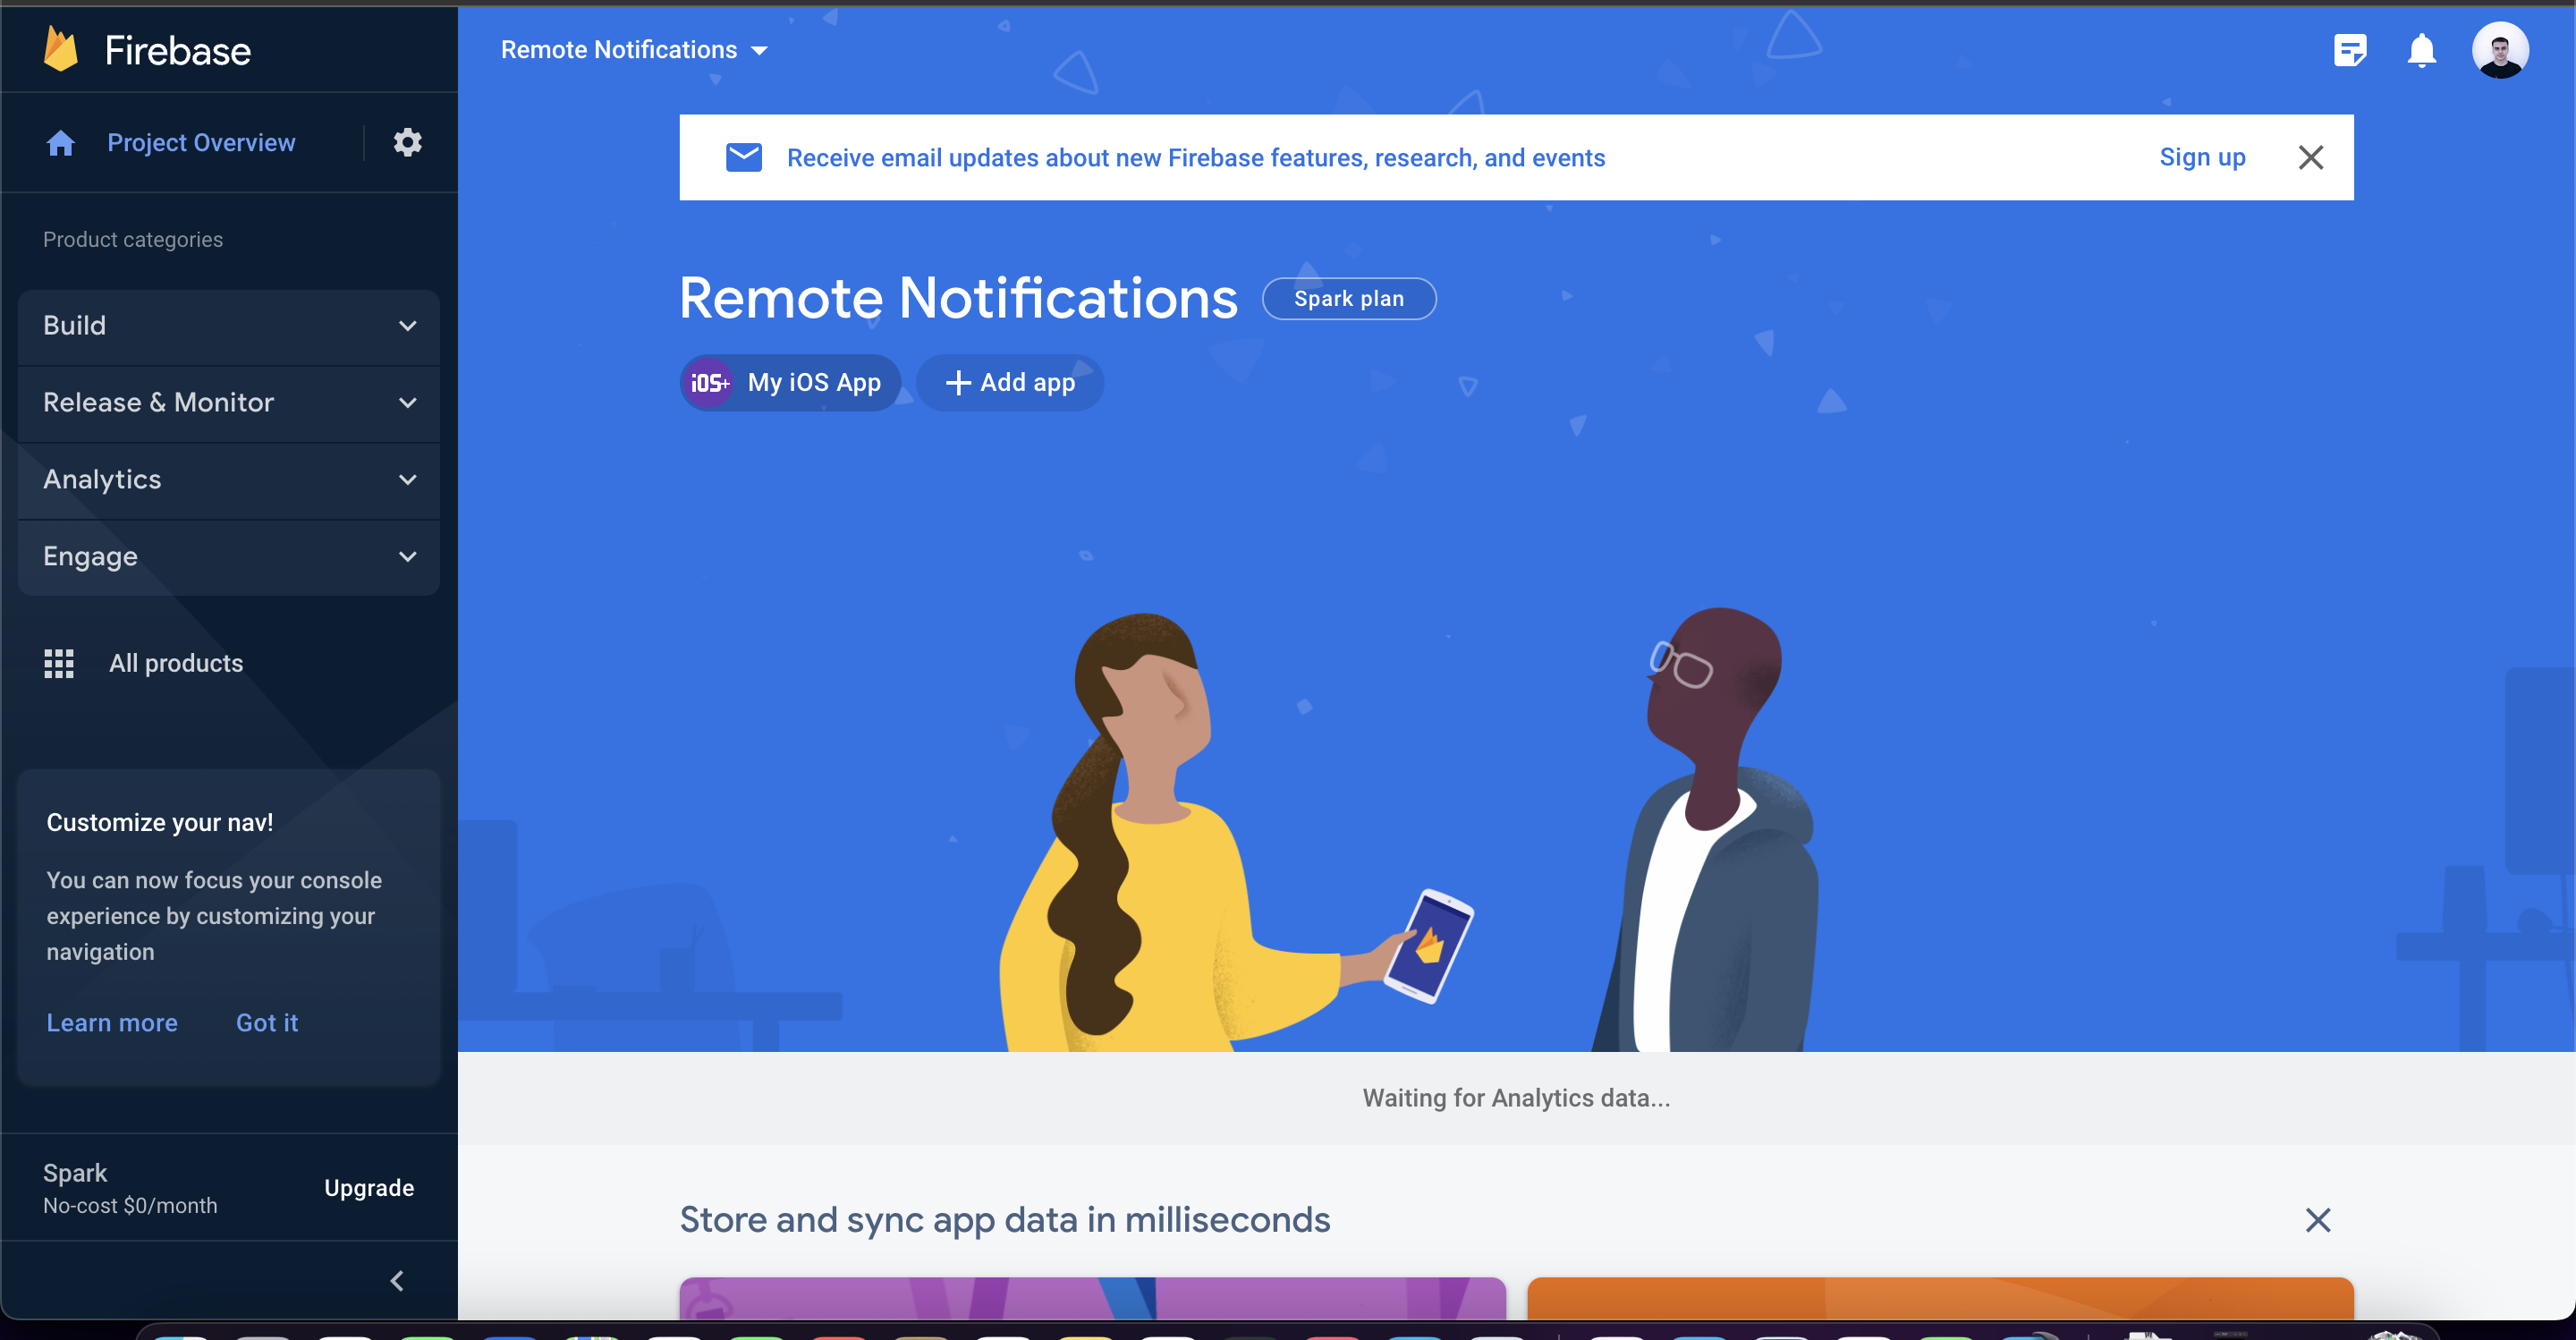
When the loading is done, then just click on Continue button and we will be navigated at the Firebase Dashboard.
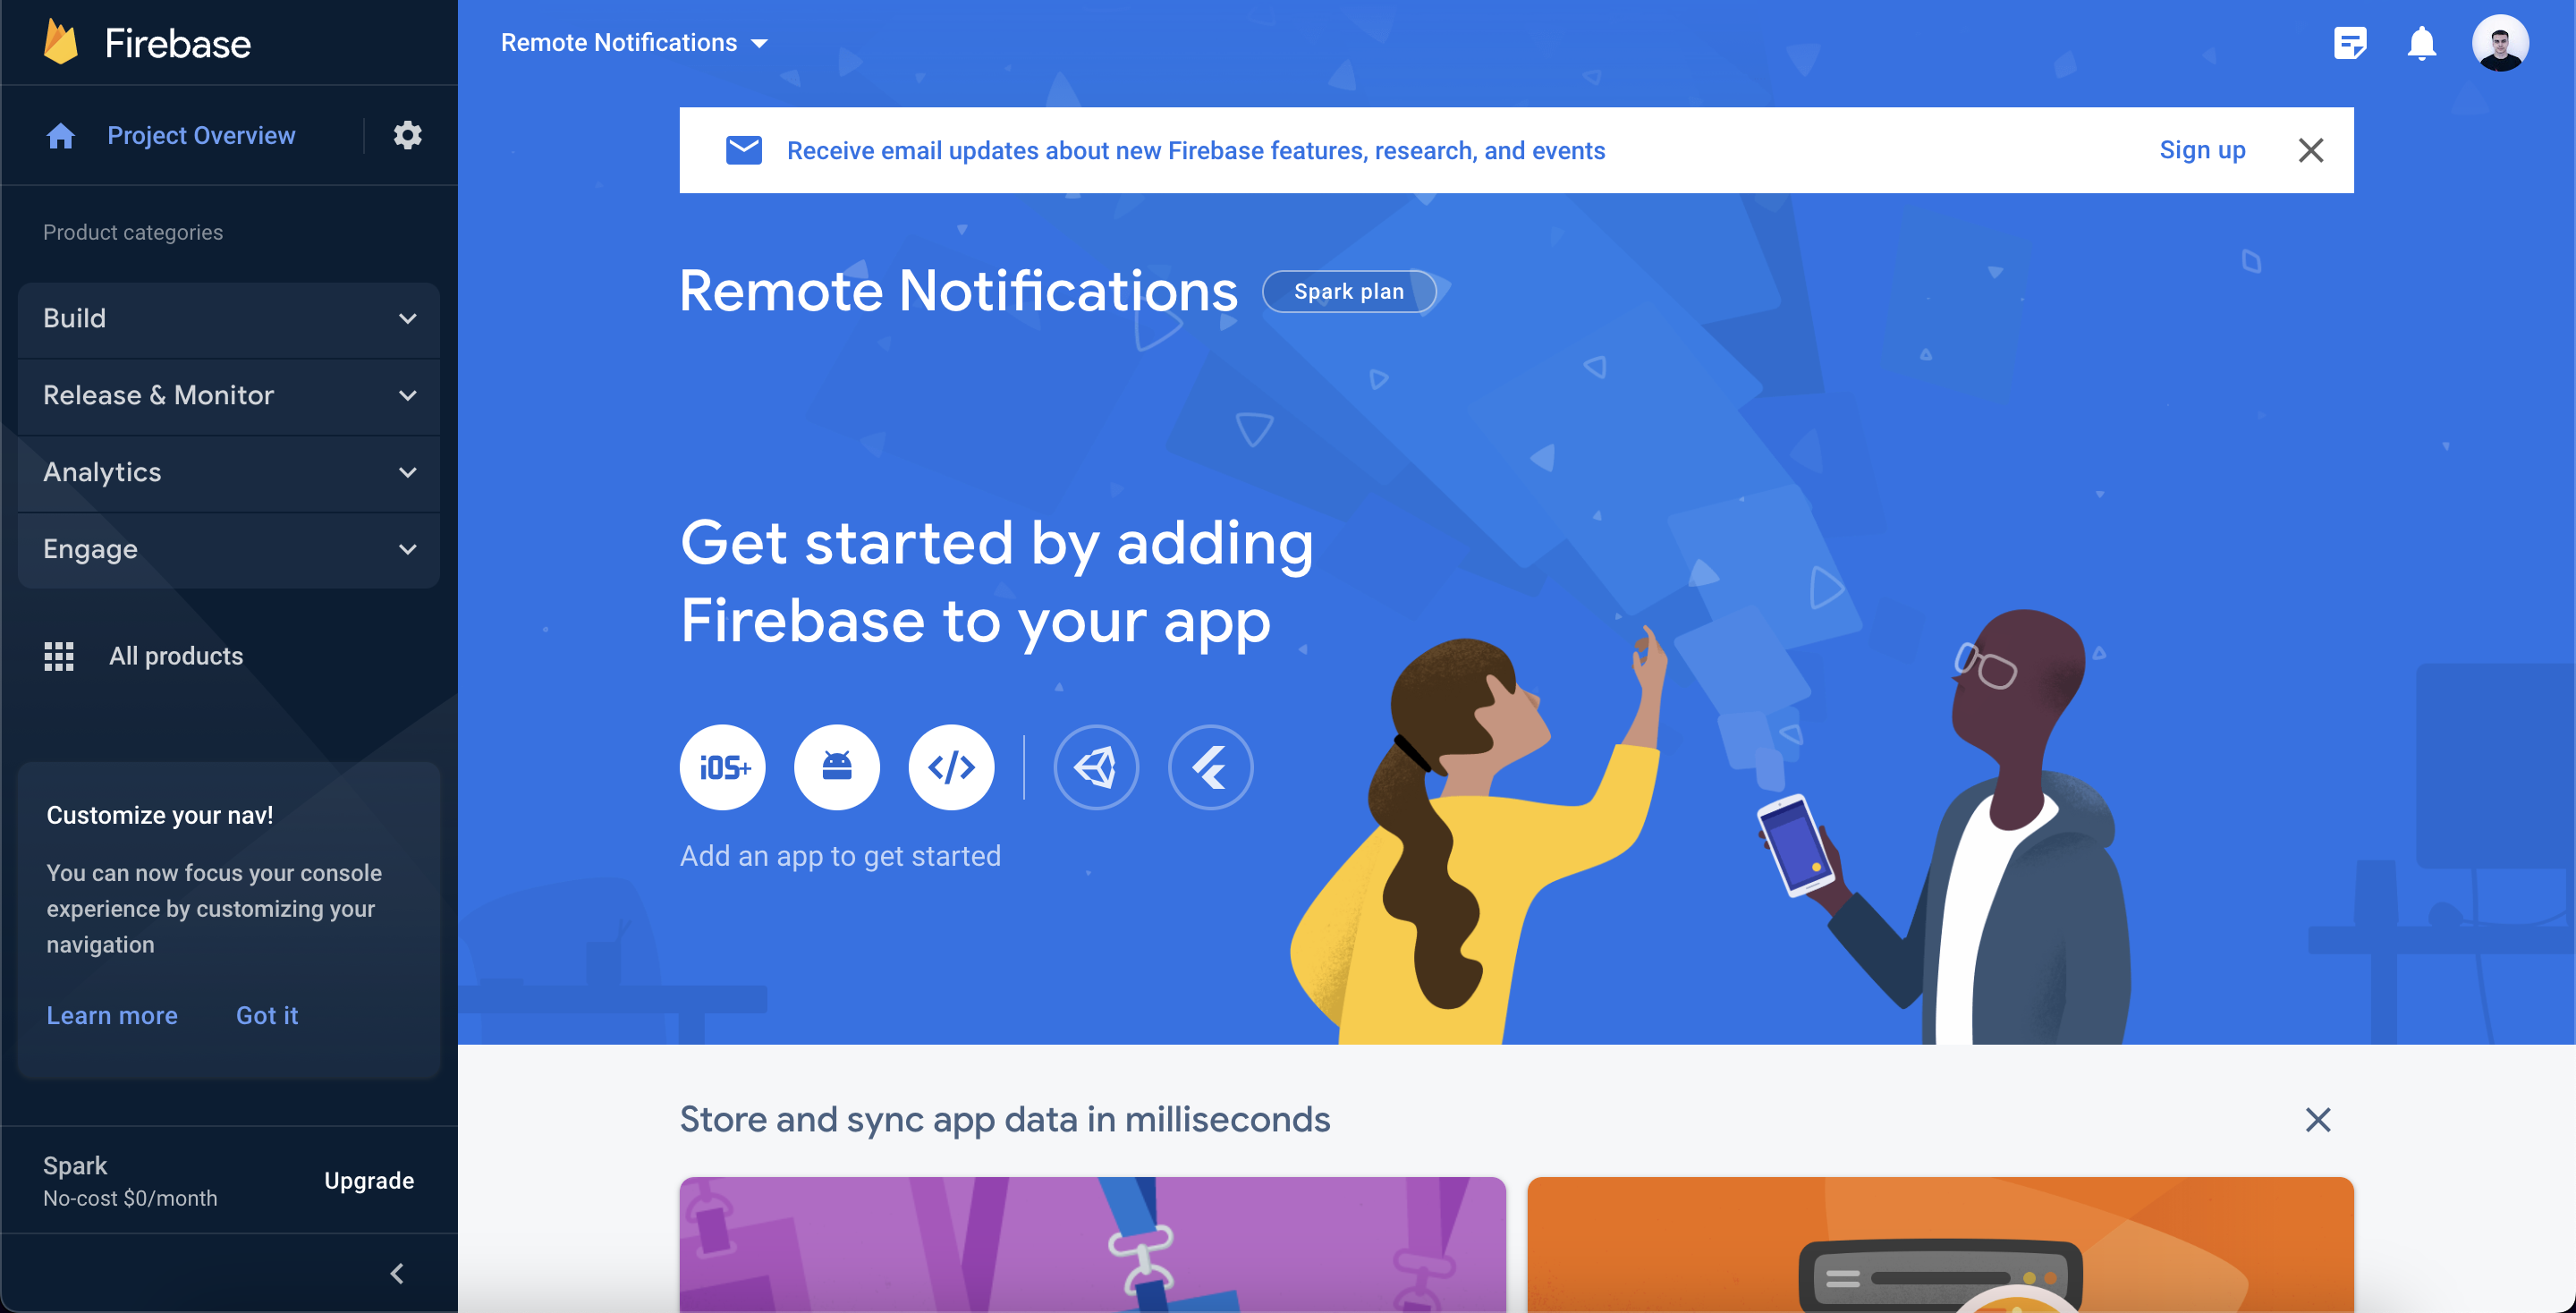
On this step we will need to continue with other configurations that we need. As we know the Firebase Console provide us the possibility to create instances of our app for both platforms iOS and Android, but for now I will start the configuration for iOS app first.
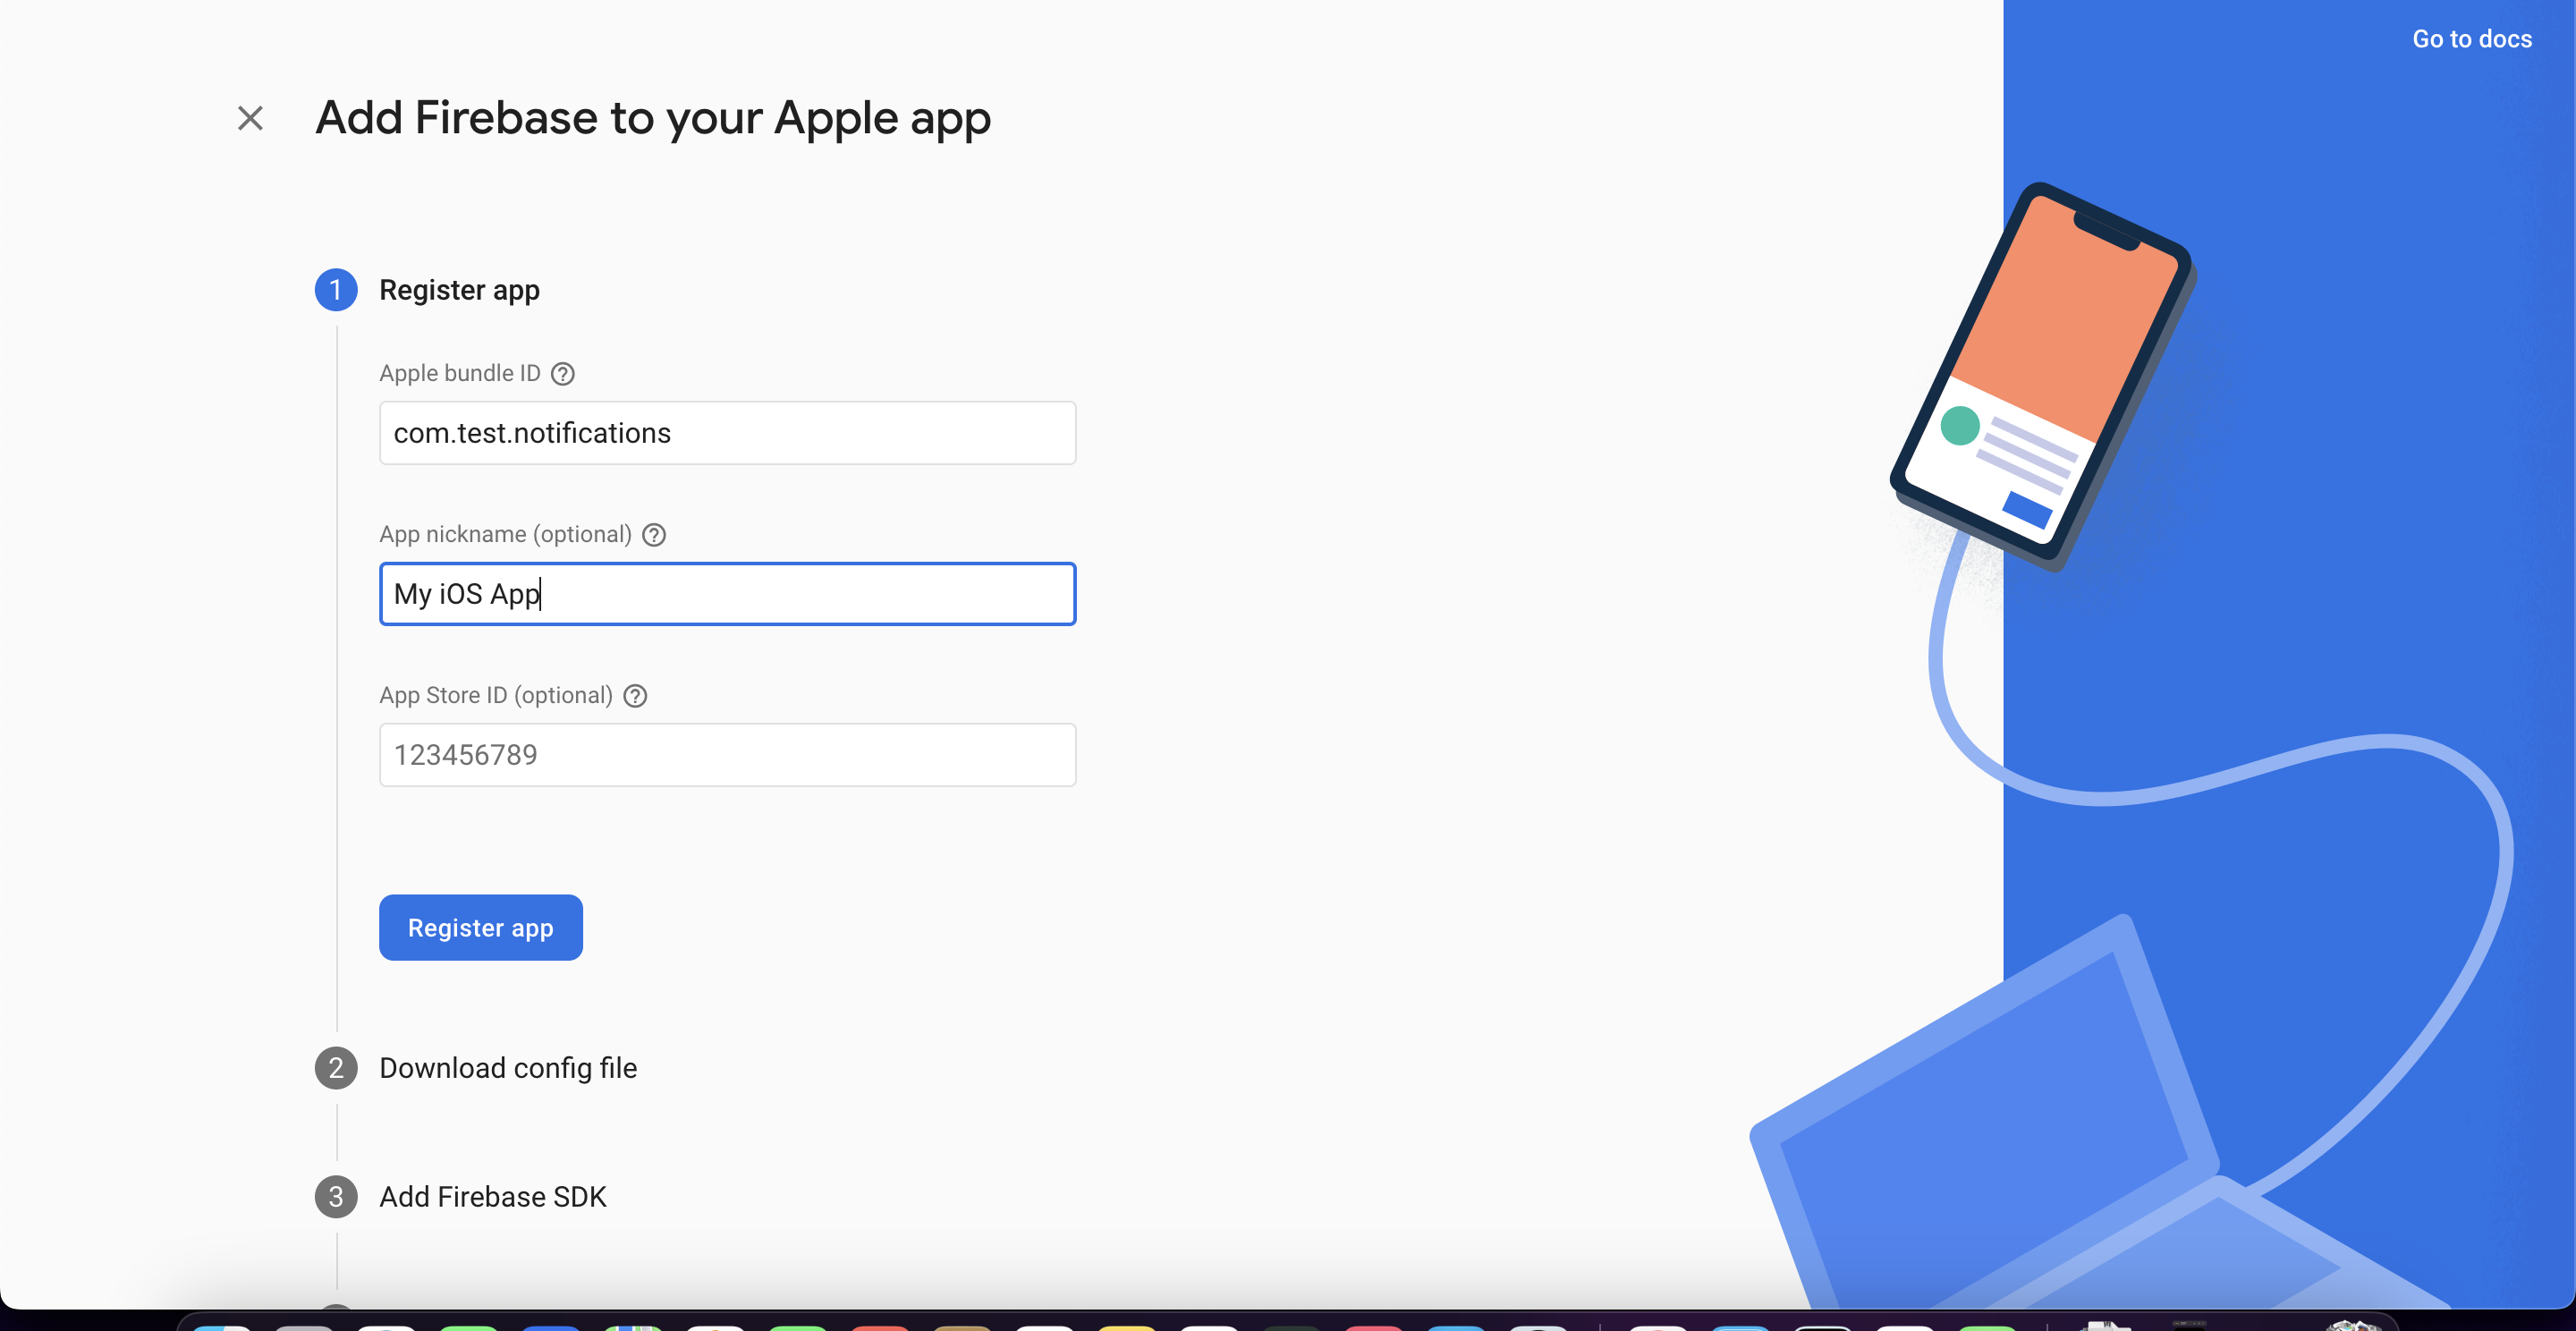
Under the project name we can pick the platform that we want to configure (iOS, android, or Web). So we will click on iOS platform.
On this step I have added an example how the bundle id would be but you will need to copy and paste the original bundle id of your project and to do it just follow steps that I have added below.
For finding the correct bundle id we need to do the following steps:
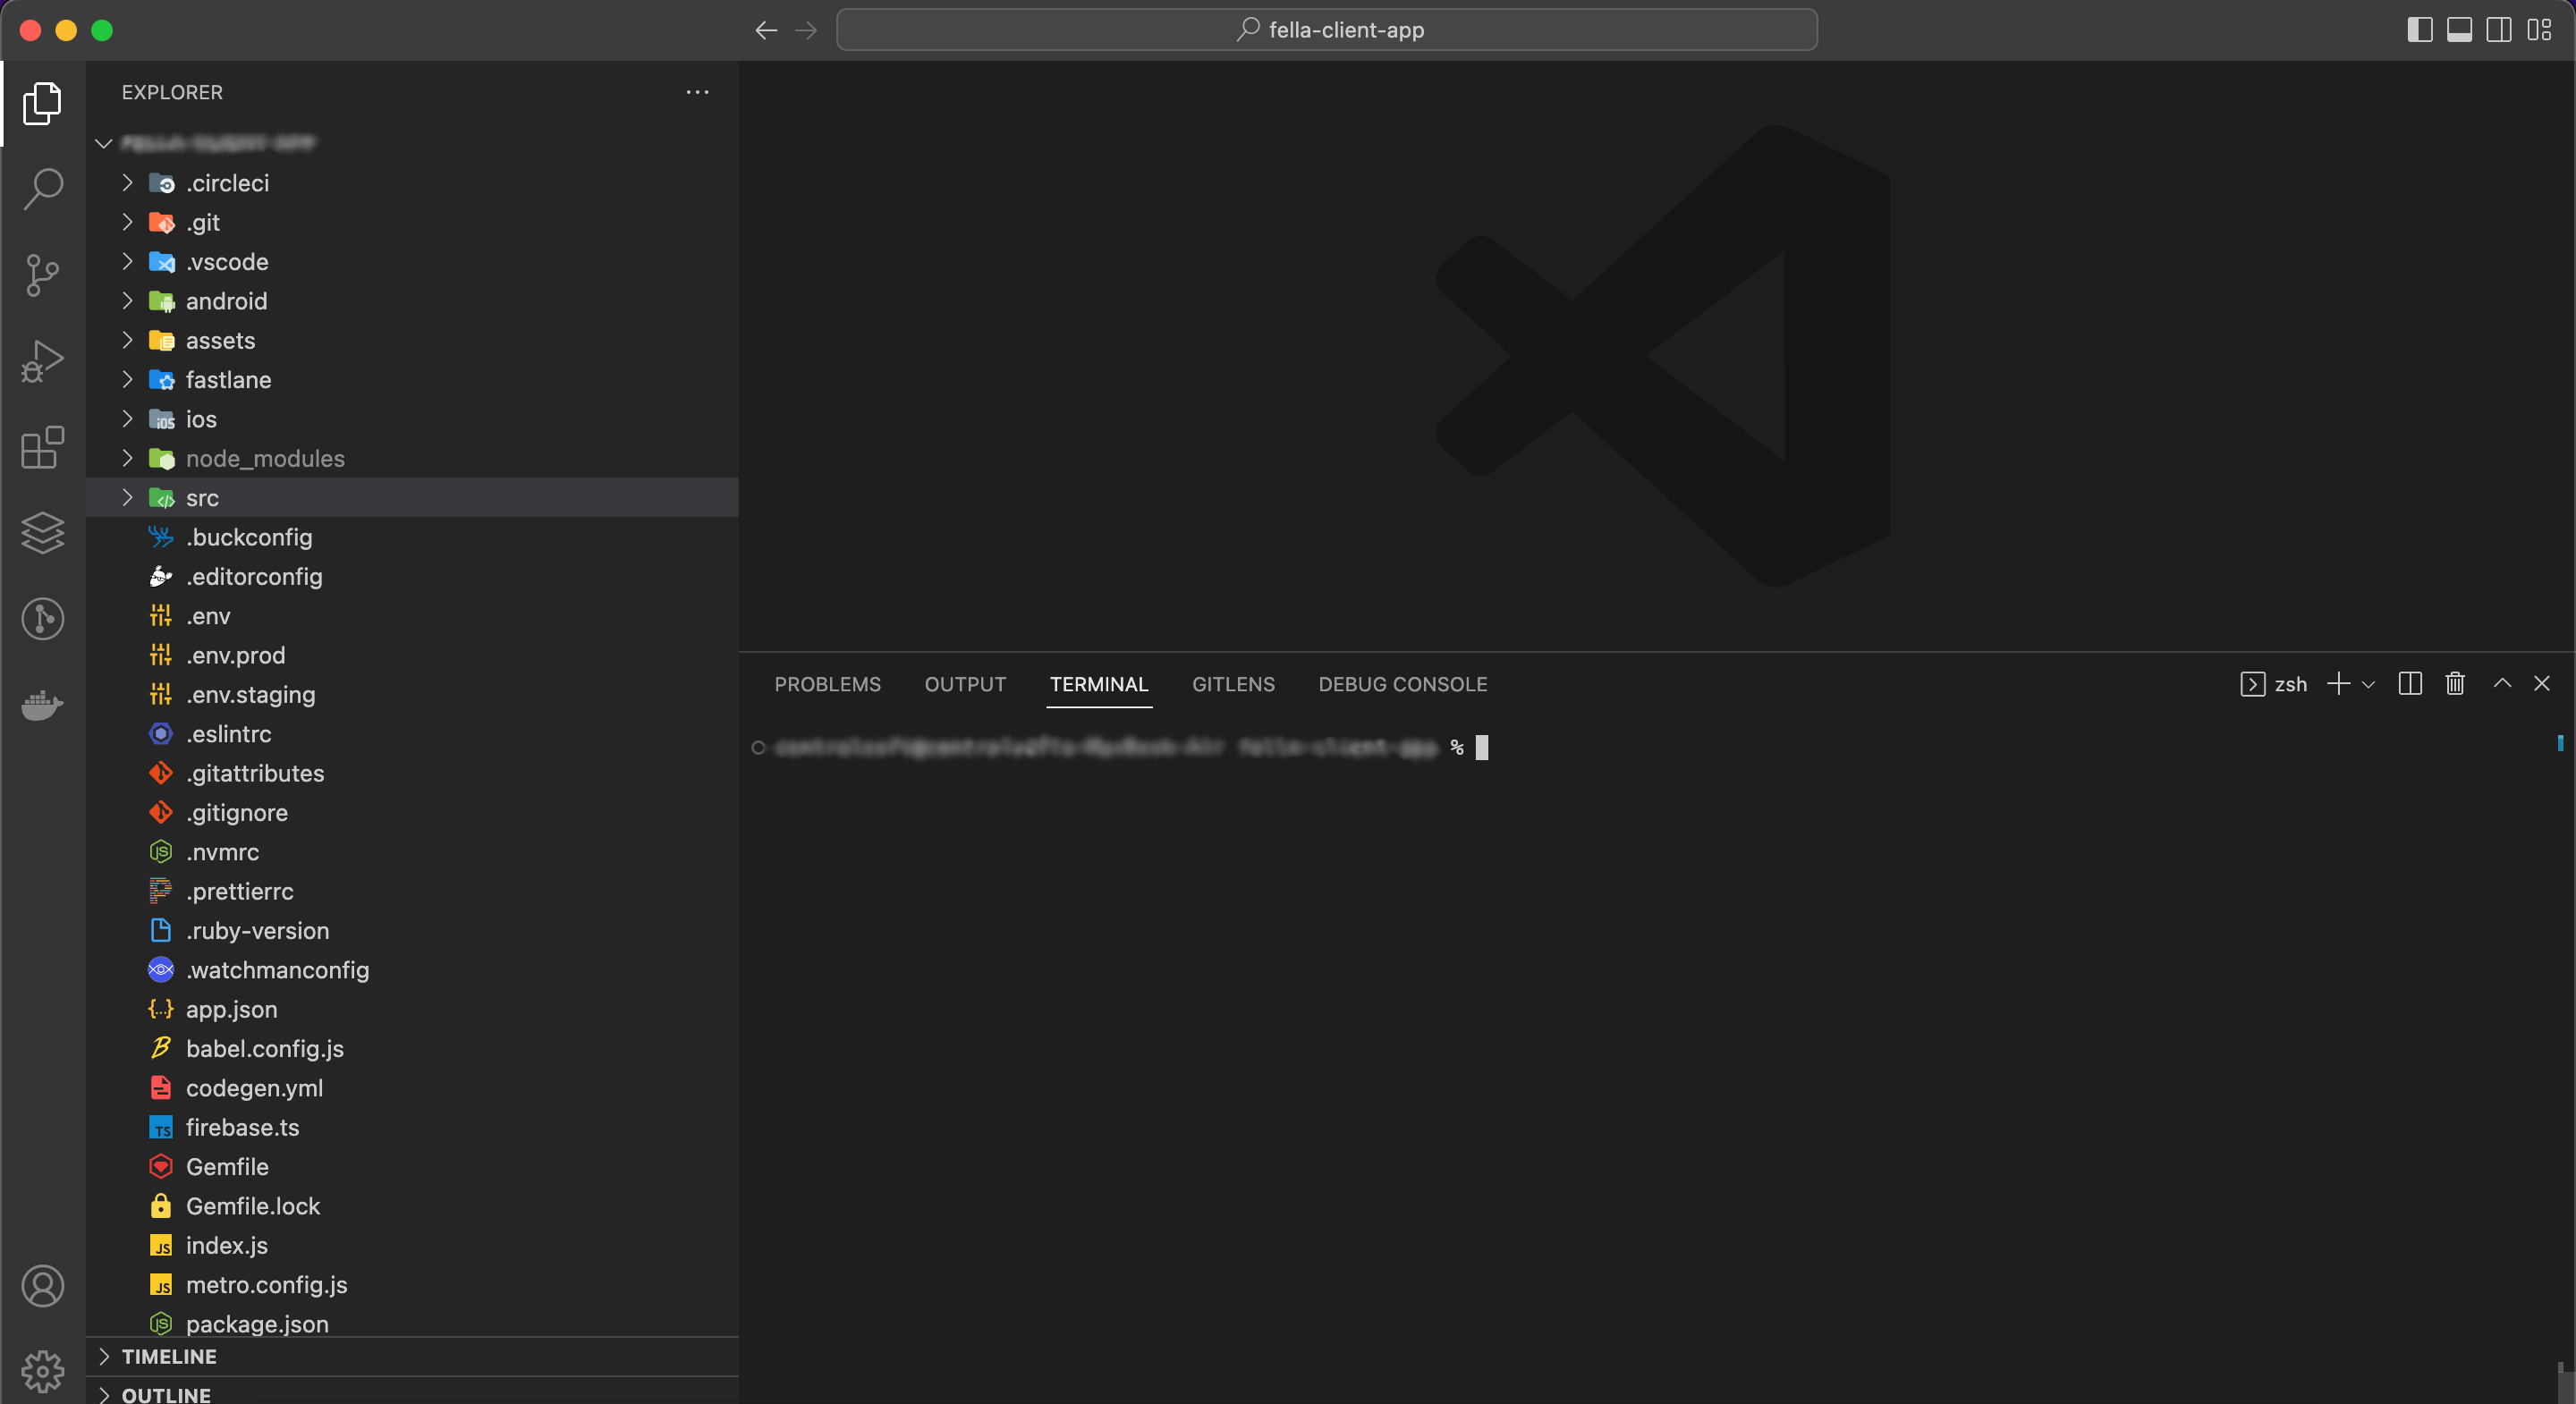
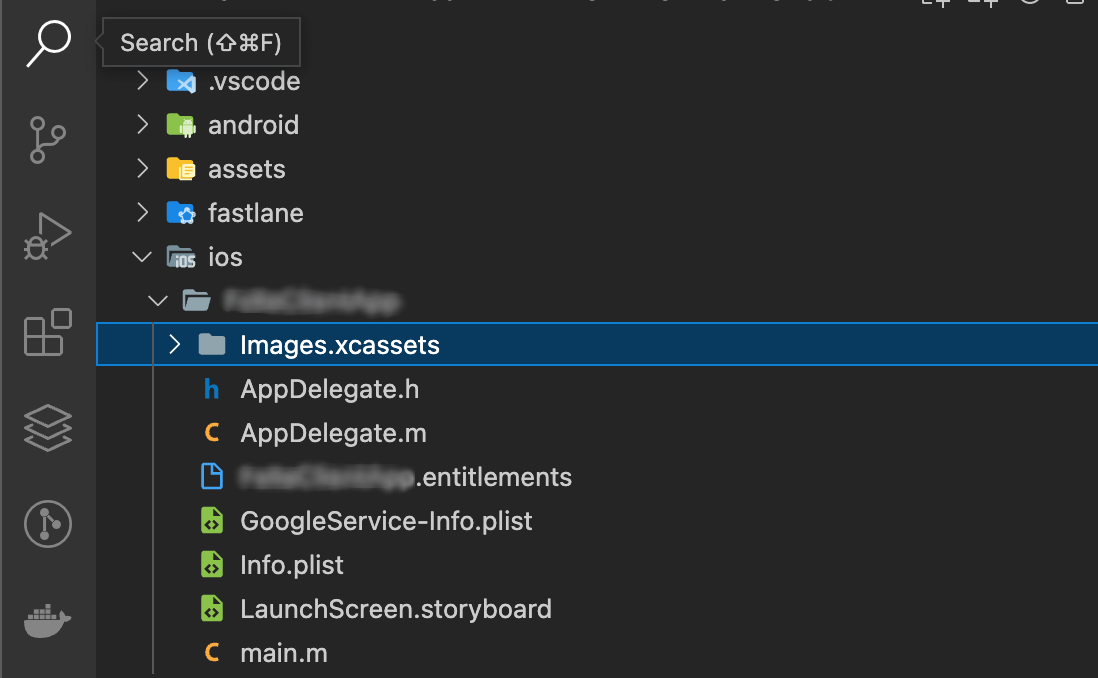
- Open your React native app on visual studio code:
- Open a new terminal
- Write the command like below:
This command will be used to open the XCode with your ios project:
xed ios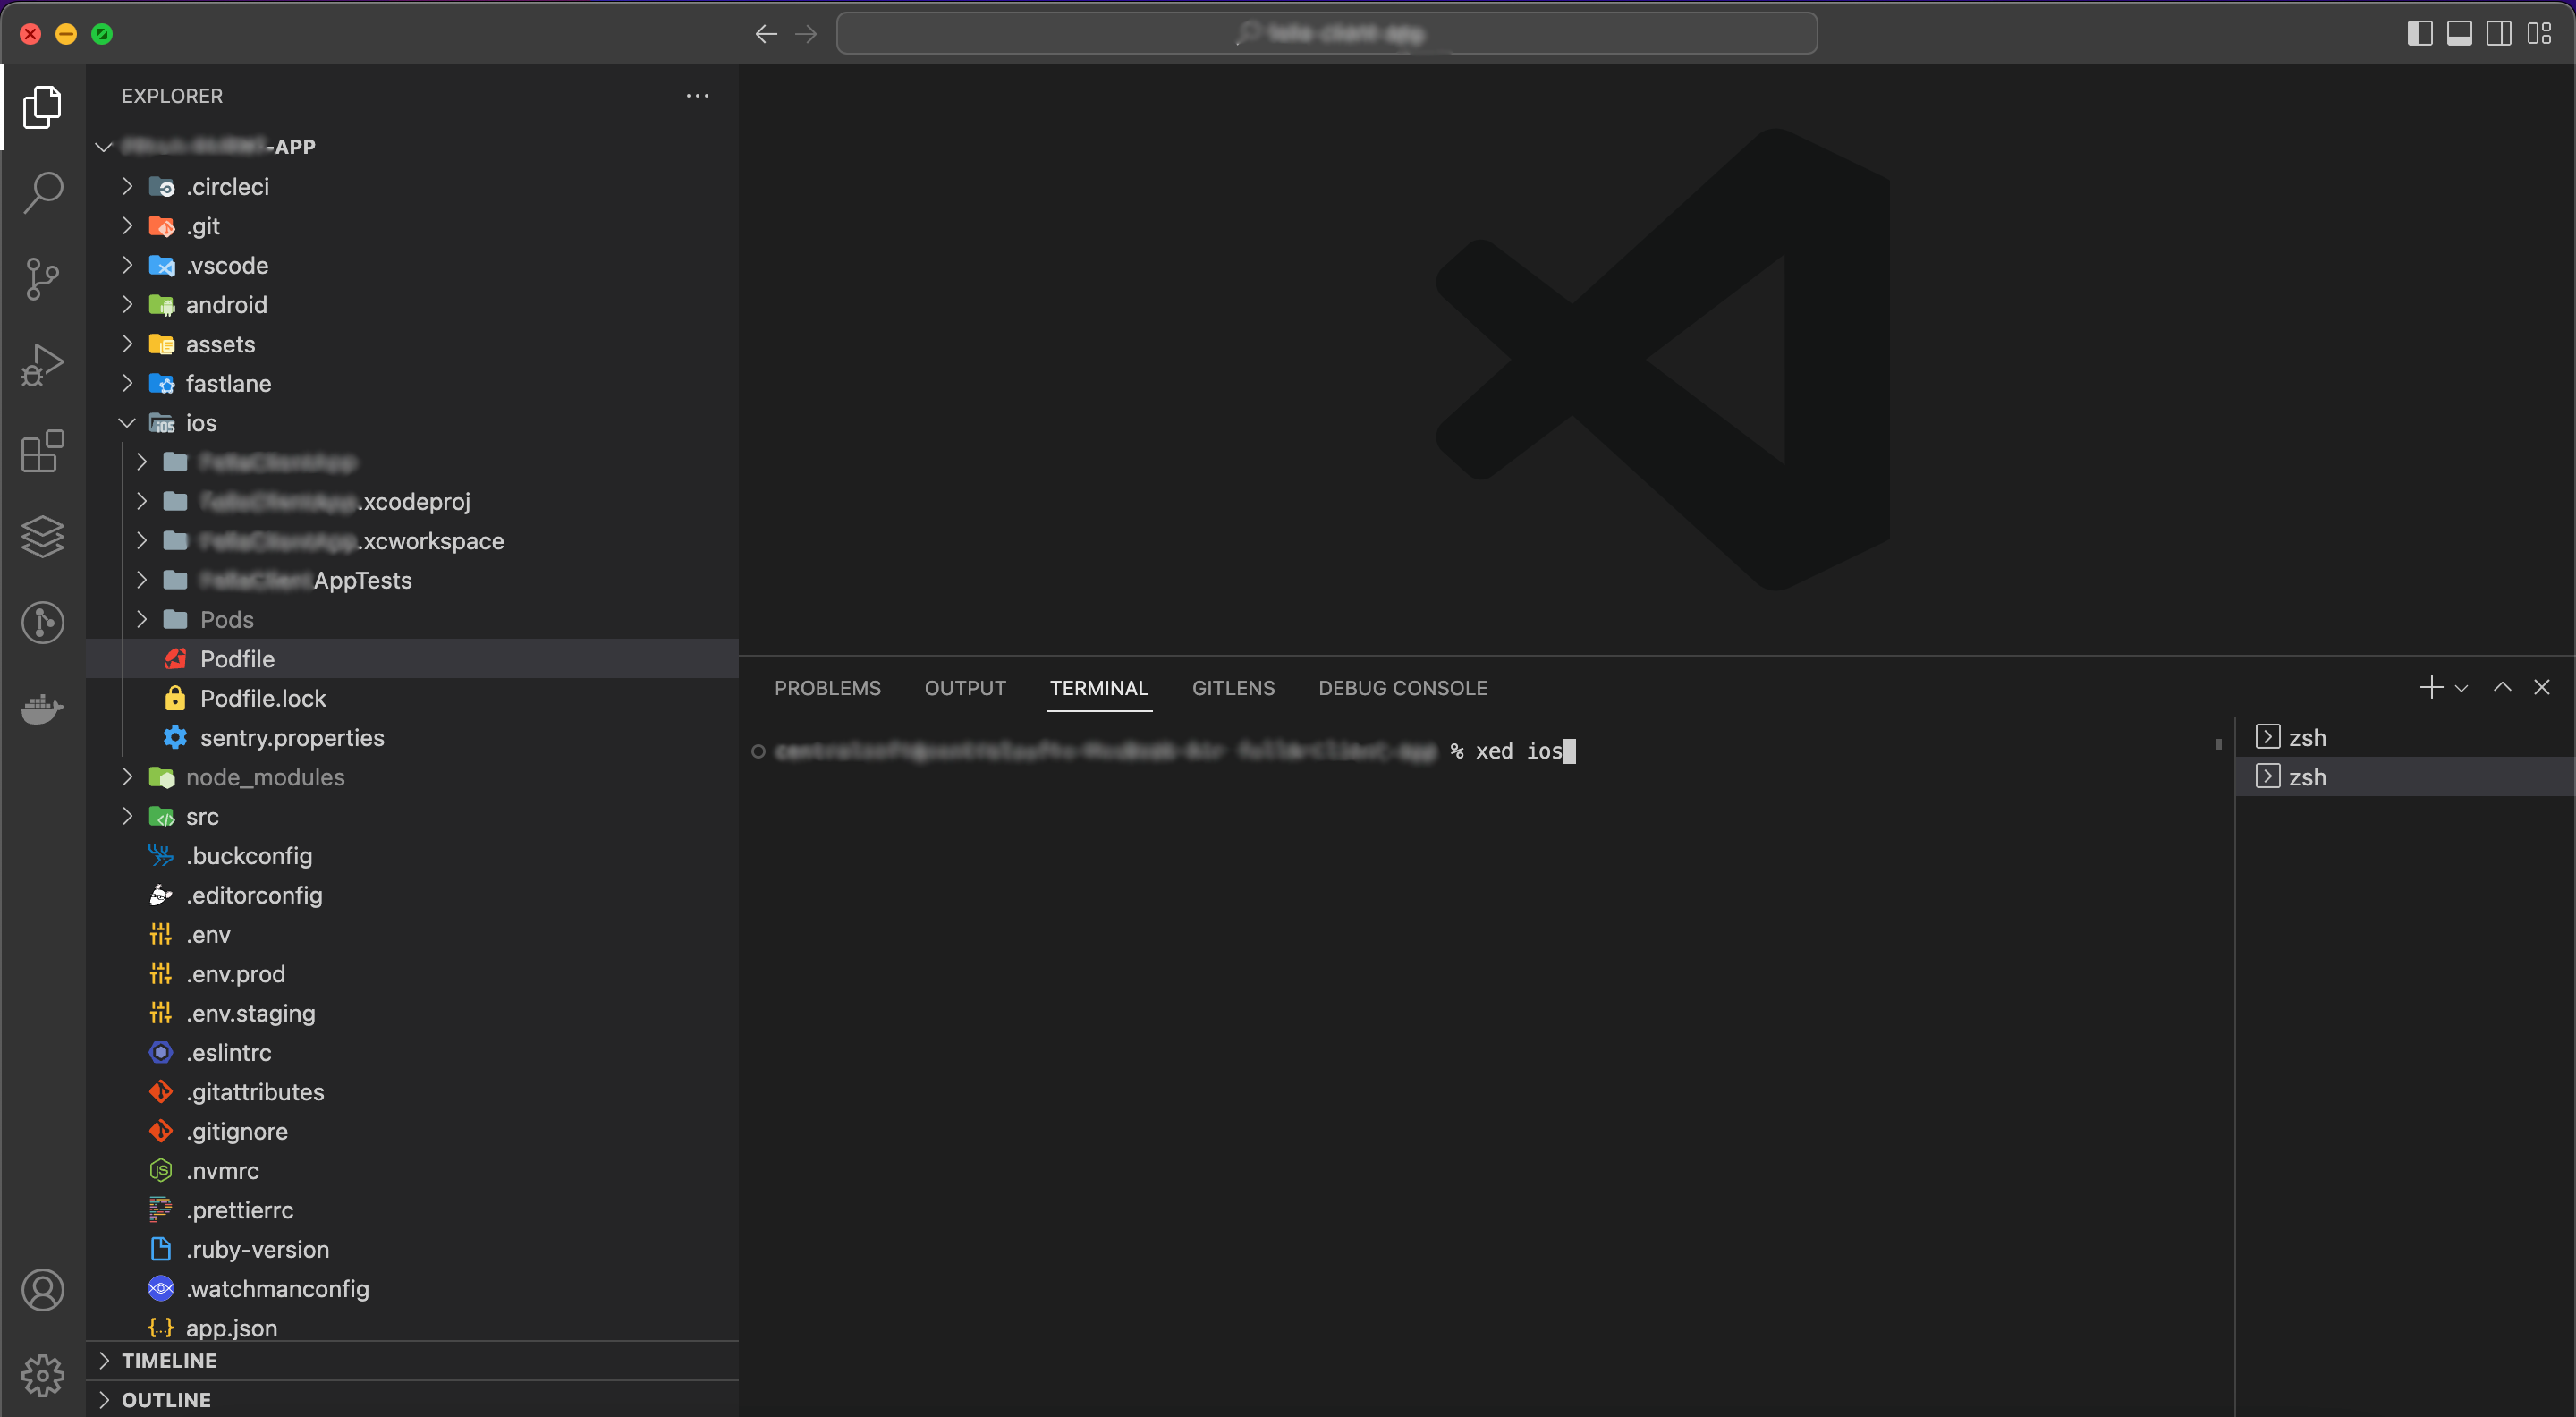
After that click Enter and you will see the XCode with your iOS app.
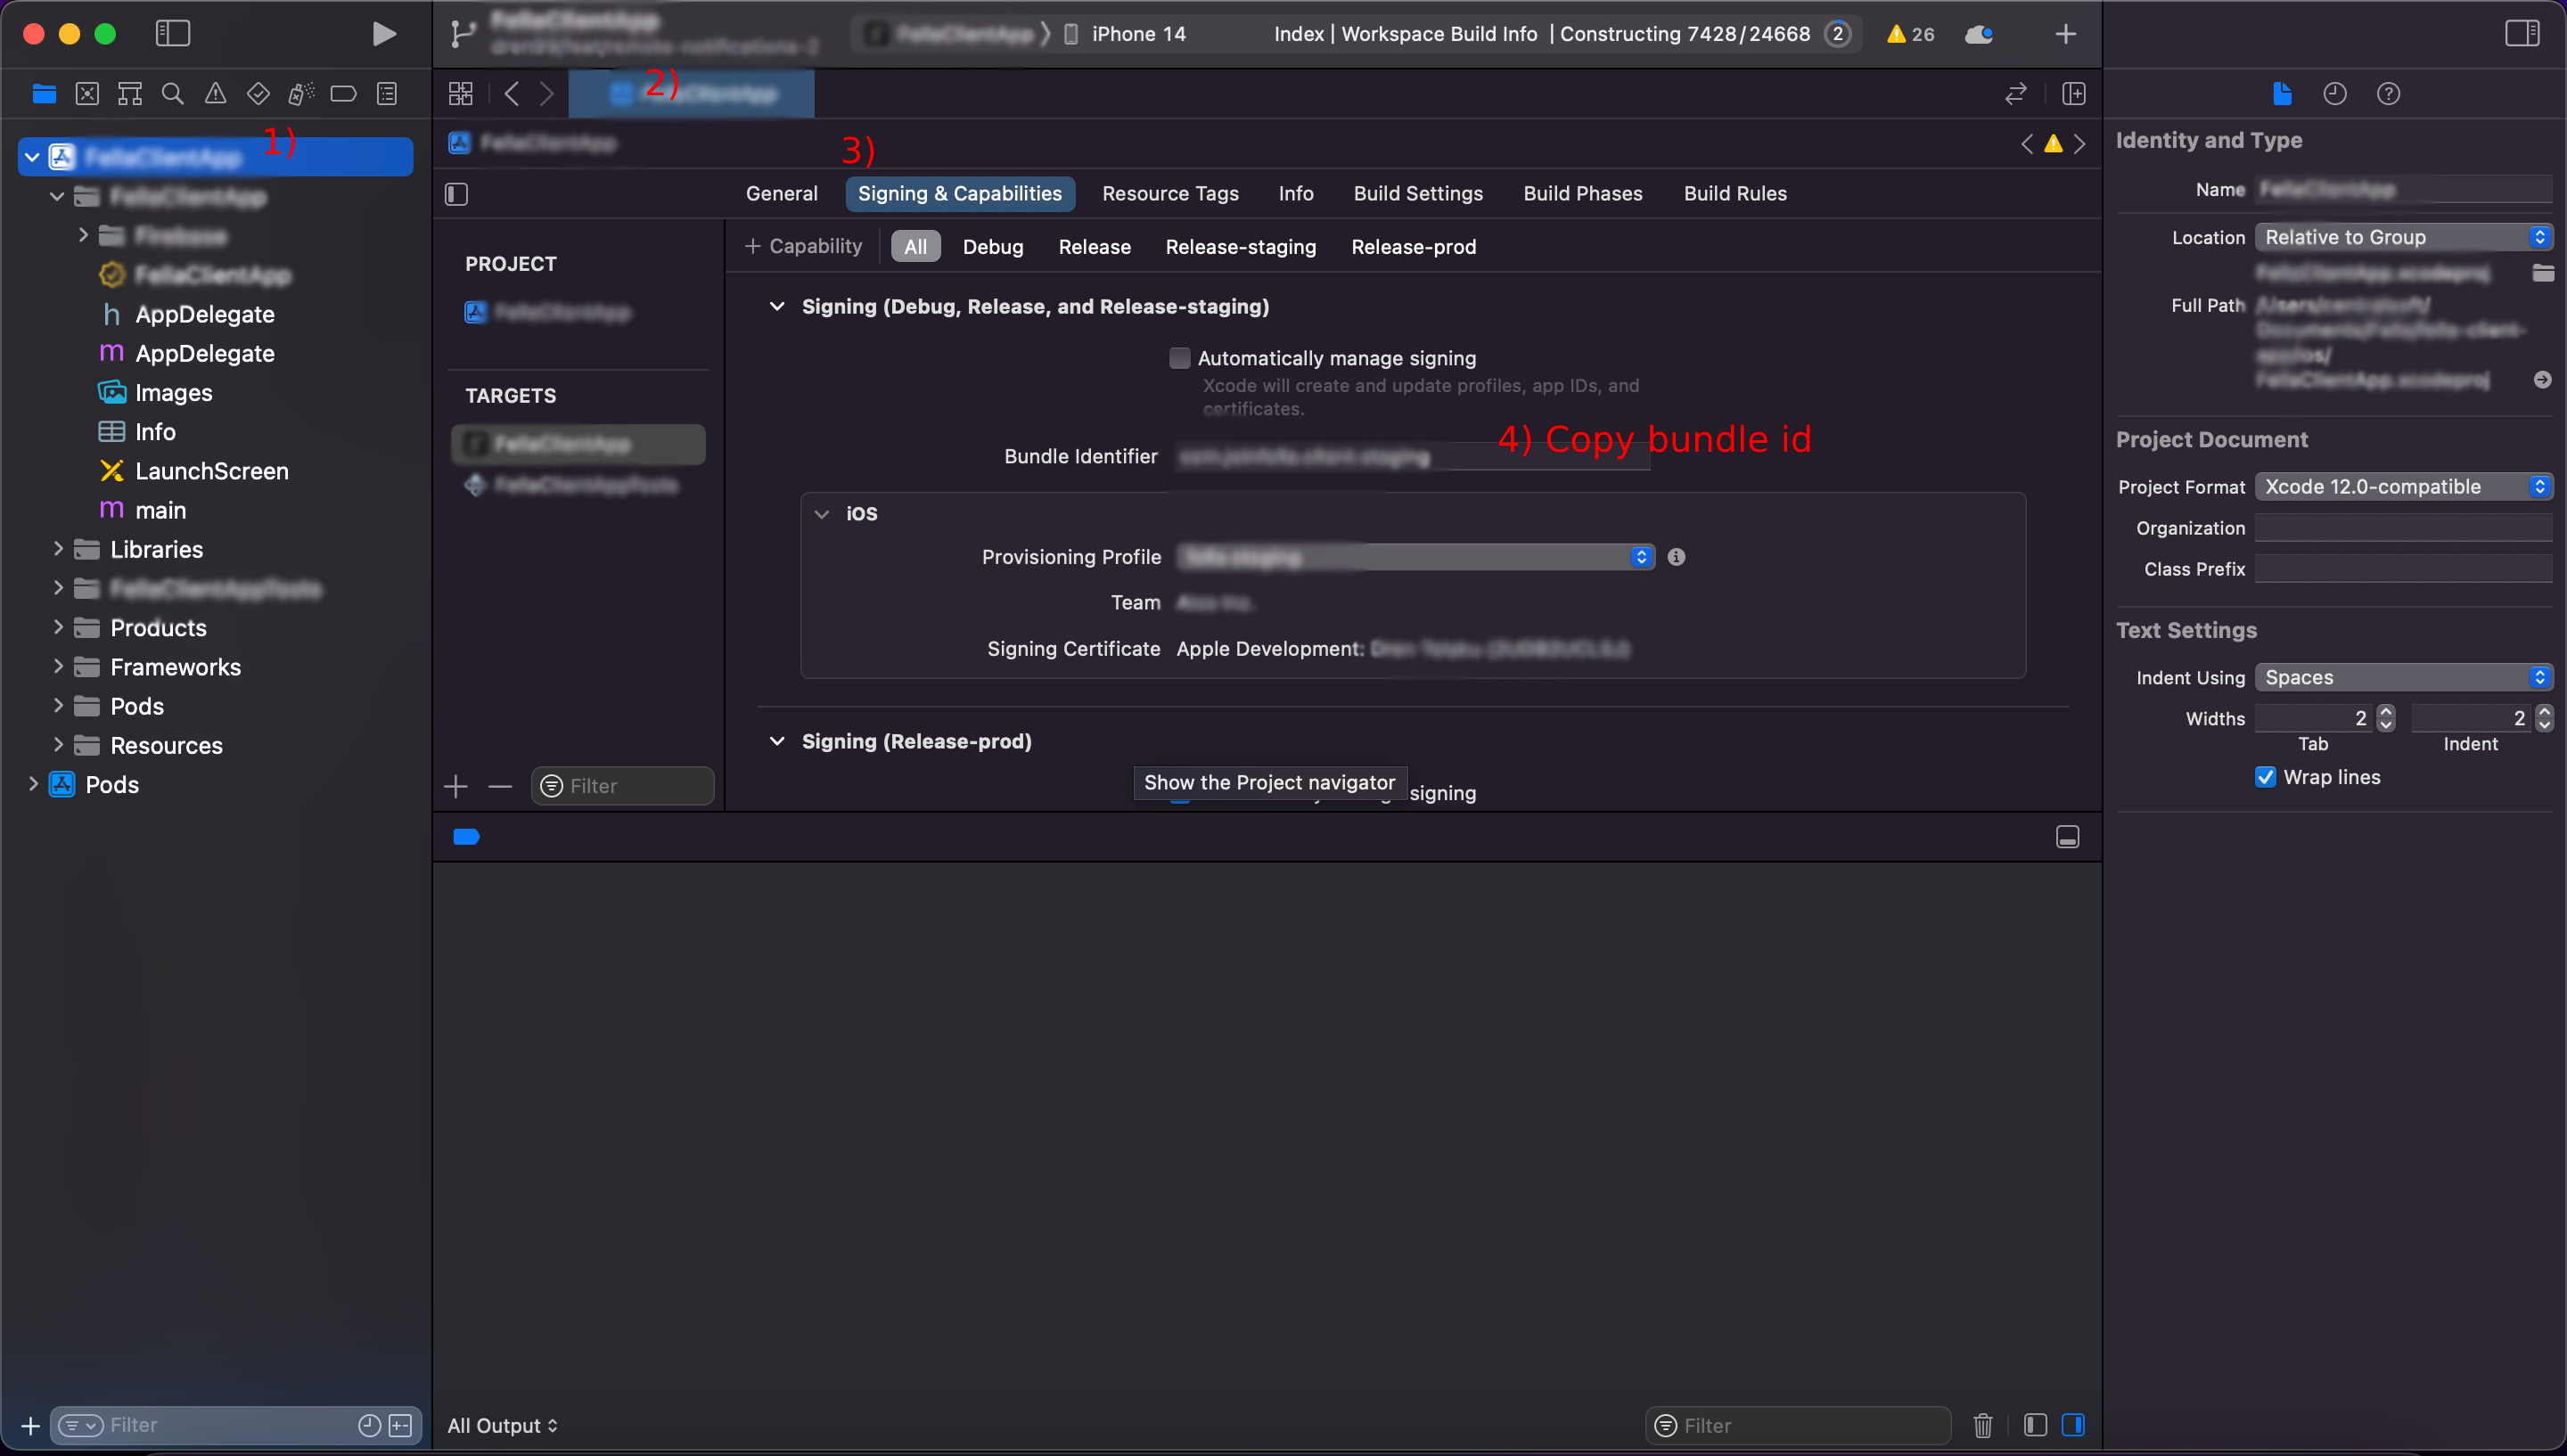
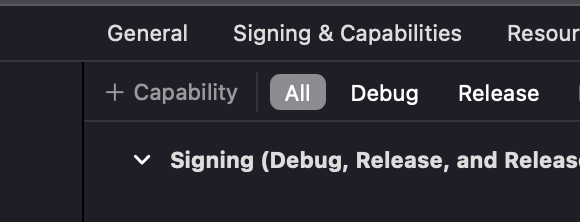
You can find the right bundle identifier based on steps below:
Click on project folder > Signing & Capabilities > All > copy Bundle Identifier
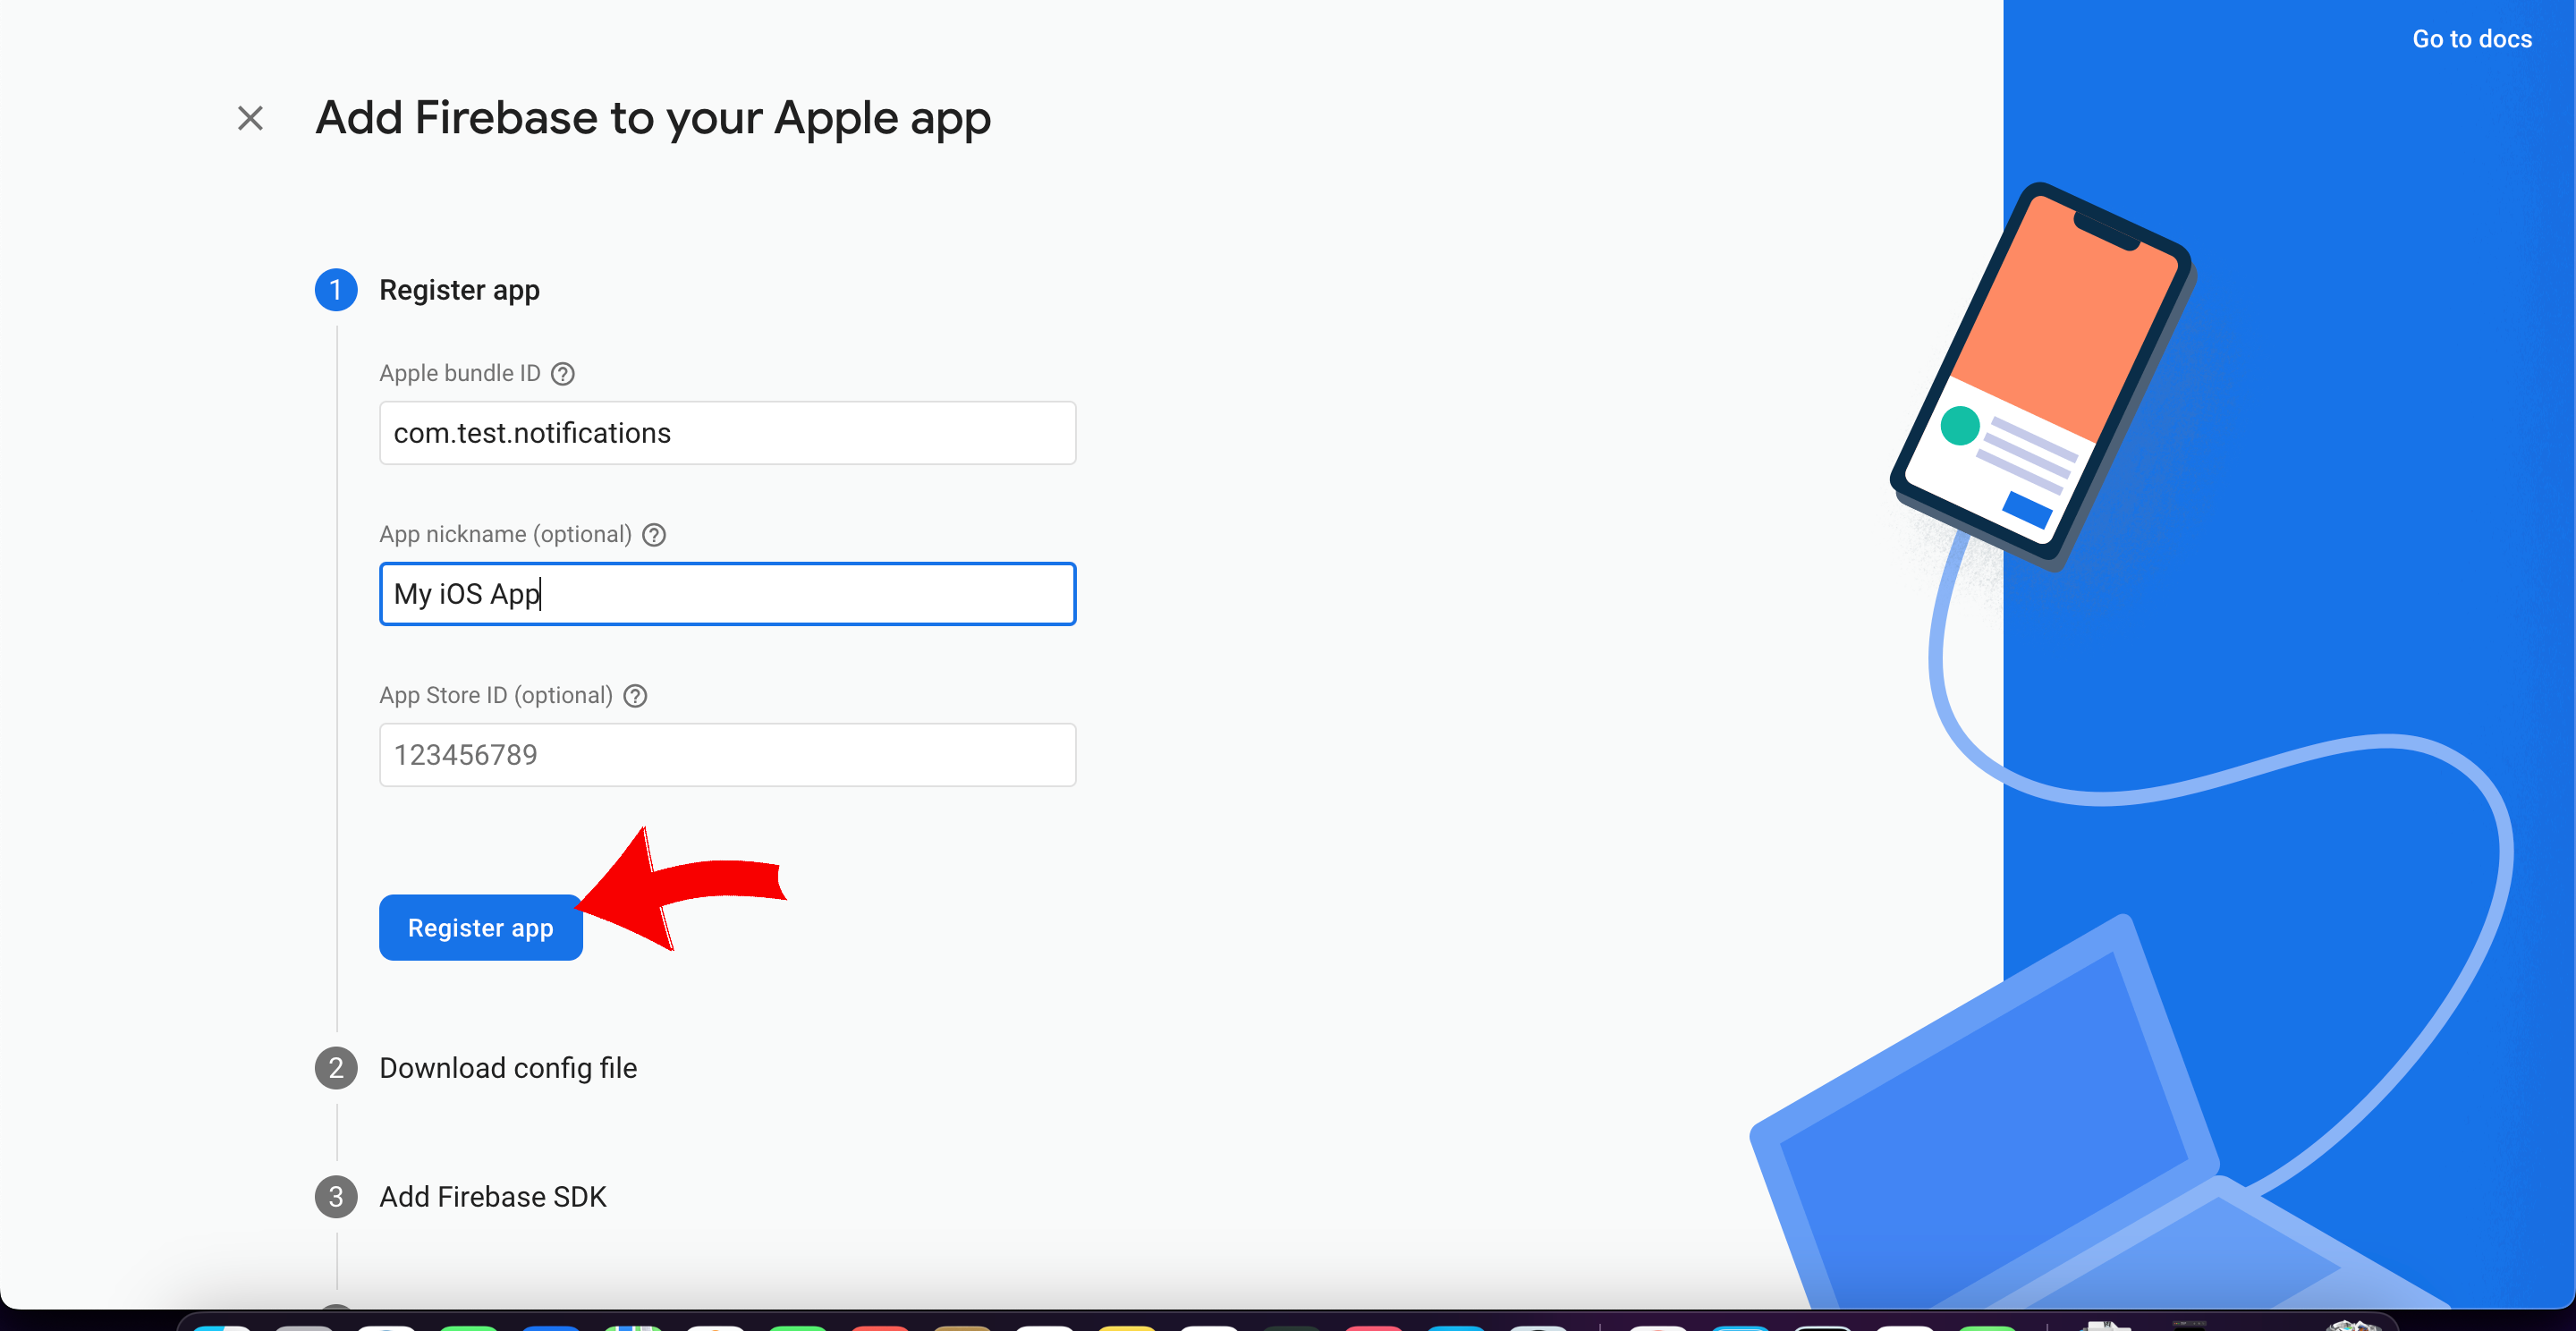
Go again on this screen and paste the bundle id that you have copied before on XCode, and click on Register App button.
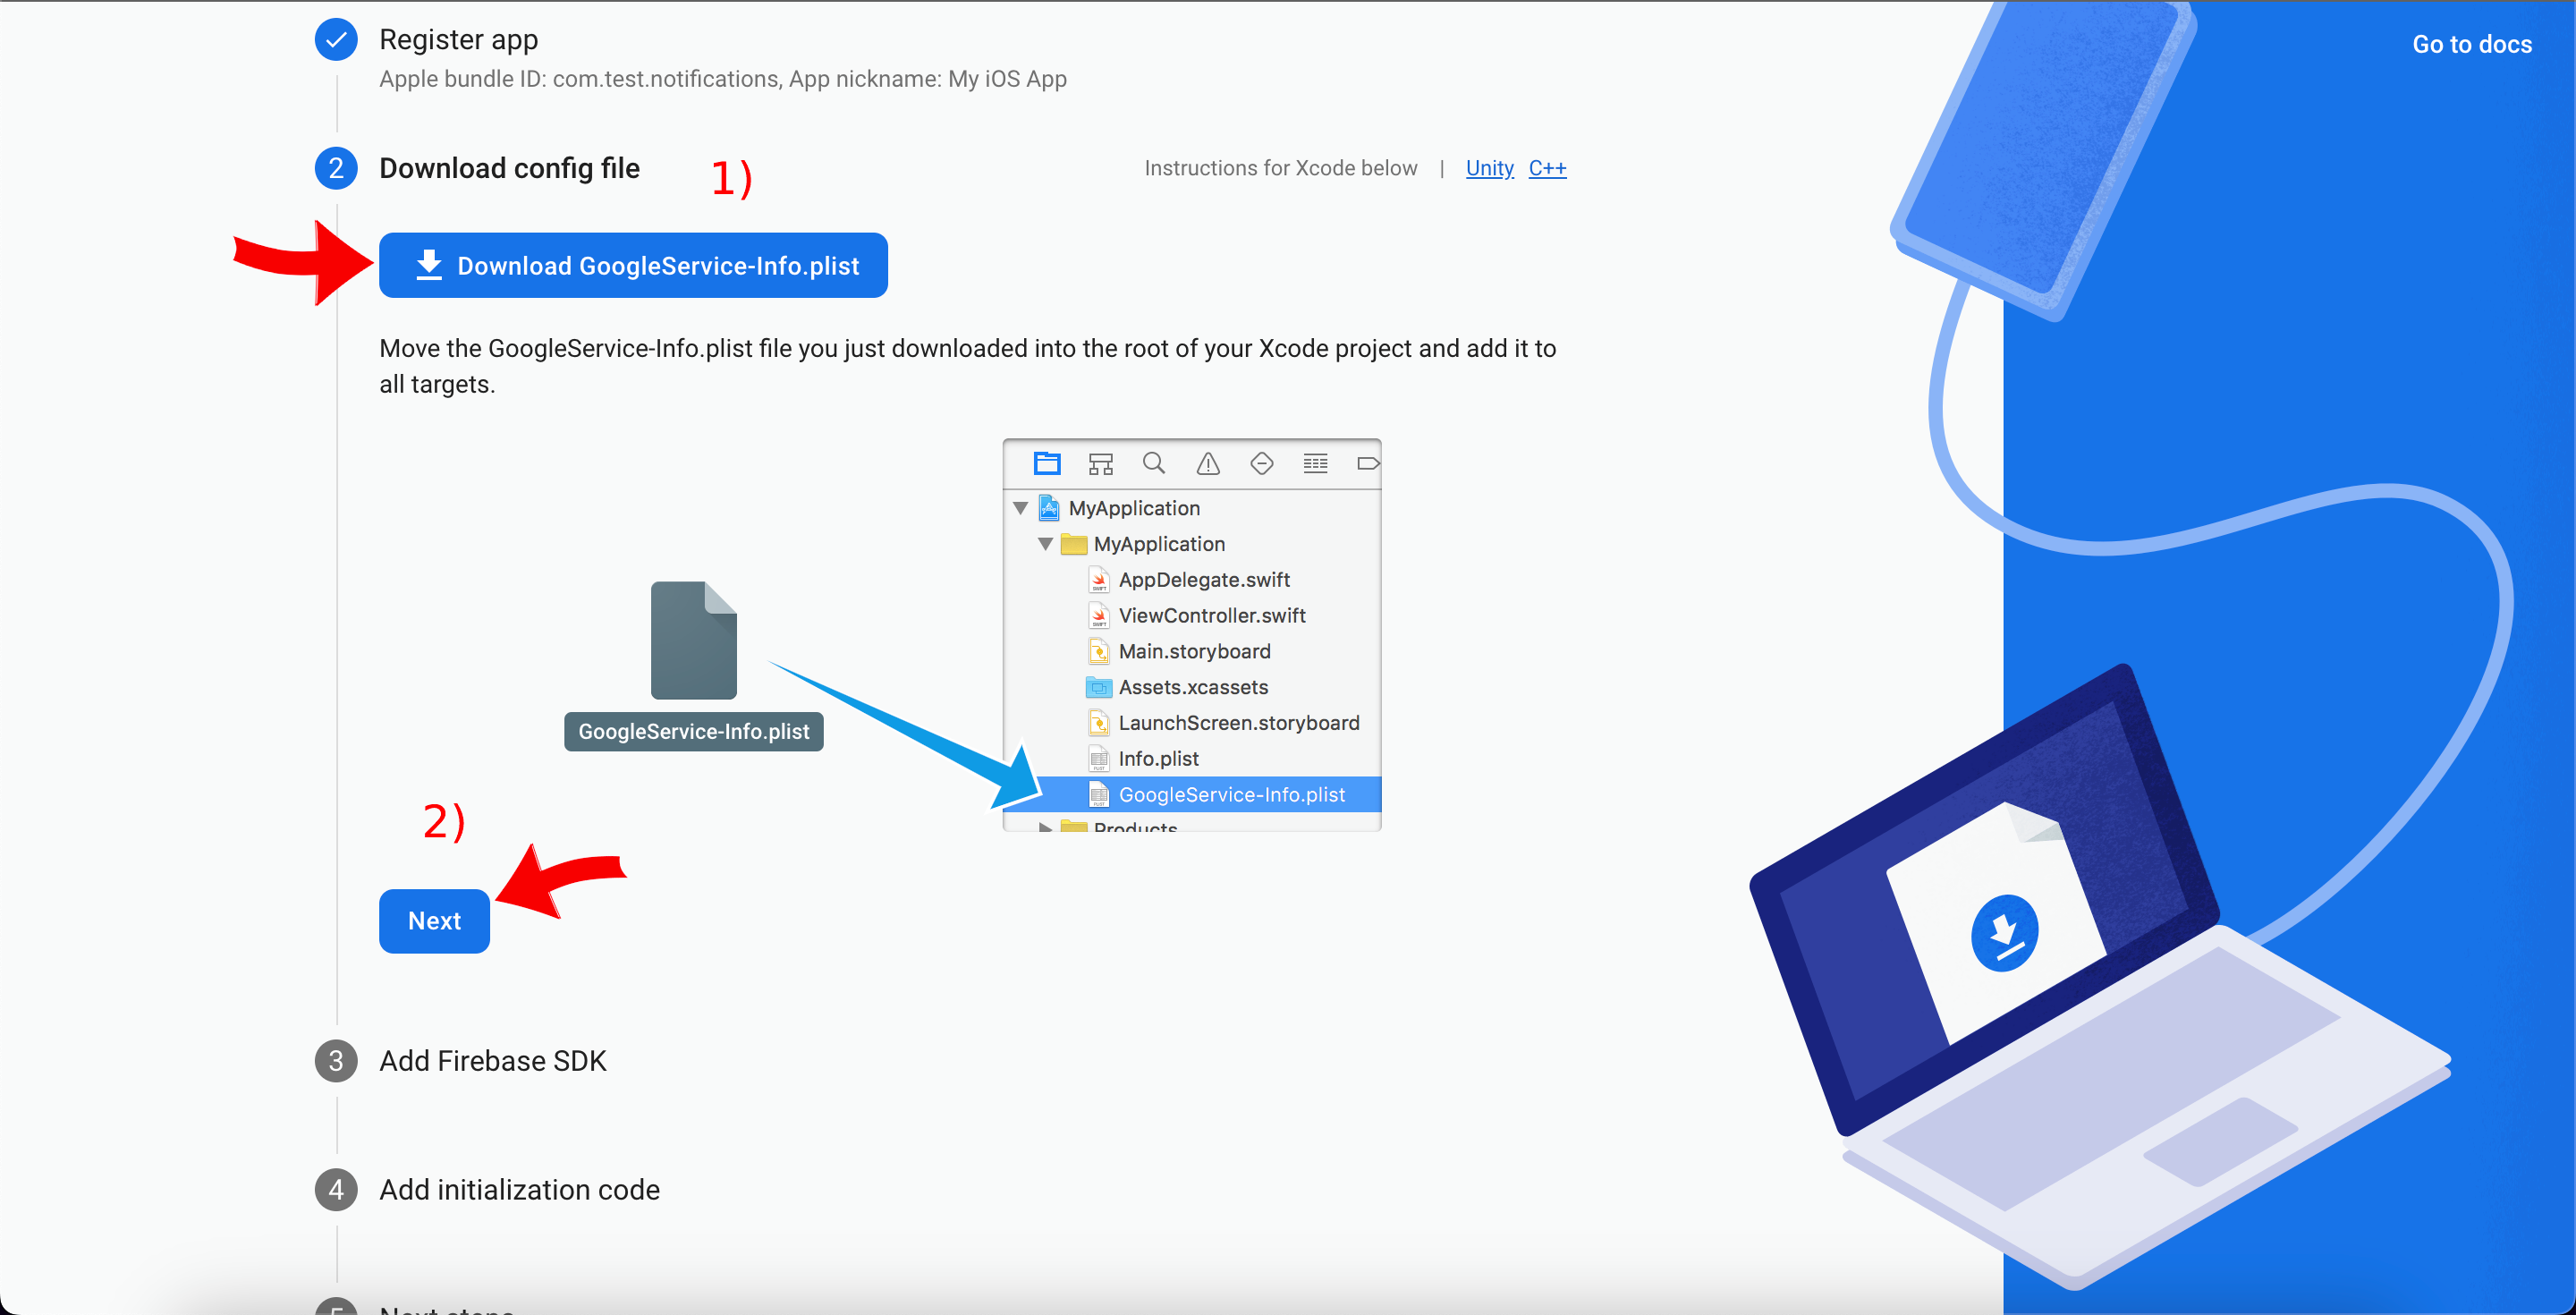
Then a similar screen will be shown, on this screen we will need to download the GoogleService-Info.plist because this file contains the critical informations and configurations for your iOS app.
After being sure that you have installed the GoogleService-Info.plist file we can click on Next button.
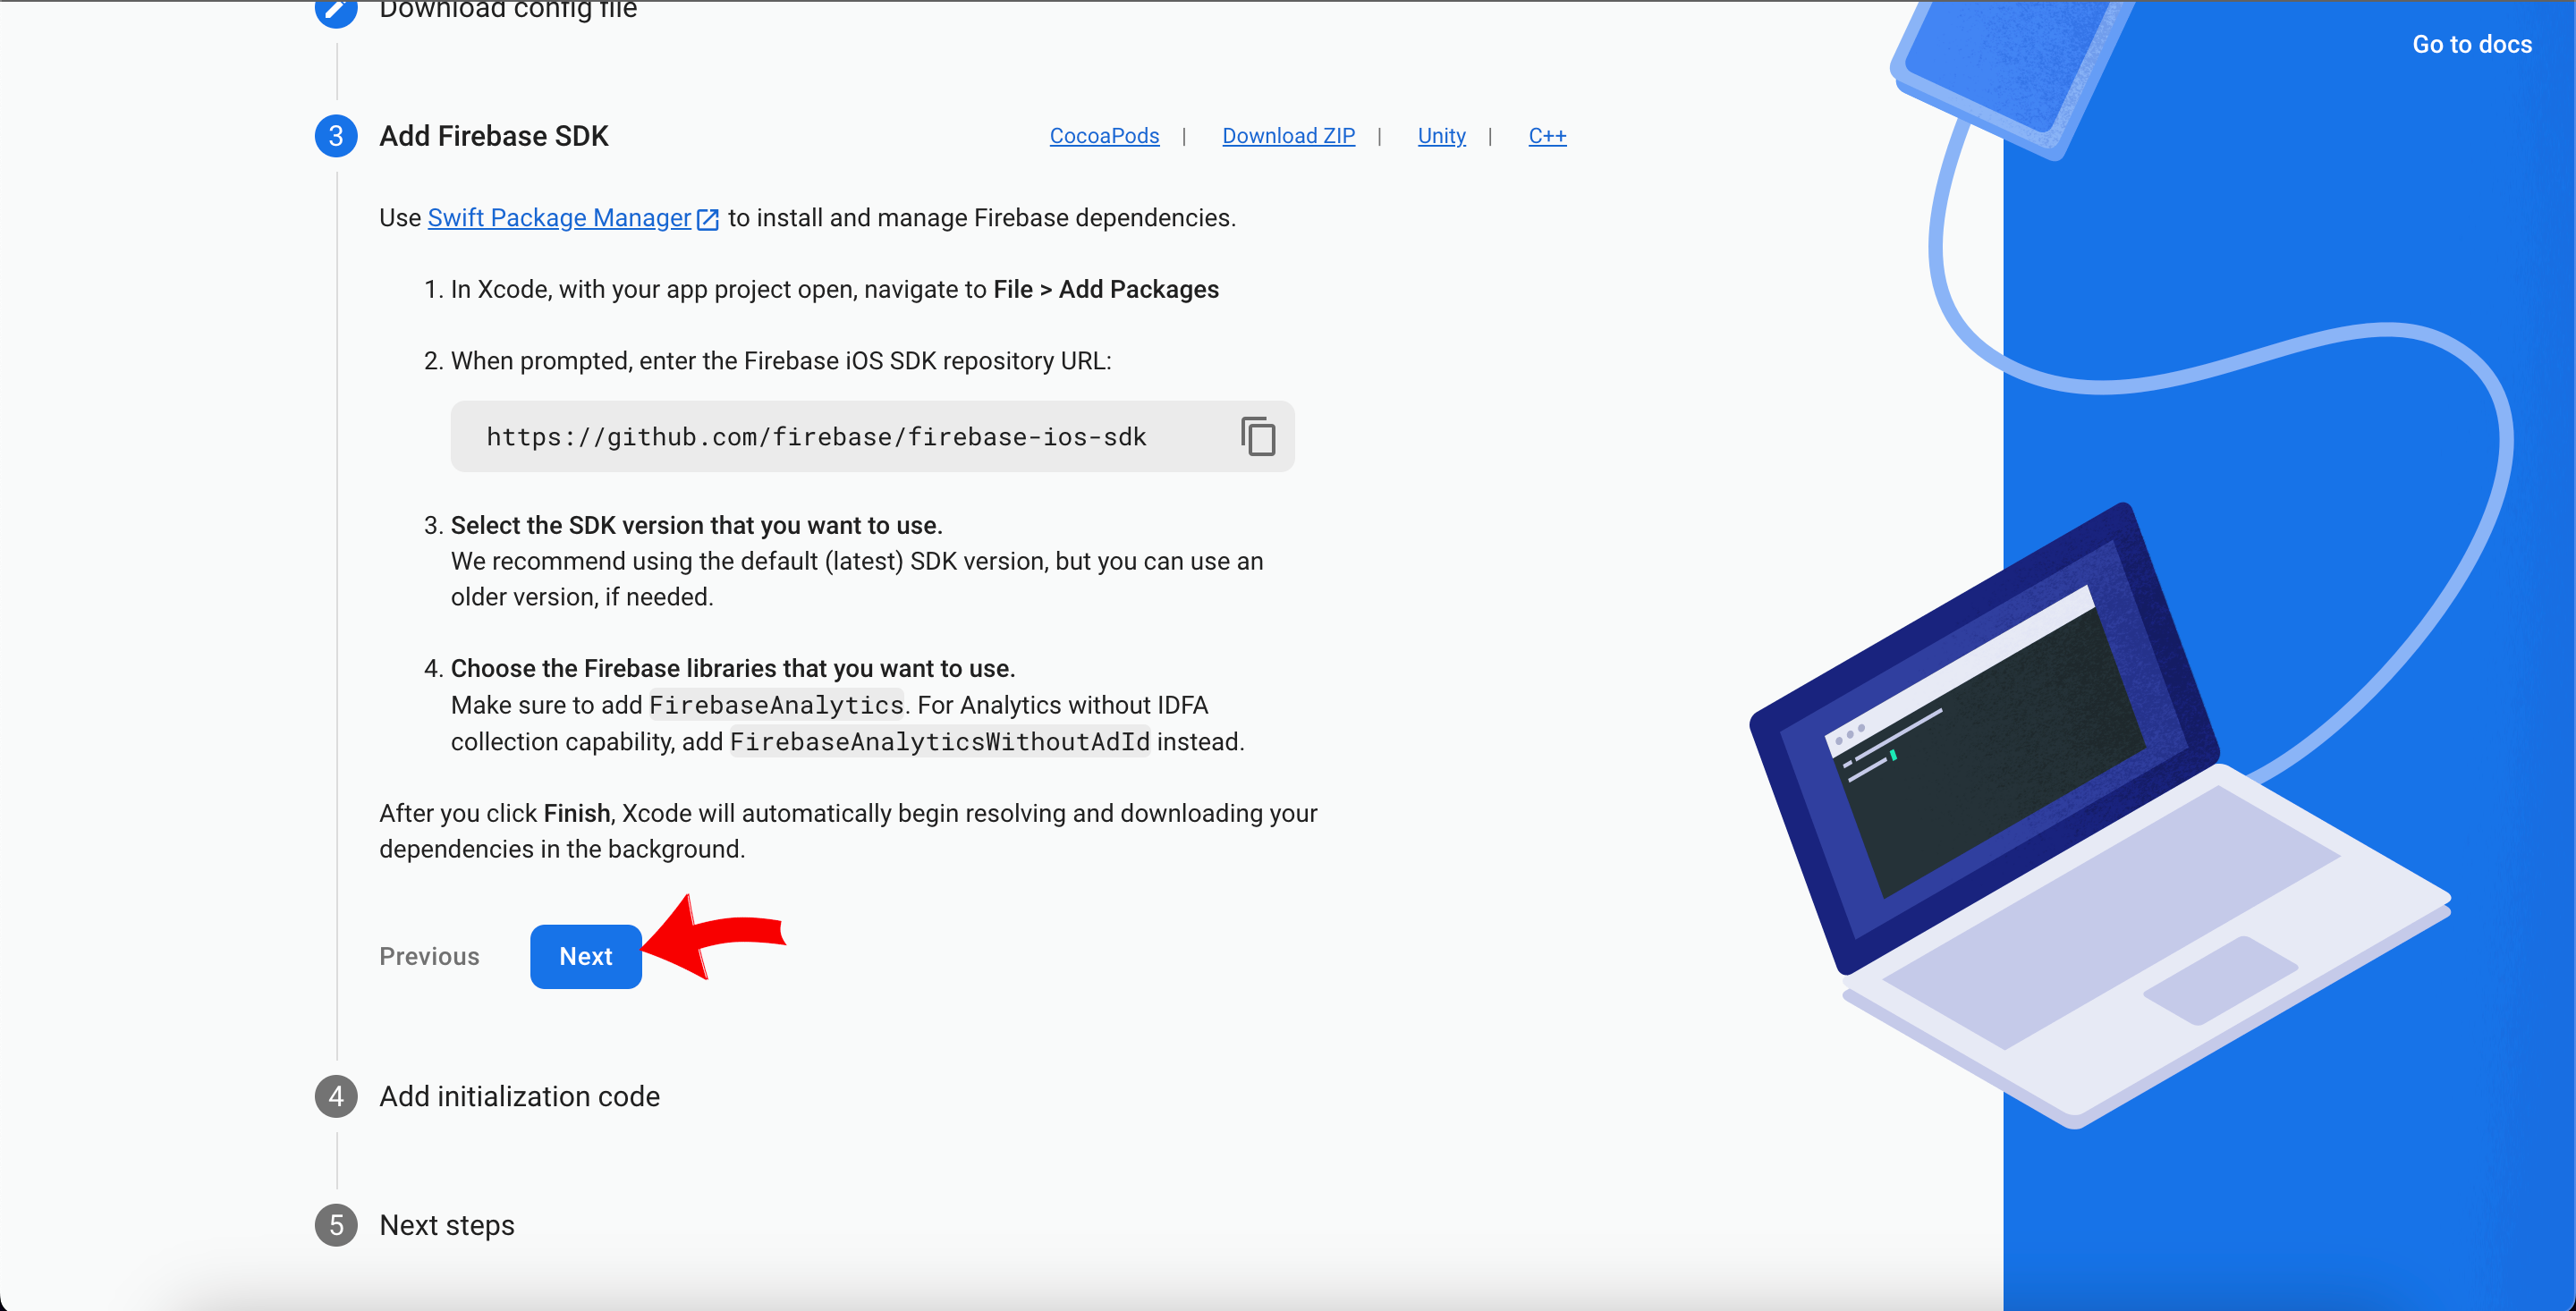
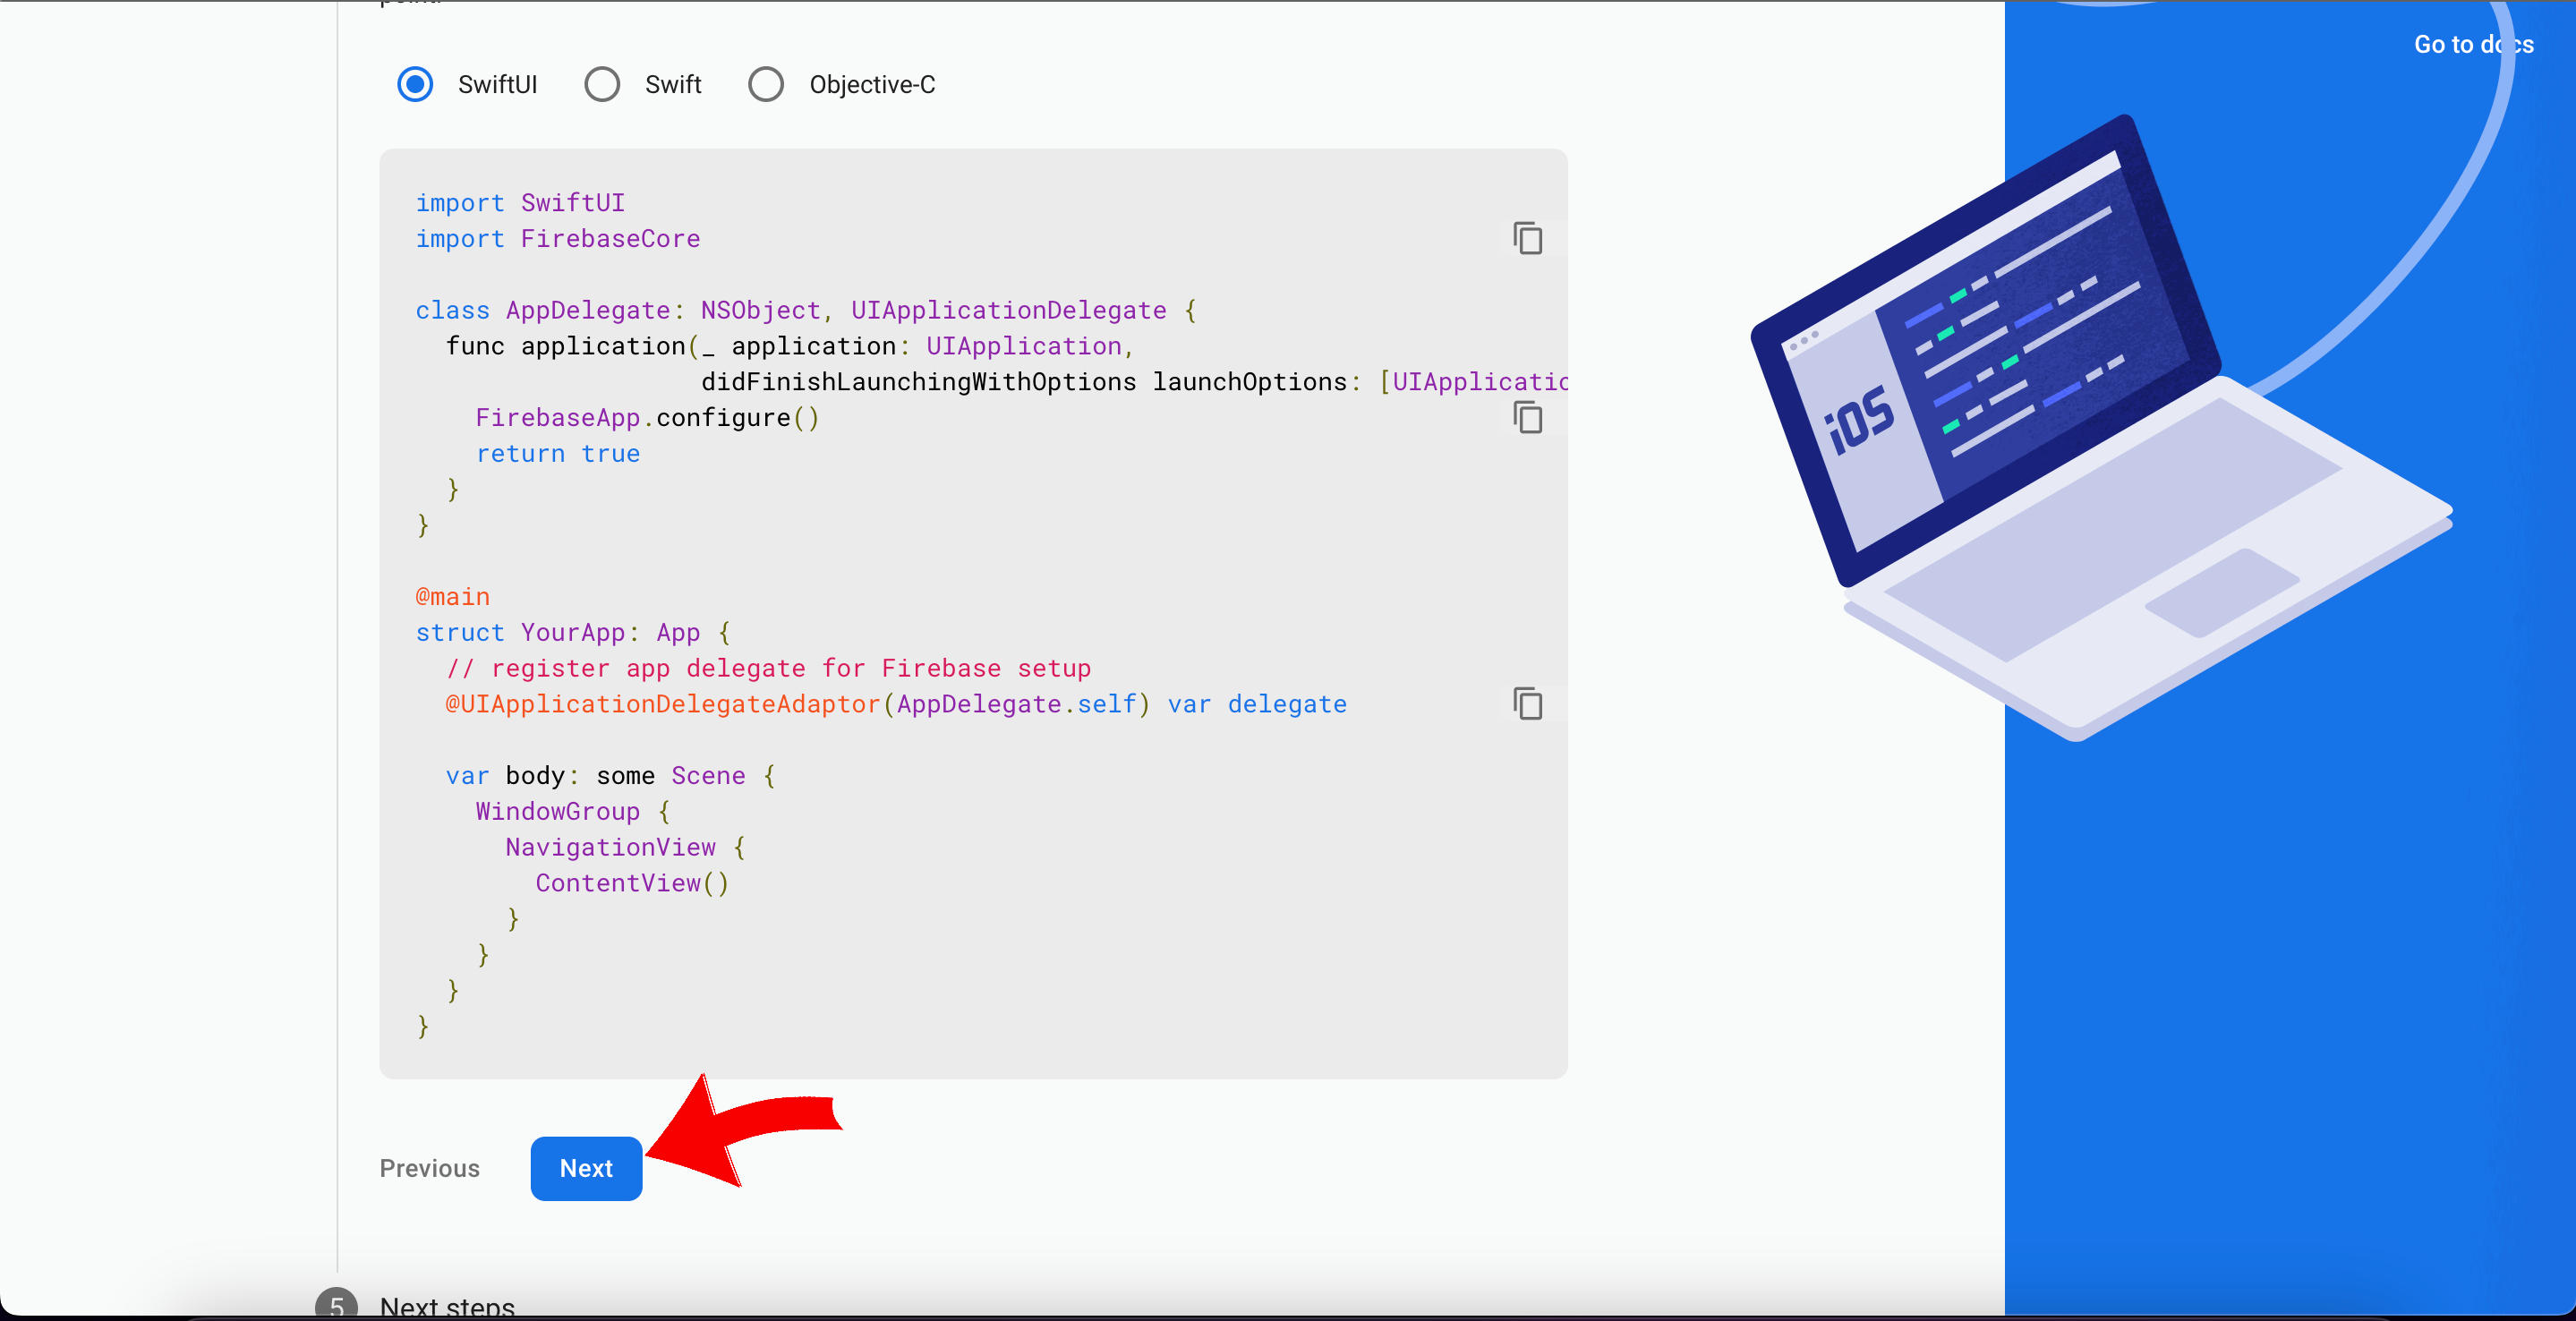
After clicking on Next button, you should click just on next buttons on all left steps because other configurations are explained later on this blog.
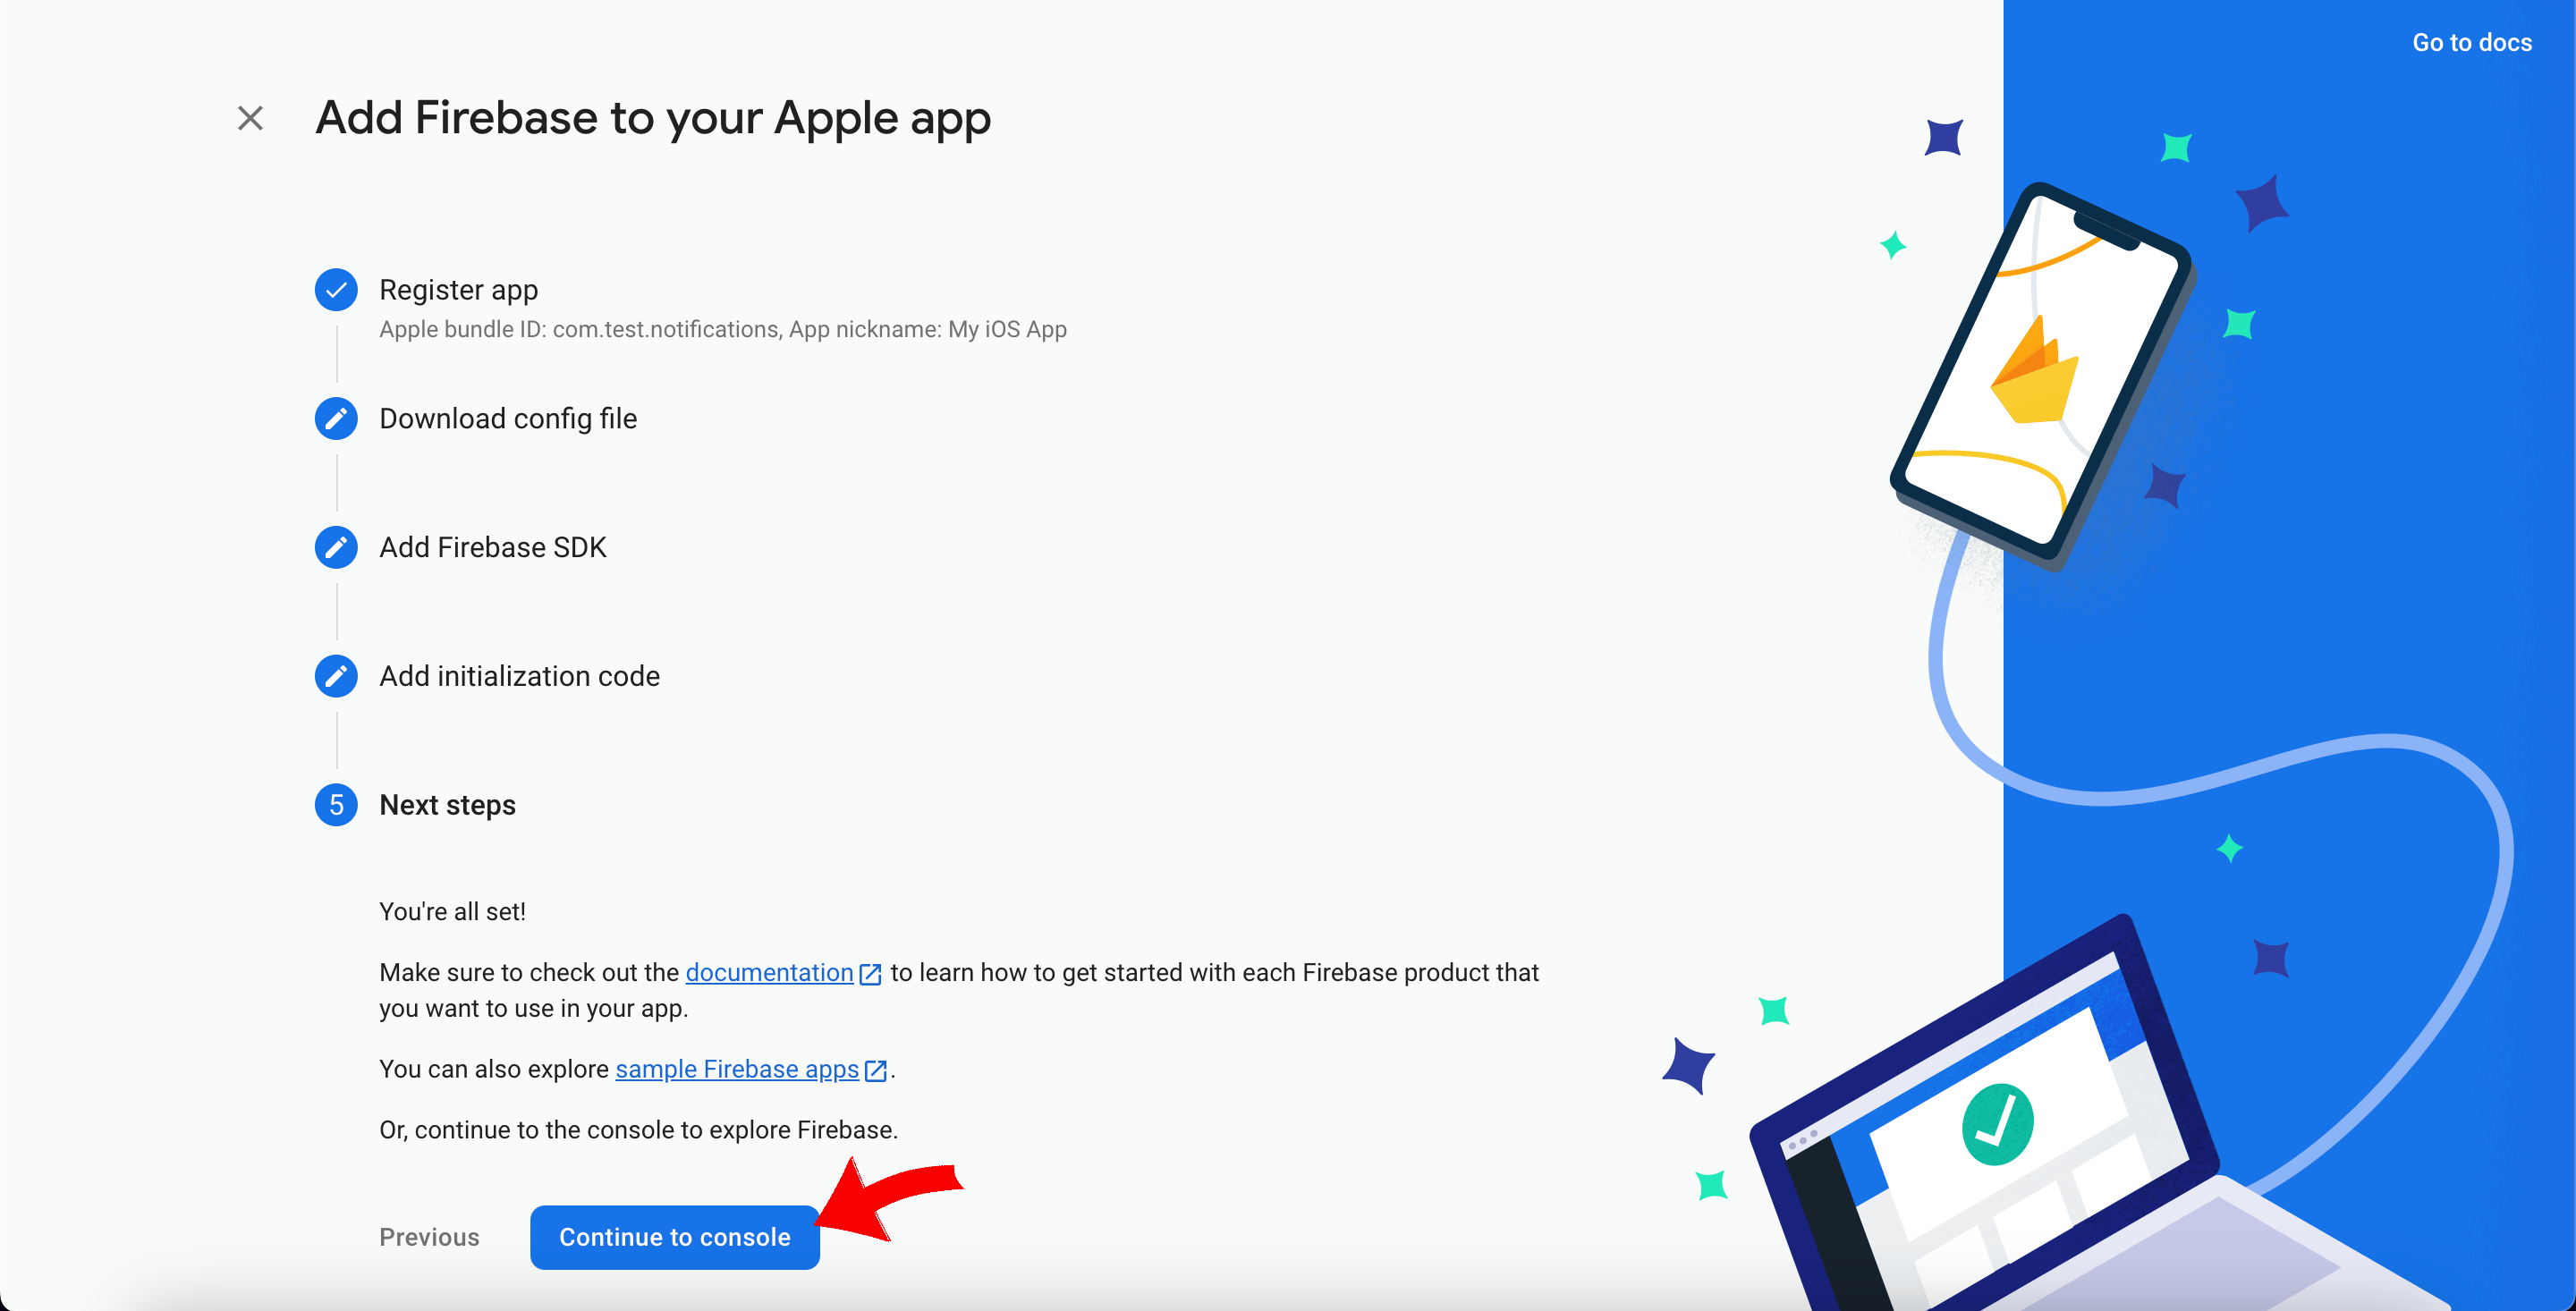
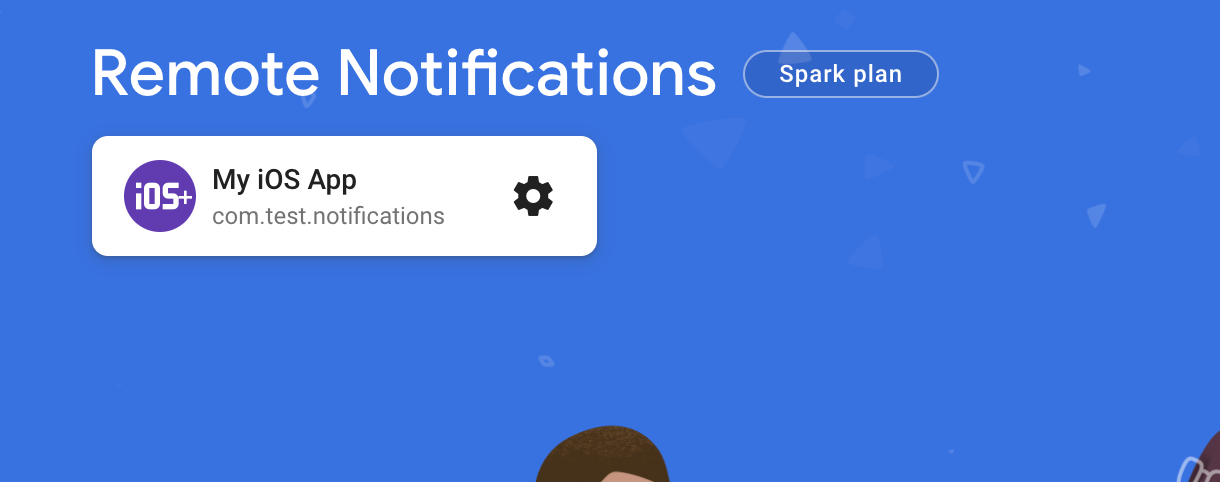
After clicking on Continue to console we will see that our iOS app is created now:
After that we should be ready to install some packages that we will need to build the system of recieving the remote notifications that are driven from a specific server.
To let you know for my project Im using yarn, so if you’re using npm just change the command yarn add to npm install:
yarn add @react-native-firebase/messagingAfter that we will need more packages:
yarn add @react-native-community/push-notification-iosyarn add @react-native-firebase/messagingyarn add react-native-push-notificationAfter being sure that we have installed all of these packages, we can continue the process of configuring the iOS first.
We should add some new pods on our Podfile, you can find the Podfile by going at the folder of ios/Podfile like below:
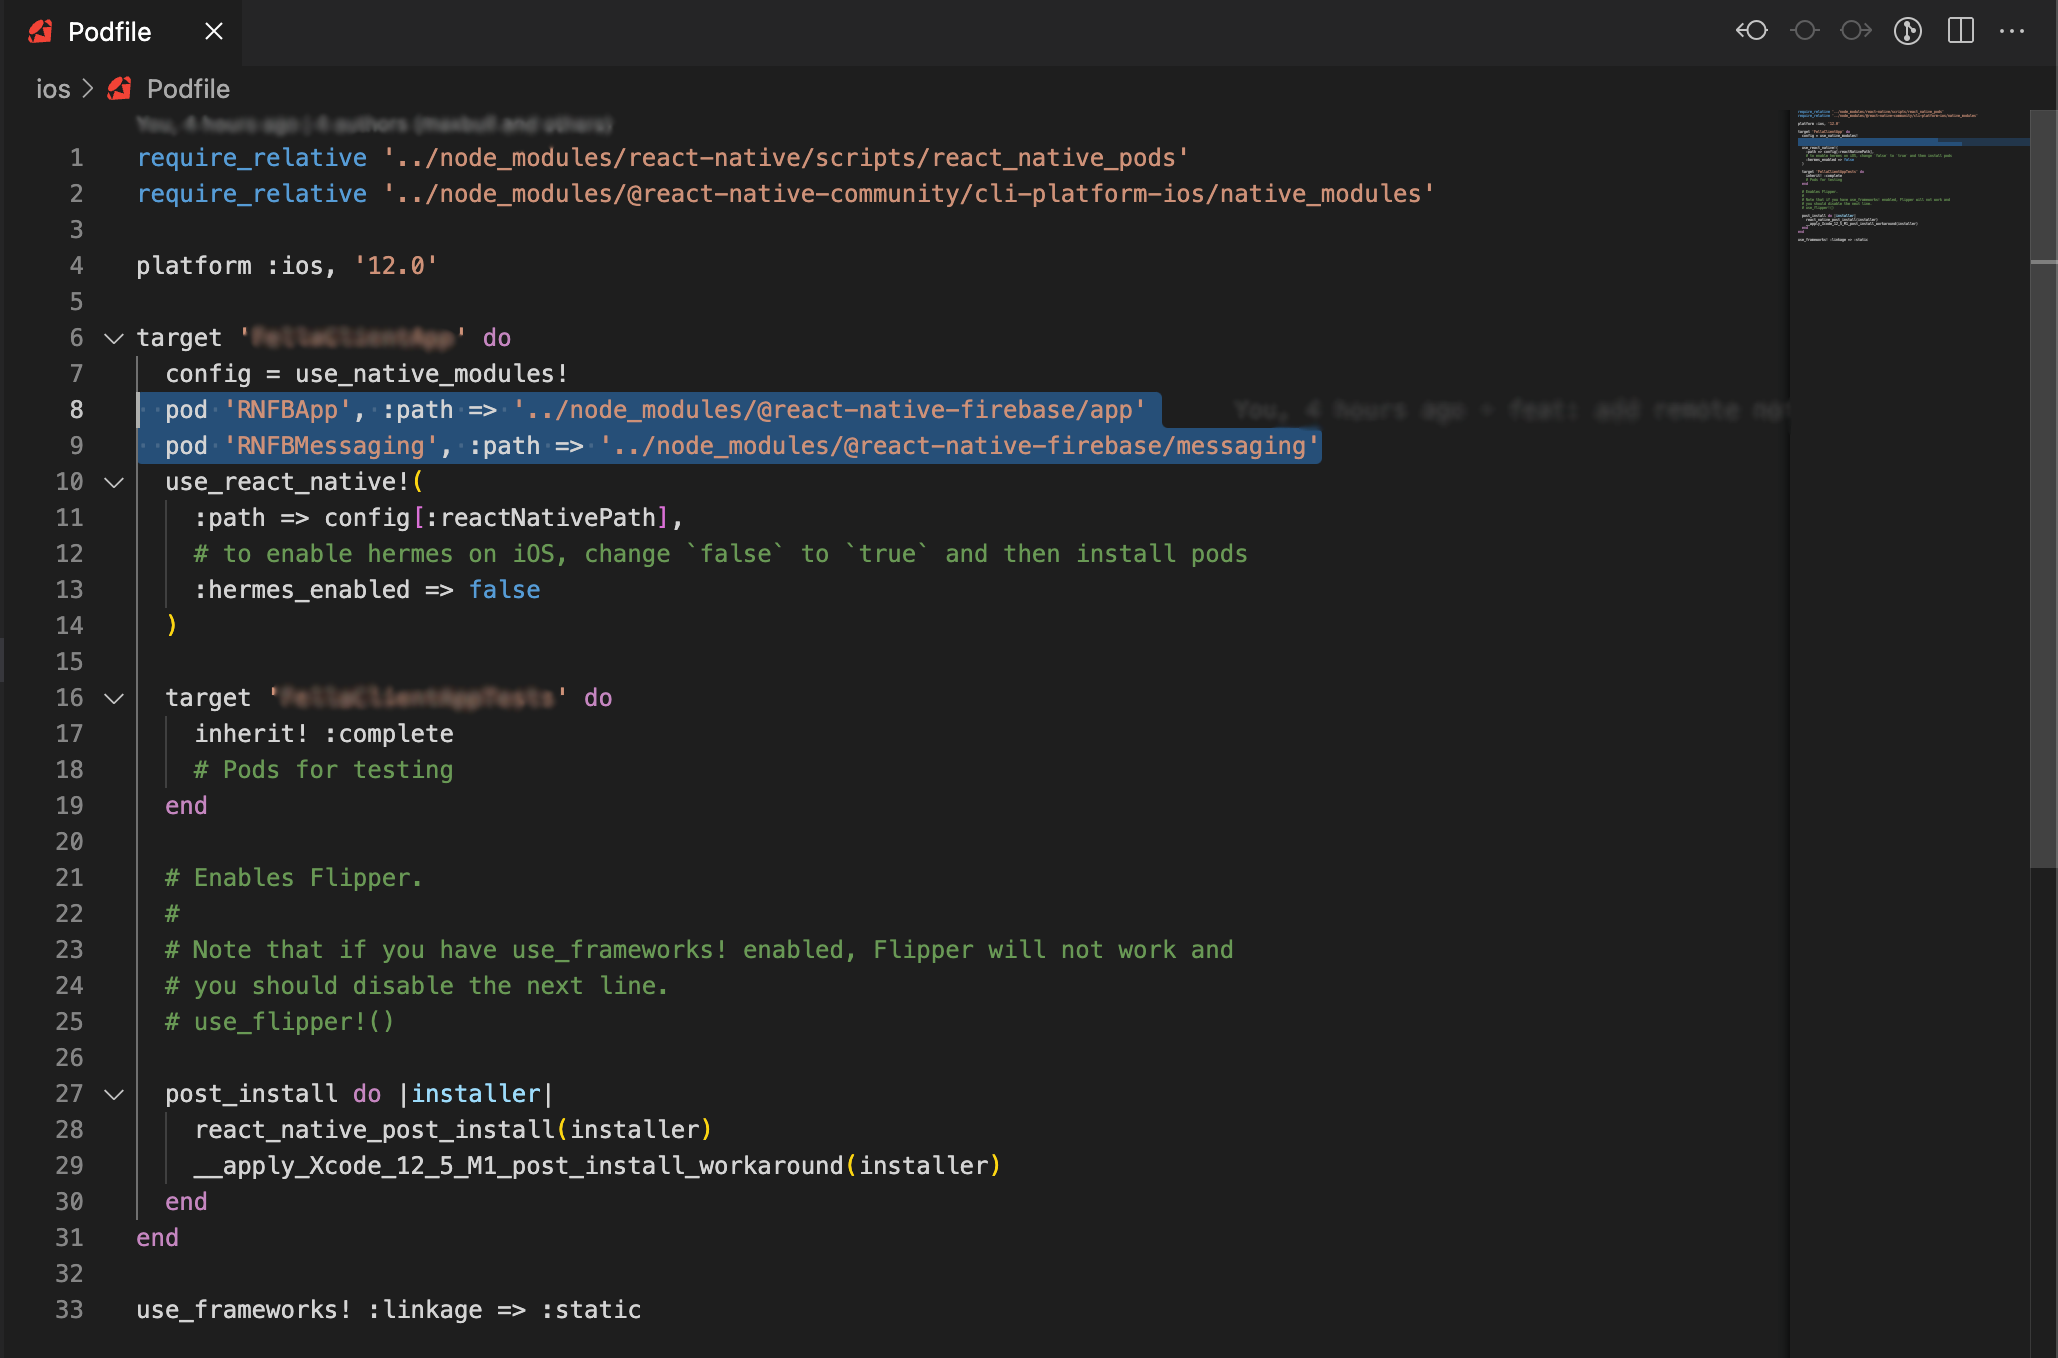
pod 'RNFBApp', :path => '../node_modules/@react-native-firebase/app'
pod 'RNFBMessaging', :path => '../node_modules/@react-native-firebase/messaging'
On your terminal of your React Native project you should go at the folder of iOS with the command like below:
cd ios
rm -rf pods
pod install
After installing new pods, we should do more changes for iOS files to make the iOS app fully functional.
The upcomming changes that we should do are on these two files AppDelegate.m and AppDelegate.h but to make changes on swift code you should add this line of code on your Podfile otherways the swift code will not be working for you. The changes that we will make on these files are crucial for giving the permission to user to recieve remote notifications on their app.
At the end of your Podfile add this:
use_frameworks! :linkage => :staticThen go to AppDelegate.h that you can find at ios/ProjectFolderApp/AppDelegate.h
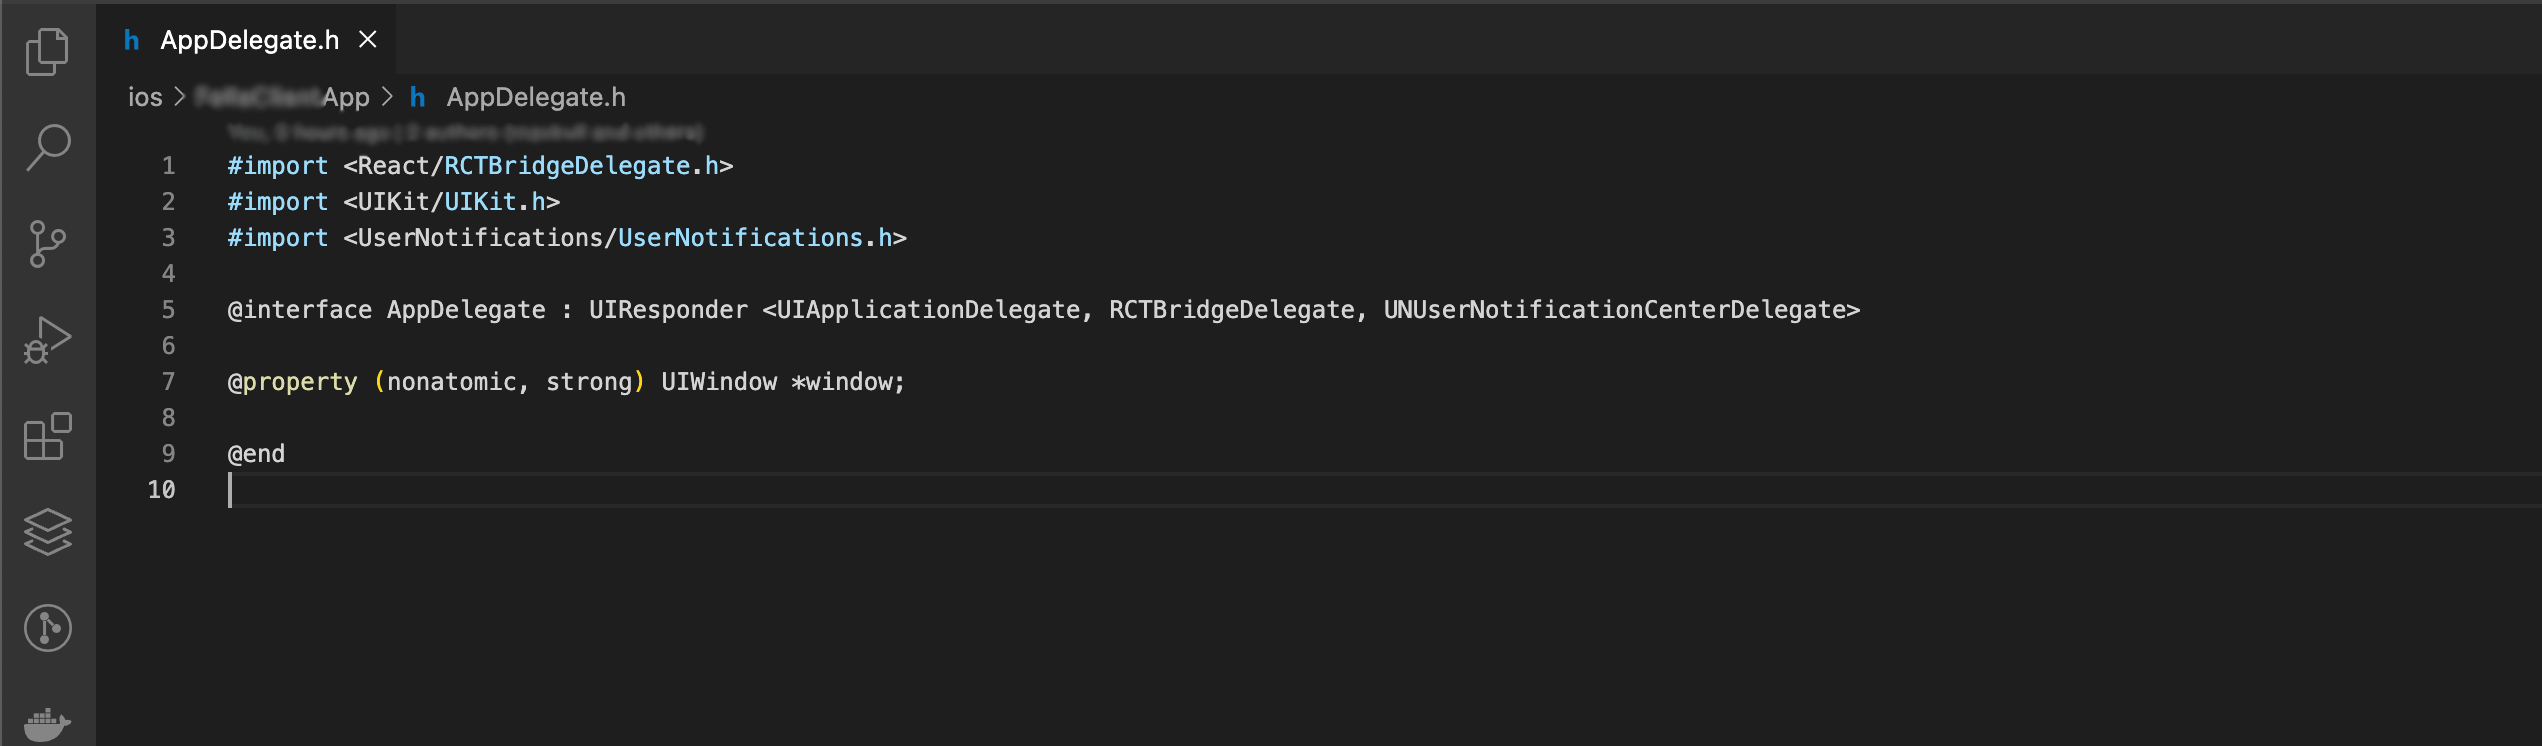
Add the following codes:
#import <UserNotifications/UserNotifications.h>

@interface AppDelegate : UIResponder <UIApplicationDelegate, RCTBridgeDelegate, UNUserNotificationCenterDelegate>
Then go to AppDelegate.m and add the following code:
#import <UserNotifications/UserNotifications.h>
#import <RNCPushNotificationIOS.h>

// under the code of [RNSplashScreen show];
// add the following code
// Define UNUserNotificationCenter
  UNUserNotificationCenter *center = [UNUserNotificationCenter currentNotificationCenter];
  center.delegate = self;

//return YES;
//}

//under return YES; }  add the following code

//Called when a notification is delivered to a foreground app.
-(void)userNotificationCenter:(UNUserNotificationCenter *)center willPresentNotification:(UNNotification *)notification withCompletionHandler:(void (^)(UNNotificationPresentationOptions options))completionHandler
{
  completionHandler(UNNotificationPresentationOptionSound | UNNotificationPresentationOptionAlert | UNNotificationPresentationOptionBadge);
}

//return [CodePush bundleURL];
//#endif
//}
//under this code add the following code

// Required for the register event.
- (void)application:(UIApplication *)application didRegisterForRemoteNotificationsWithDeviceToken:(NSData *)deviceToken
{
 [RNCPushNotificationIOS didRegisterForRemoteNotificationsWithDeviceToken:deviceToken];
}
// Required for the notification event. You must call the completion handler after handling the remote notification.
- (void)application:(UIApplication *)application didReceiveRemoteNotification:(NSDictionary *)userInfo
fetchCompletionHandler:(void (^)(UIBackgroundFetchResult))completionHandler
{
  [RNCPushNotificationIOS didReceiveRemoteNotification:userInfo fetchCompletionHandler:completionHandler];
}
// Required for the registrationError event.
- (void)application:(UIApplication *)application didFailToRegisterForRemoteNotificationsWithError:(NSError *)error
{
 [RNCPushNotificationIOS didFailToRegisterForRemoteNotificationsWithError:error];
}
// Required for localNotification event
- (void)userNotificationCenter:(UNUserNotificationCenter *)center
didReceiveNotificationResponse:(UNNotificationResponse *)response
         withCompletionHandler:(void (^)(void))completionHandler
{
  [RNCPushNotificationIOS didReceiveNotificationResponse:response];
}
After adding the code on AppDelegate.m we will need to create a specific file for iOS:
Go to ios/ProjectFolderApp/ and create a new file with the name with the same name as folder of project for example TestFolder.entitlements and add the code like below:
<?xml version="1.0" encoding="UTF-8"?>
<!DOCTYPE plist PUBLIC "-//Apple//DTD PLIST 1.0//EN" "http://www.apple.com/DTDs/PropertyList-1.0.dtd">
<plist version="1.0">
<dict>
	<key>aps-environment</key>
	<string>development</string>
</dict>
</plist>
Then go to xcode and click on +Capability
And search for Push Notifications click it twice to add. We should see something like this:
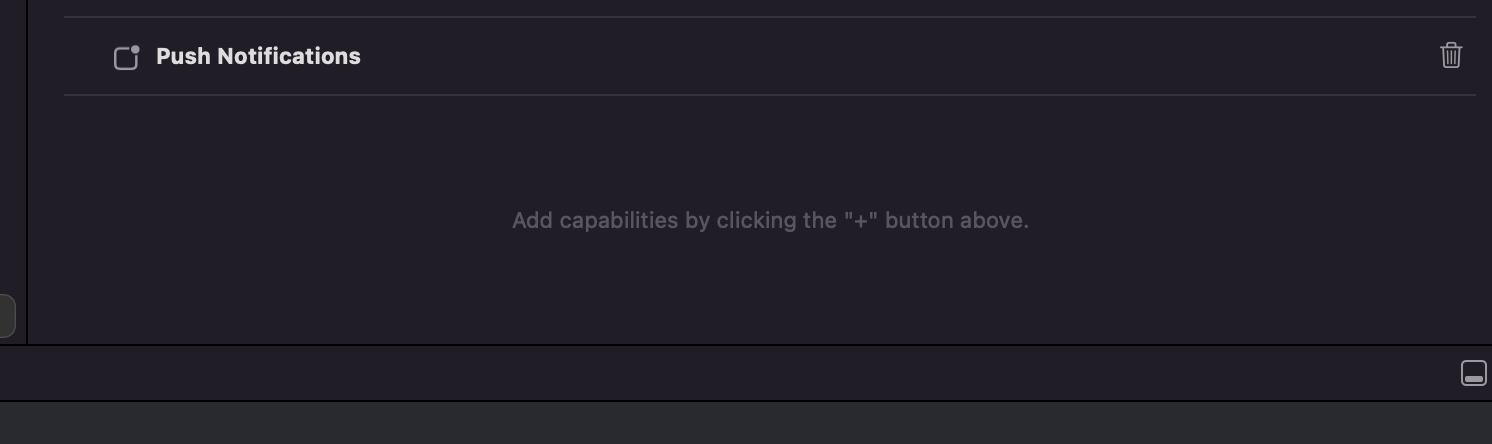
We will need to add one more that is called Background Modes:
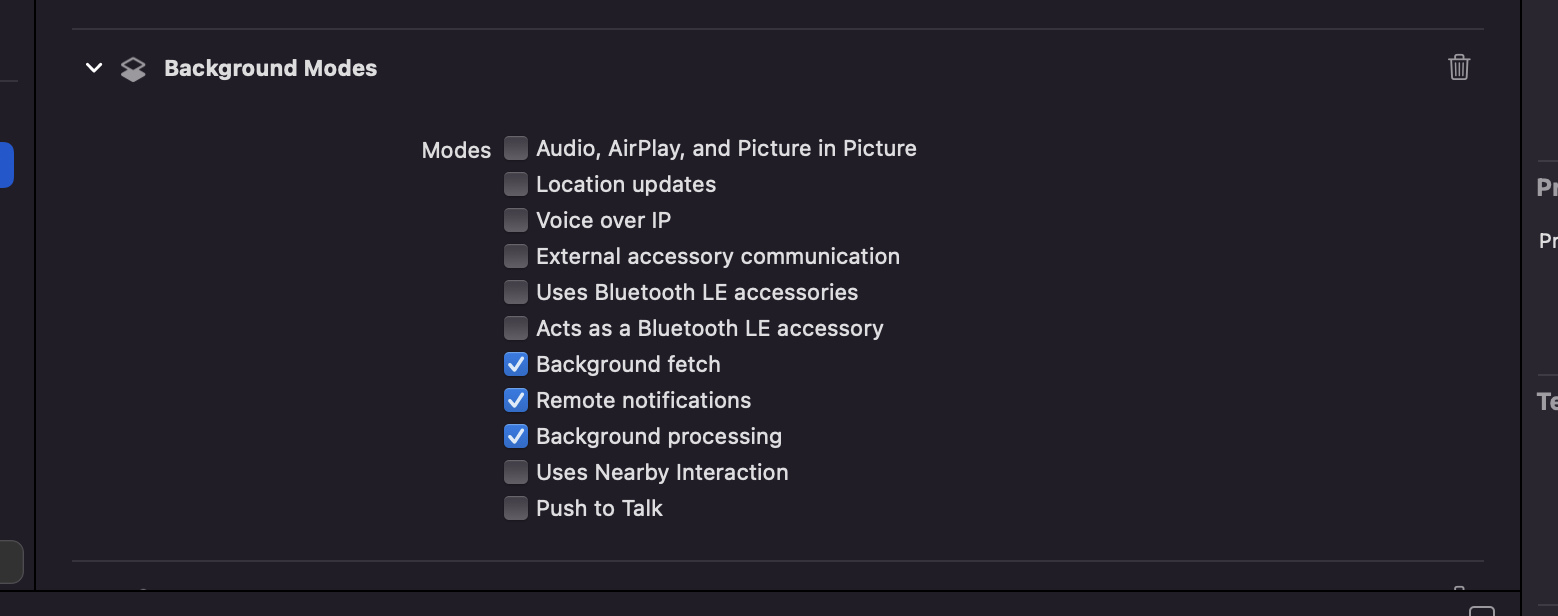
And enable (Background fetch, Remote notifications, Background processing).
On this step we are done with the configuration on our project but we will need to do one more thing. We should have a valid Provision profiles, Identifiers and Apns Keys.
Please click the link below and log-in on your Apple ID account:
First of all we should have a valid certificate that will be used for signing our app:
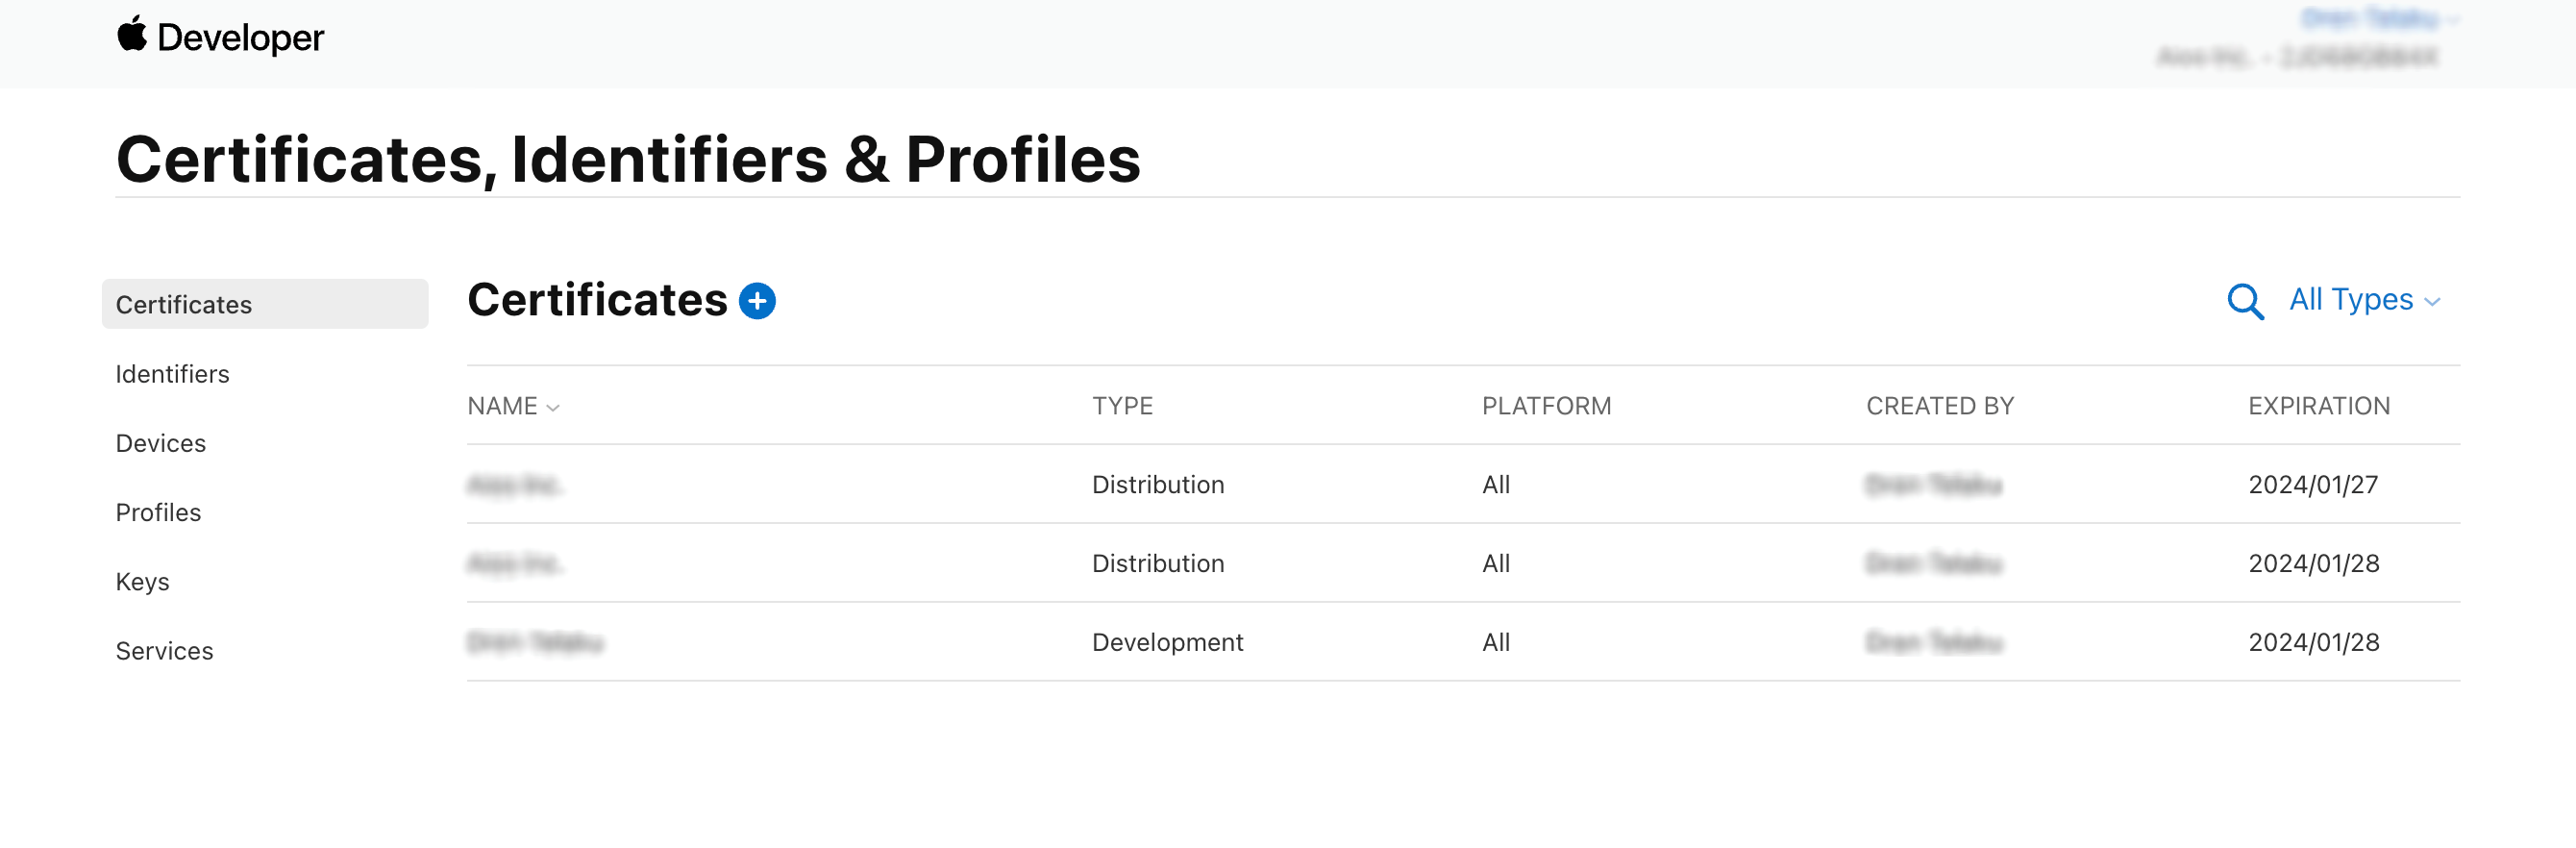
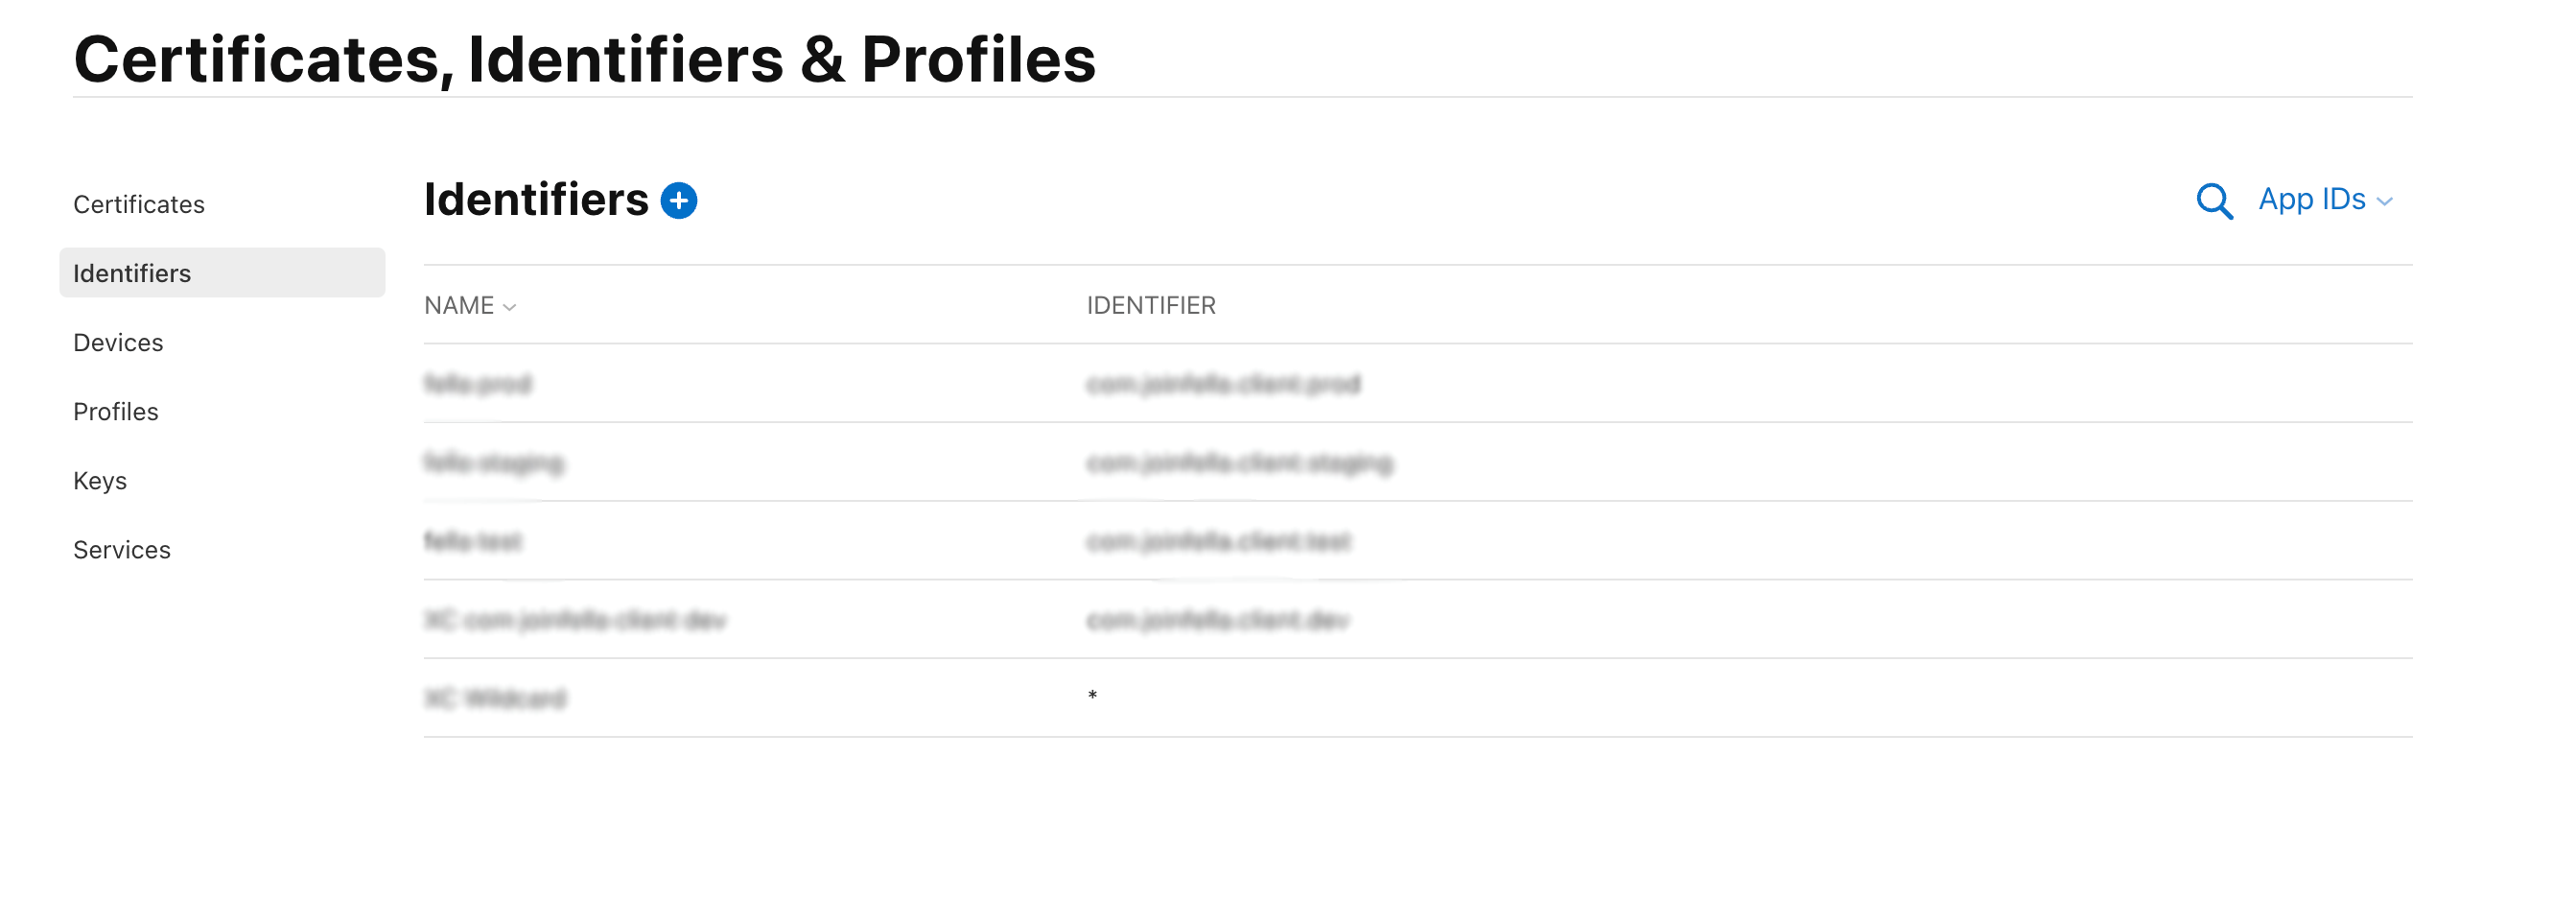
Then we should have an Identifier for our app, if you don’t have you can create it on the Plus Button next to Idenfitiers title:
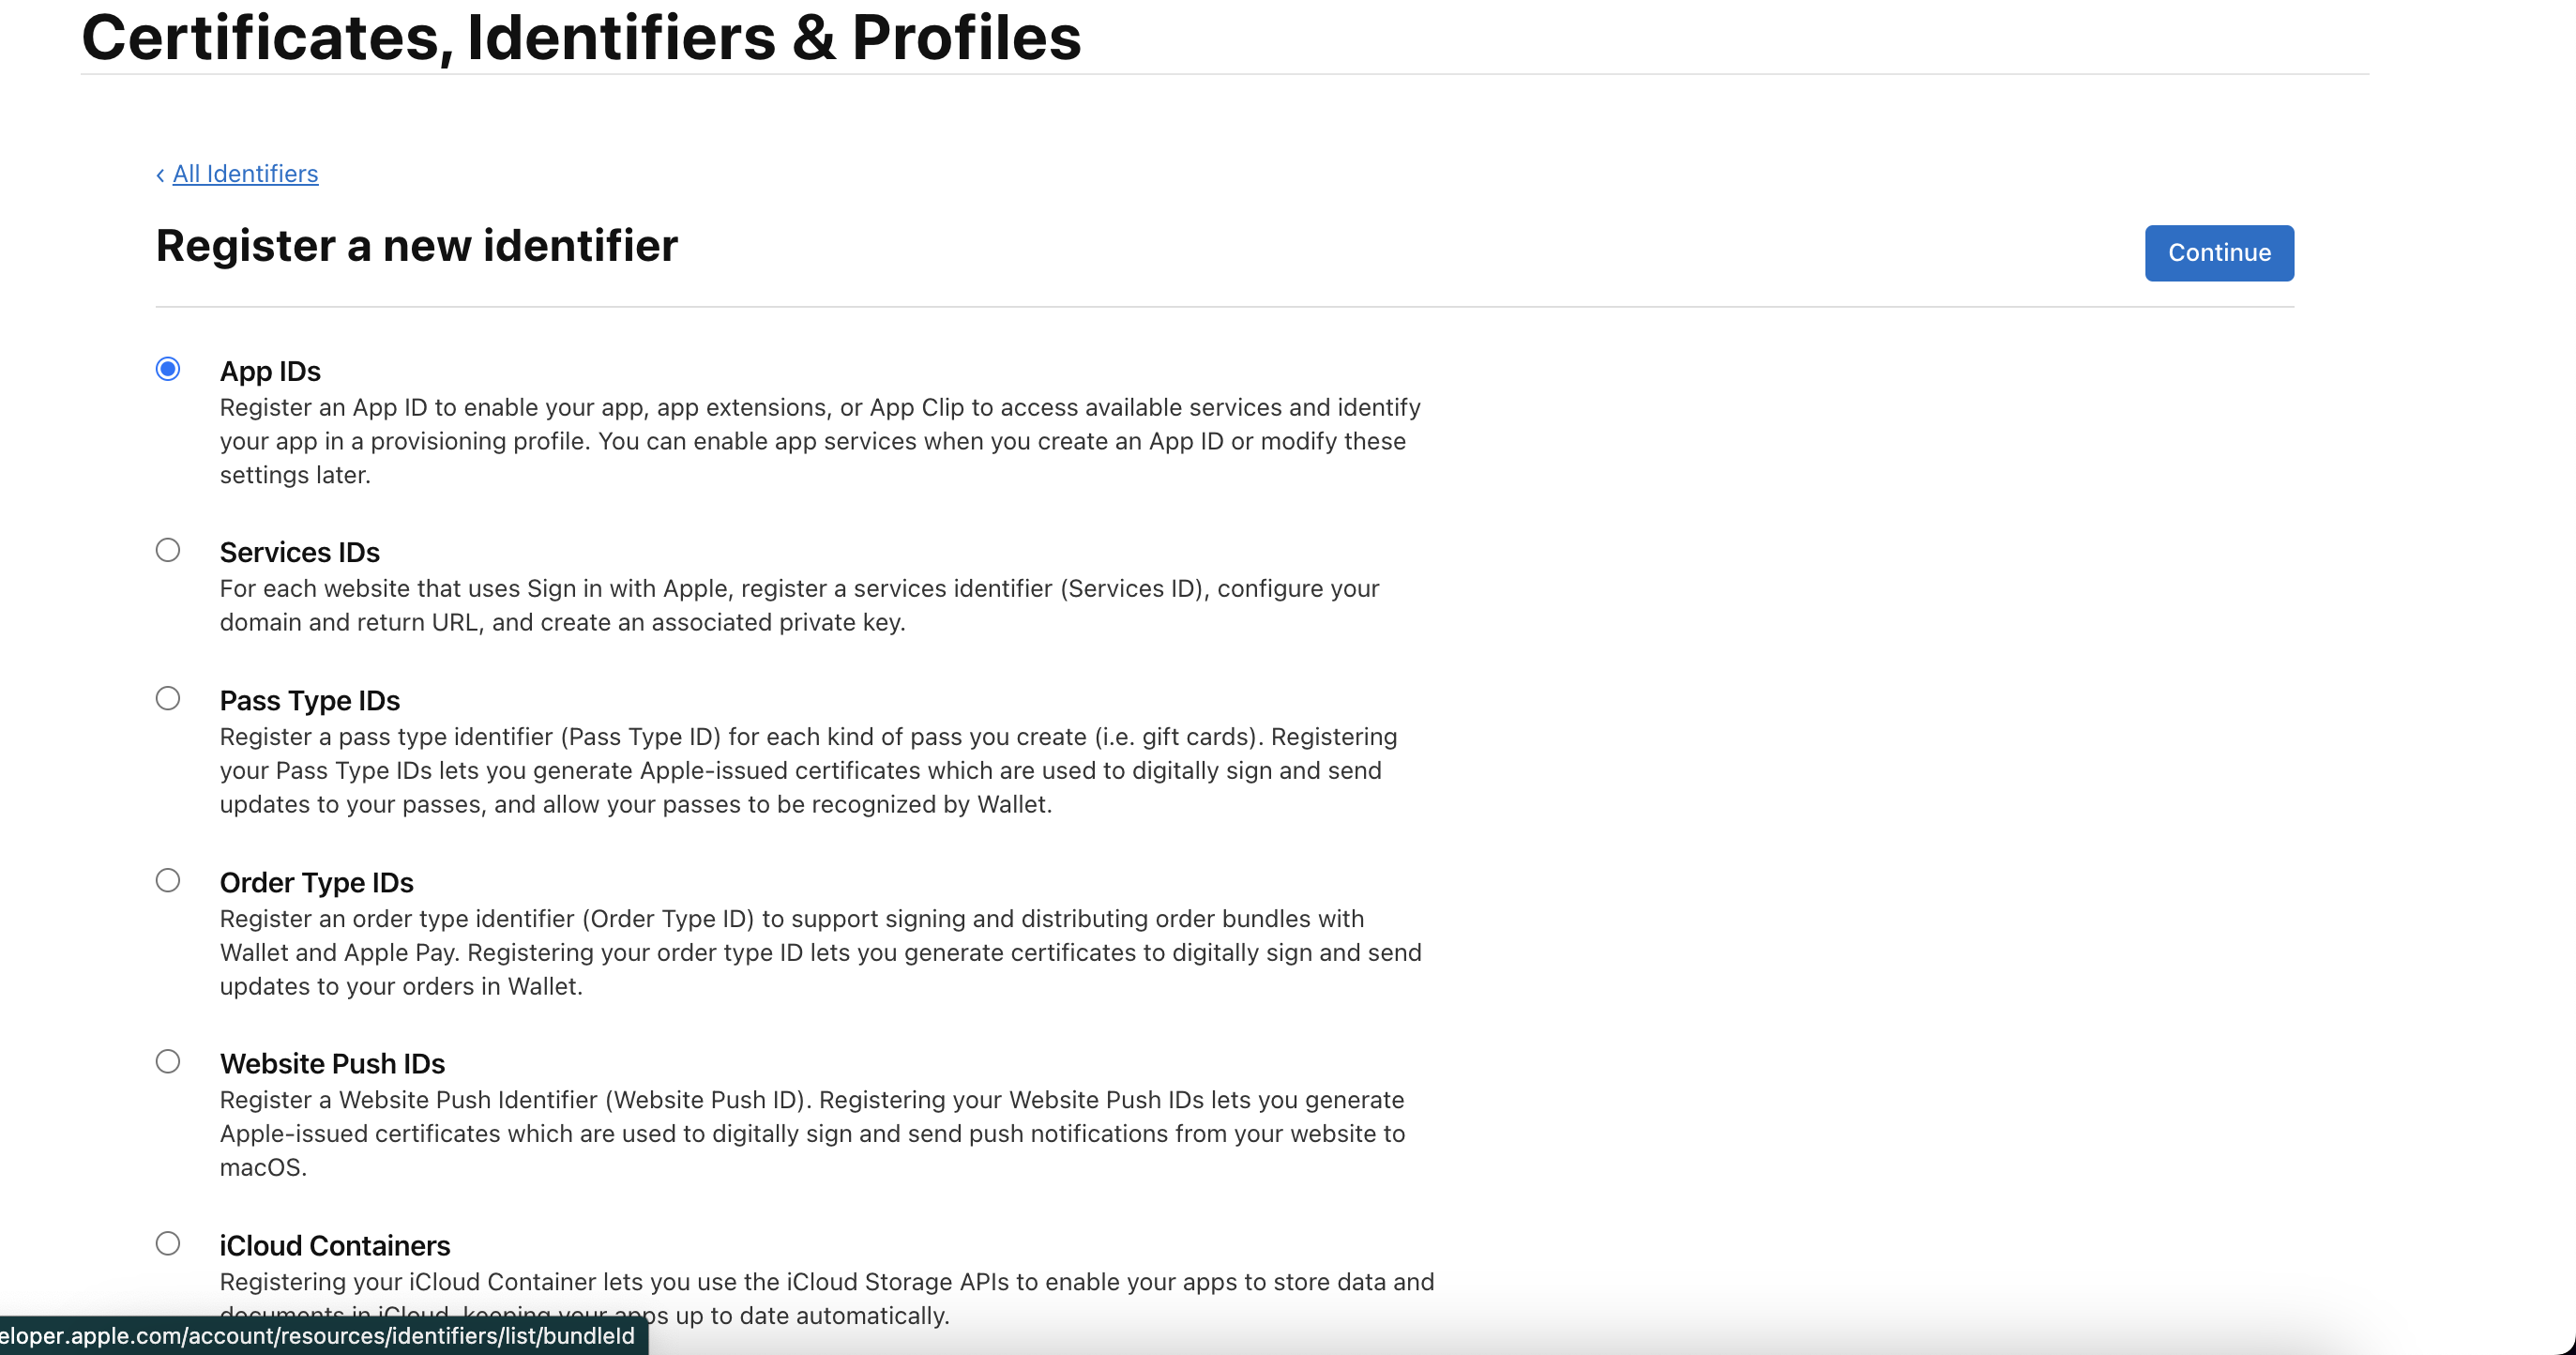
Pick the App IDs and click on Continue button
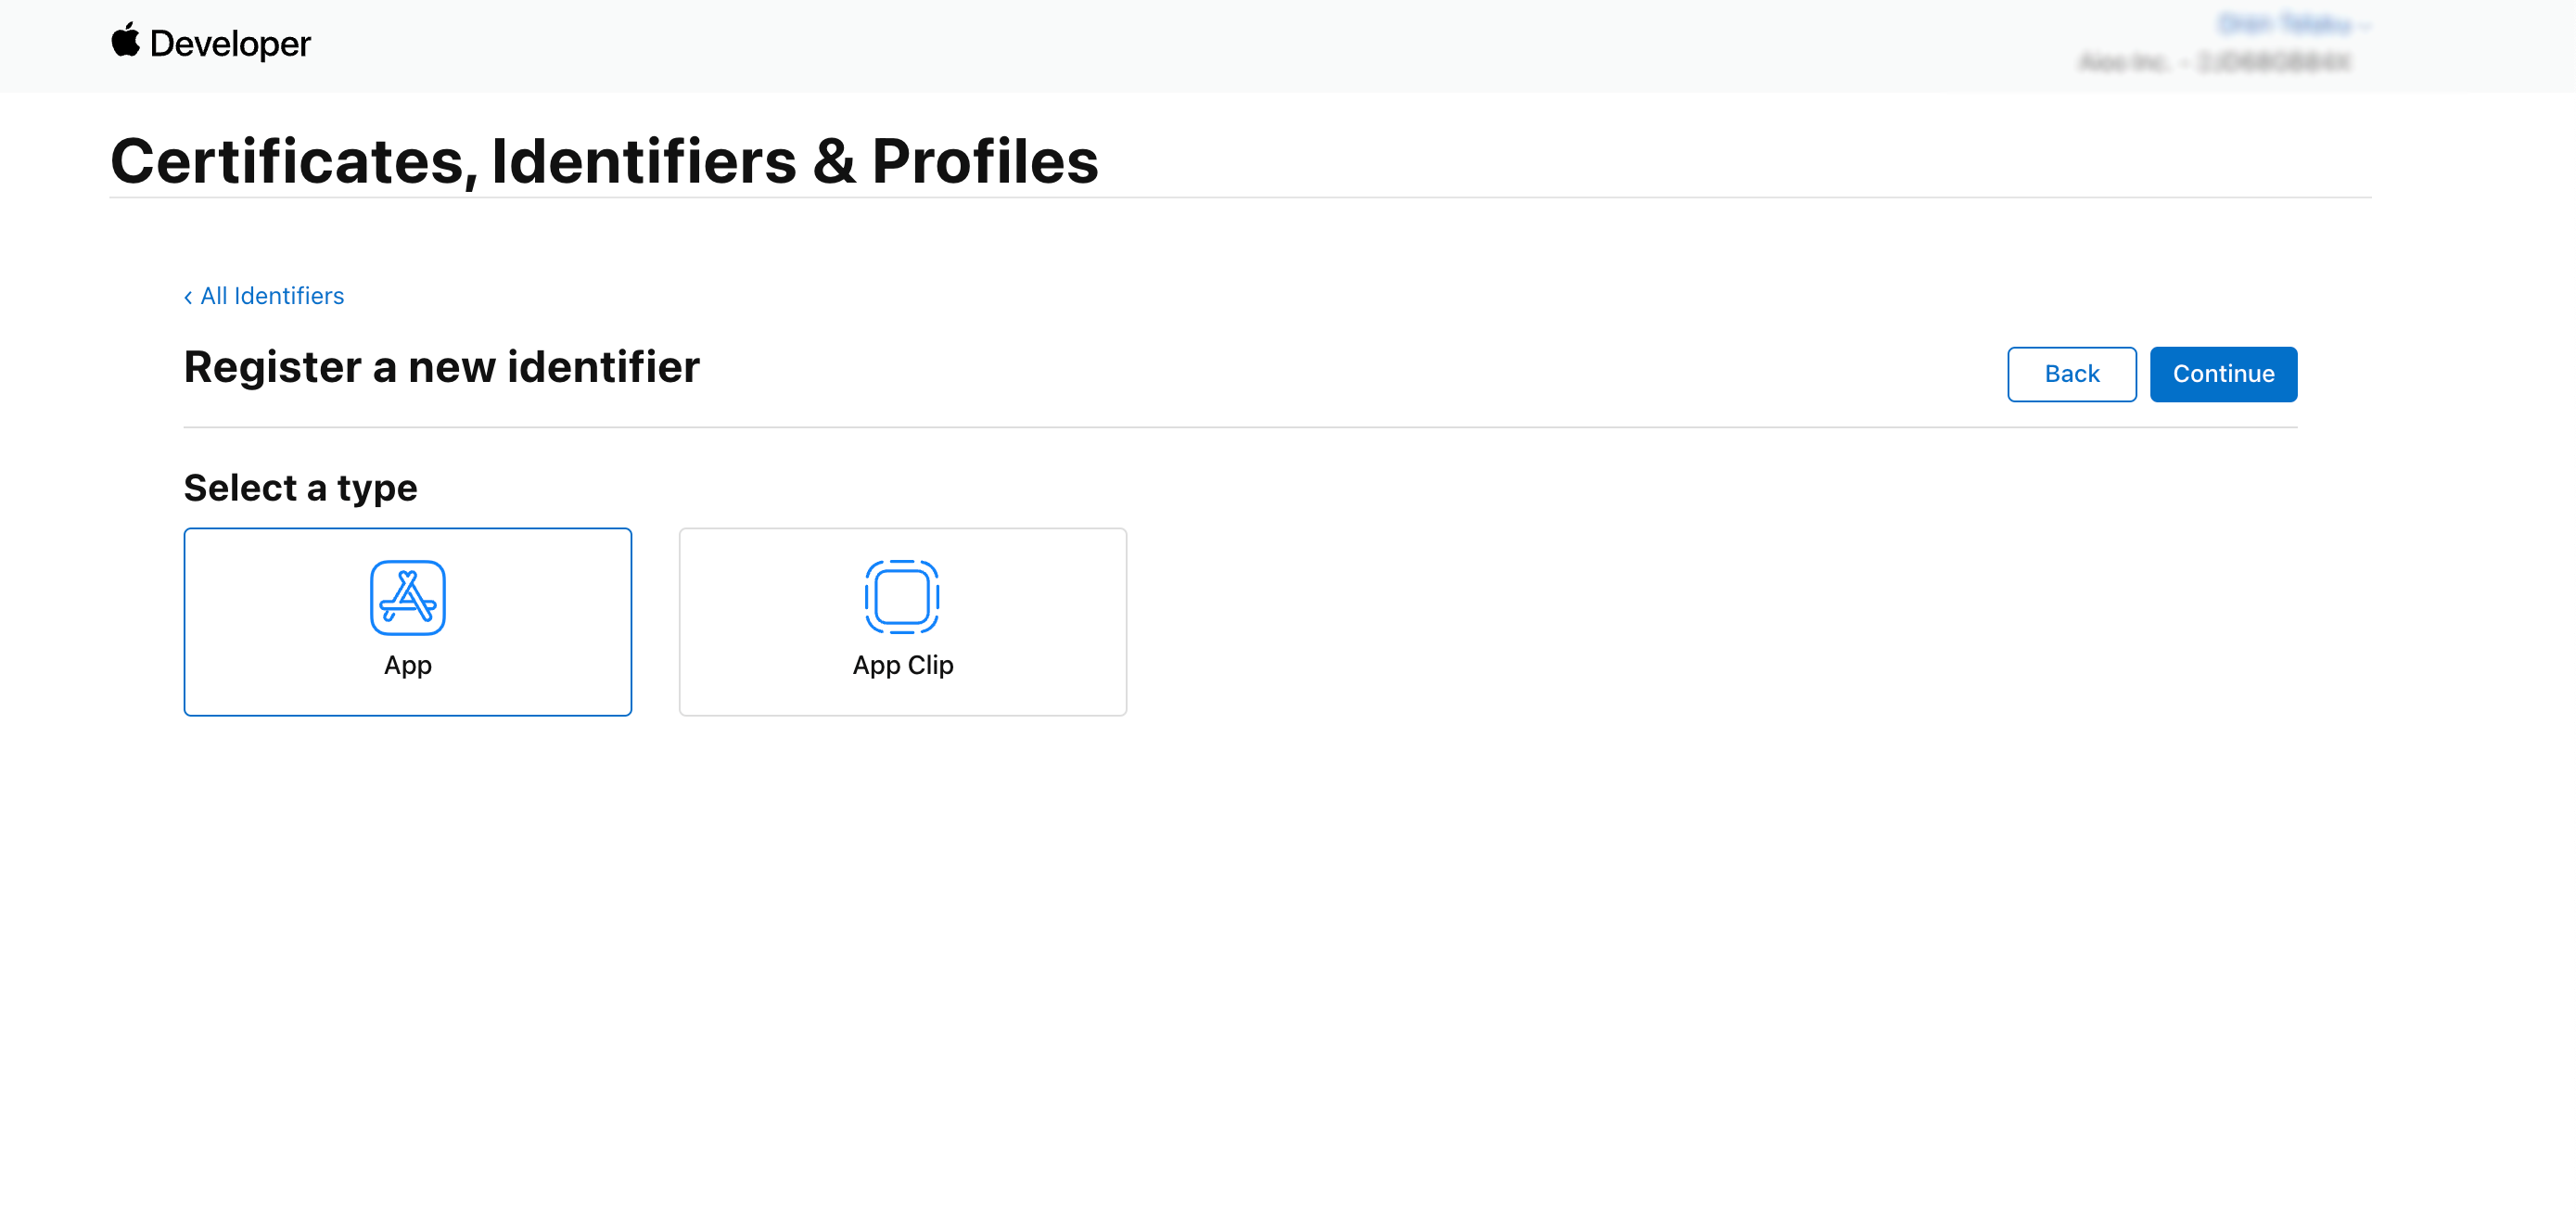
Select a type App then click Continue
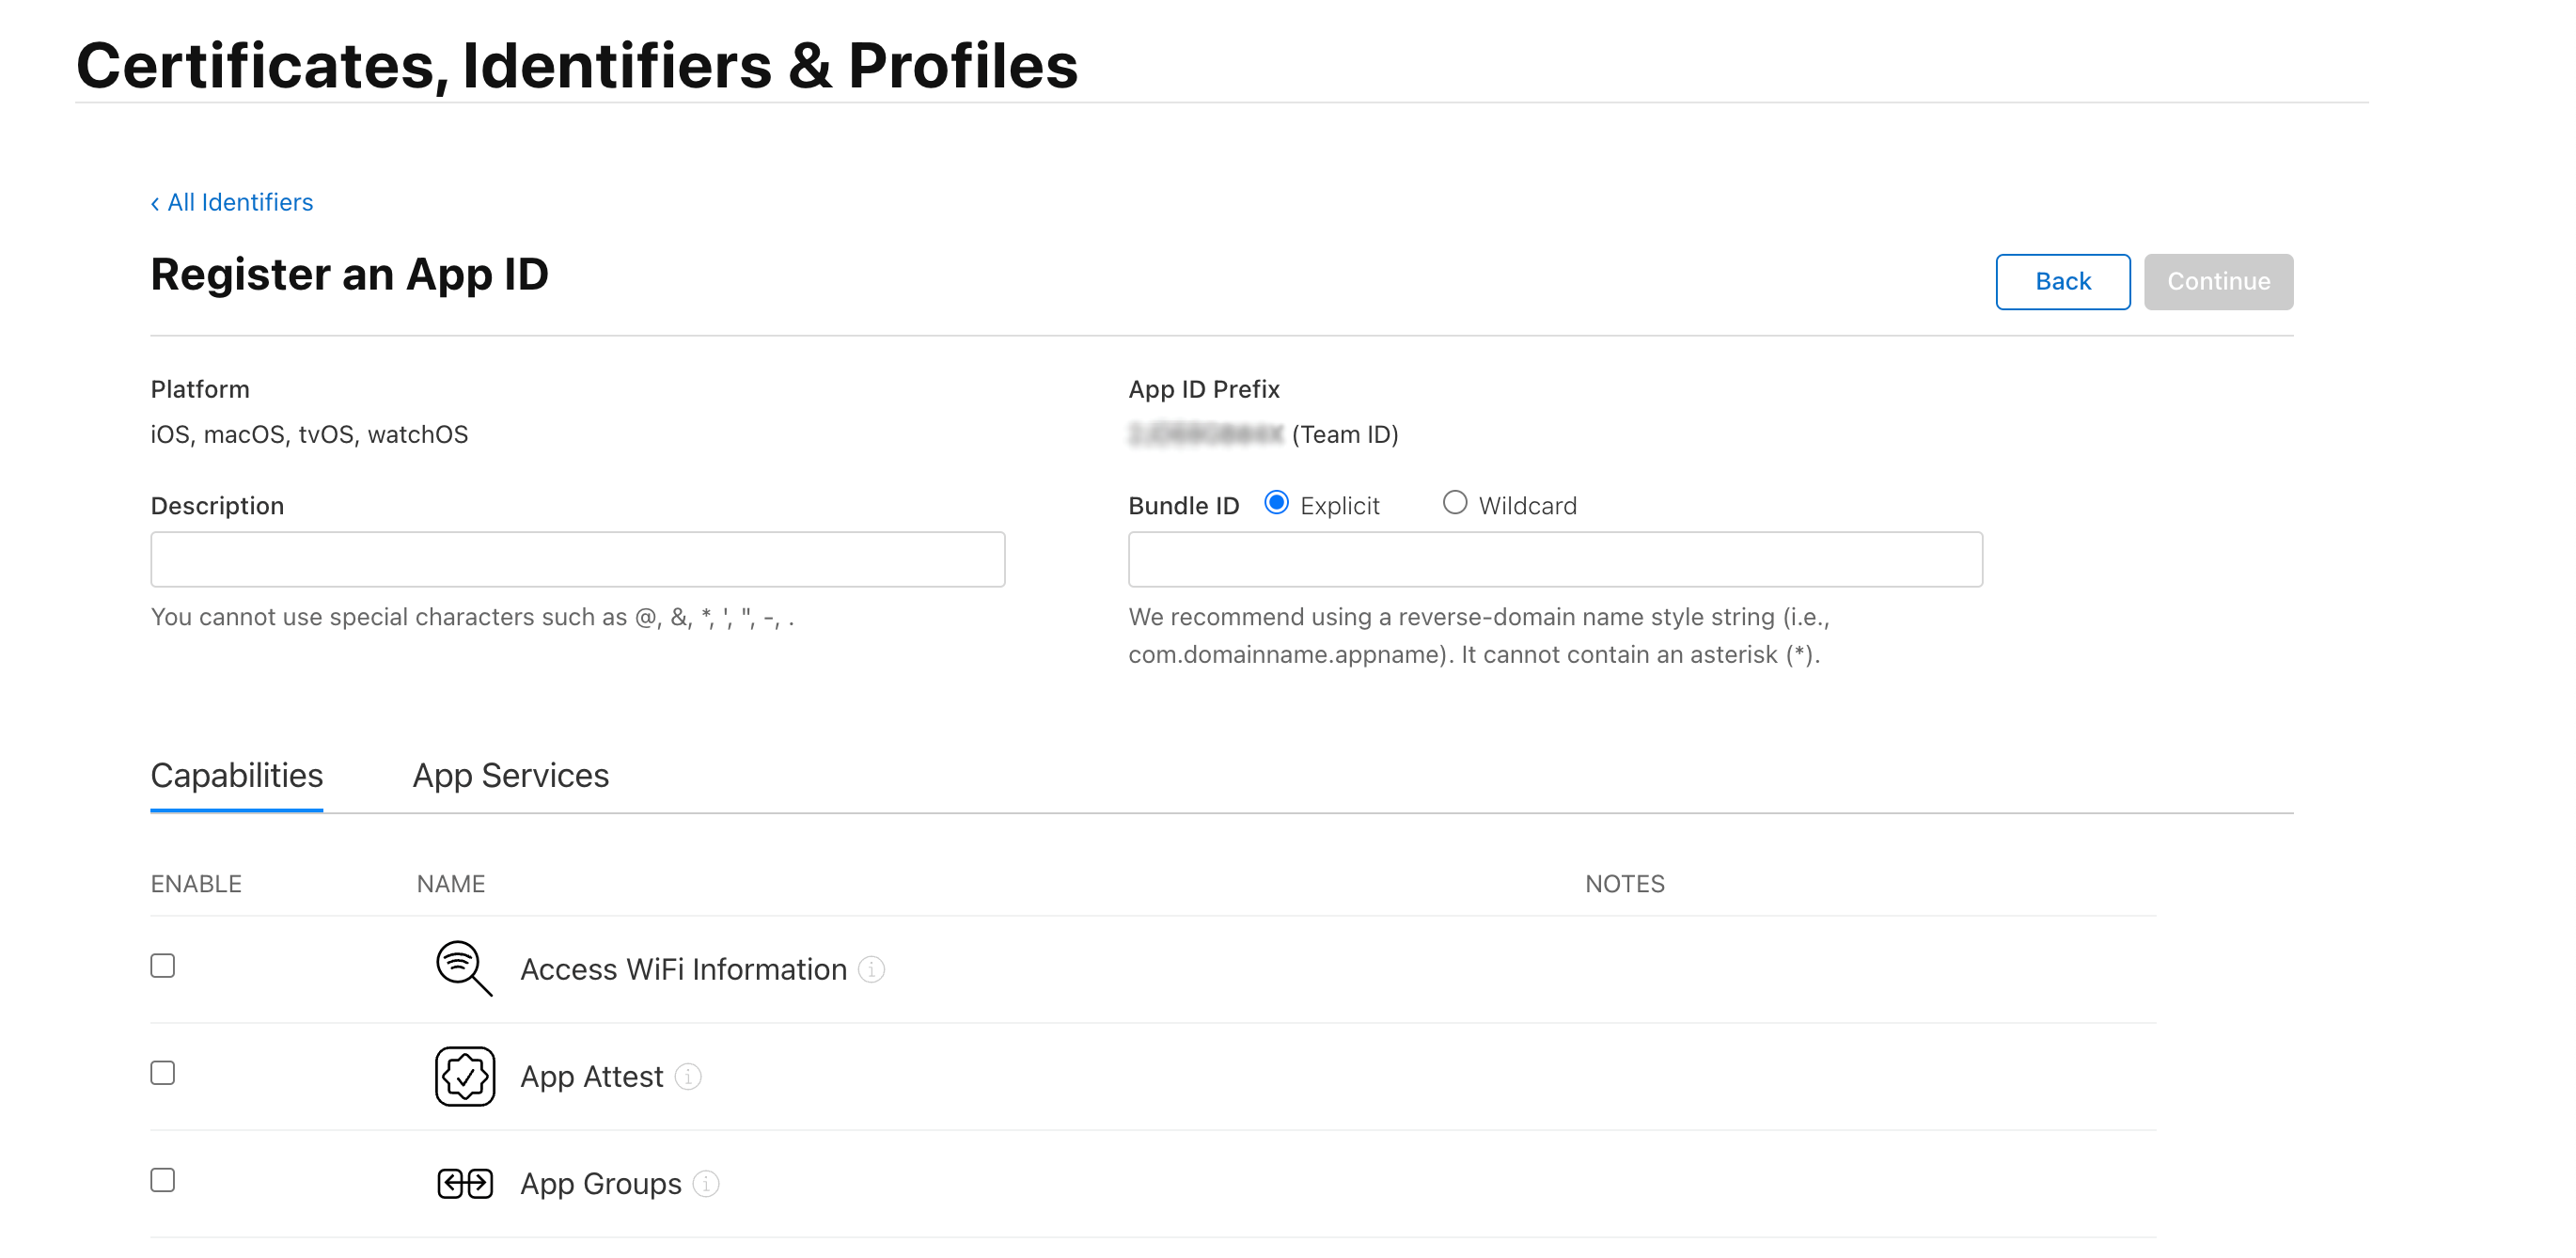
On this step you can add a Description and the bundle id should be the same as you have copied before on XCode.

scroll down to enable the Push notifications service for this identifier.
Then just click on continue and you will se your app indentifier.
After that we need to have a provision profile that will be used on xcode configuration for signing the app and giving the right permissions for recieving remote notifications from the server.
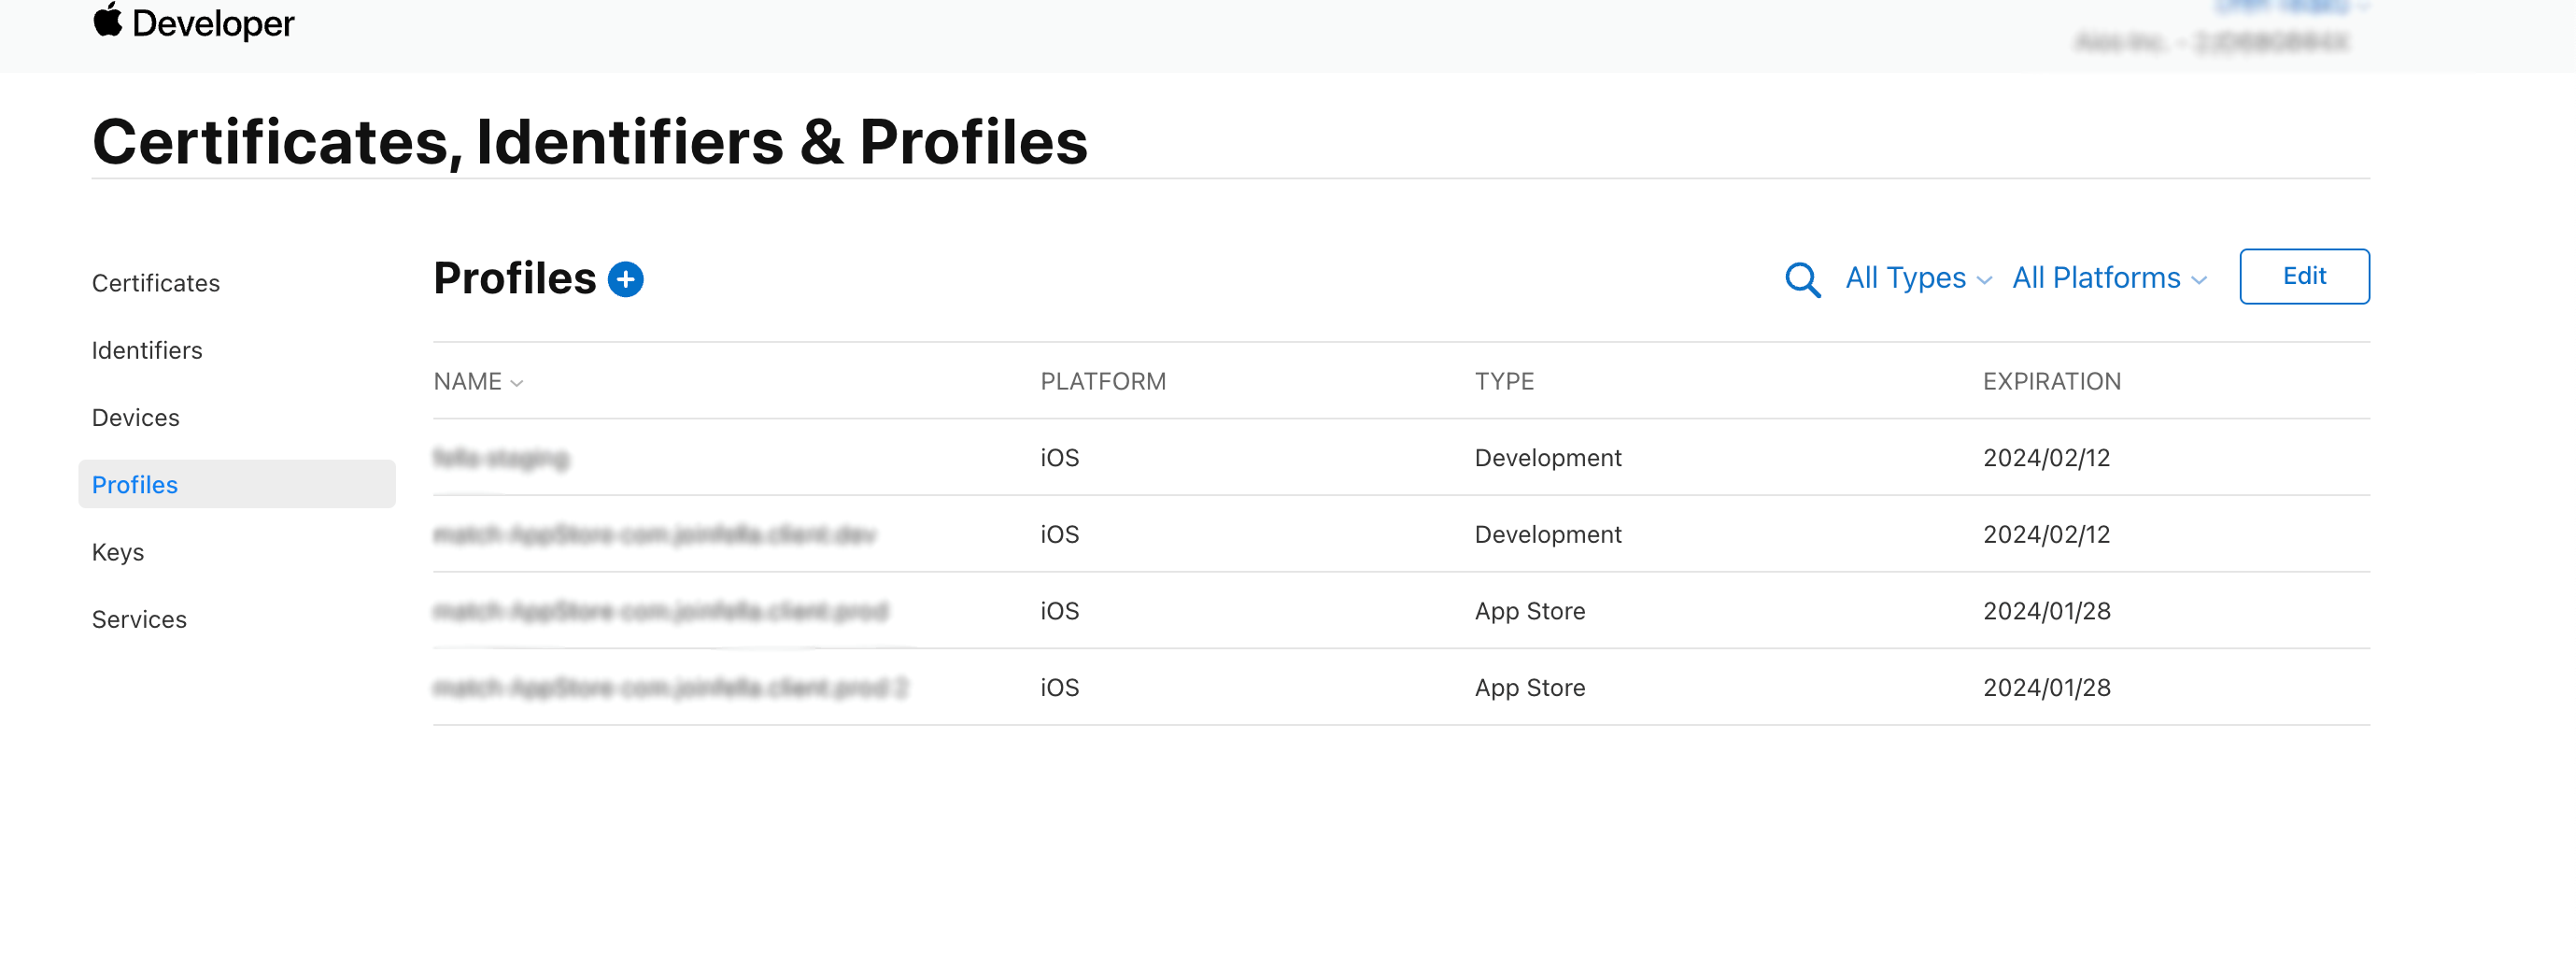
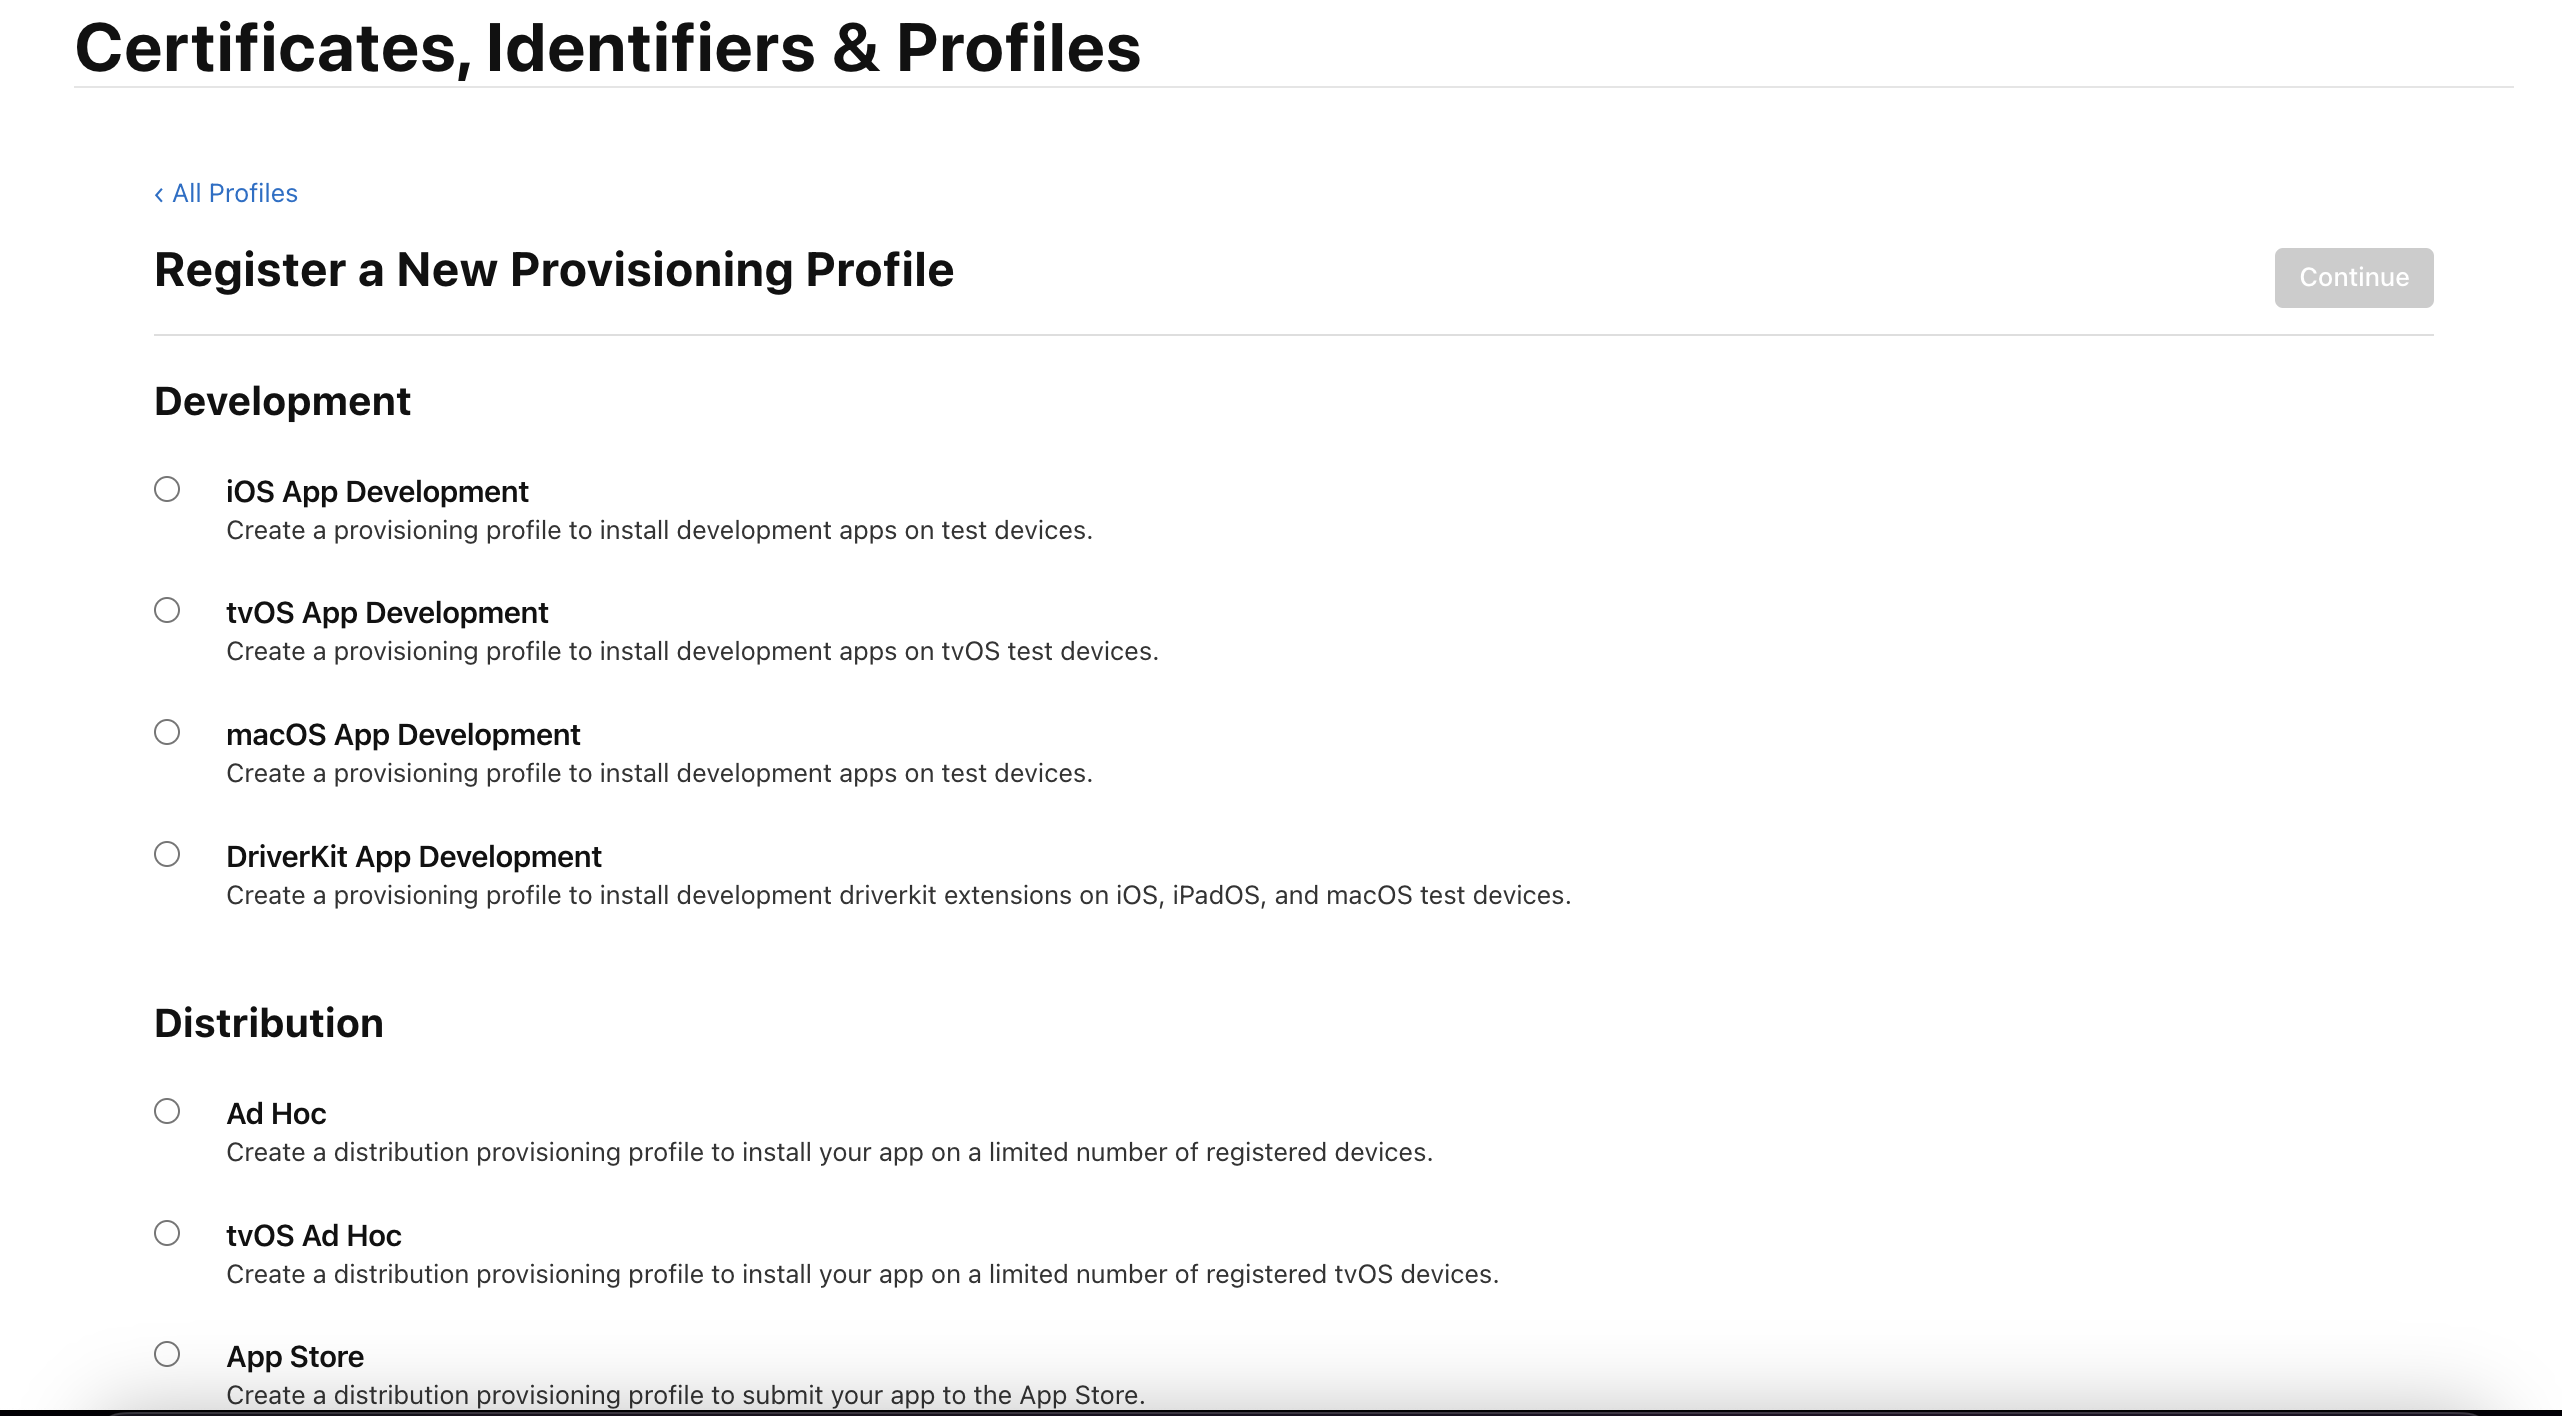
If you don’t have a Provision Profile you can create it by clicking on the plus button.
If you’re configuring your app for staging/or development environment you should click on iOS App Development. Or if you’re configuring the app for Production environment you should enable the App Store or Distribution Provision Profile.
After that you need to select the App Id that is connected with this provision profile that you’re creating. Be sure to pick the right App Id otherways the notifications will never be shown on your app.
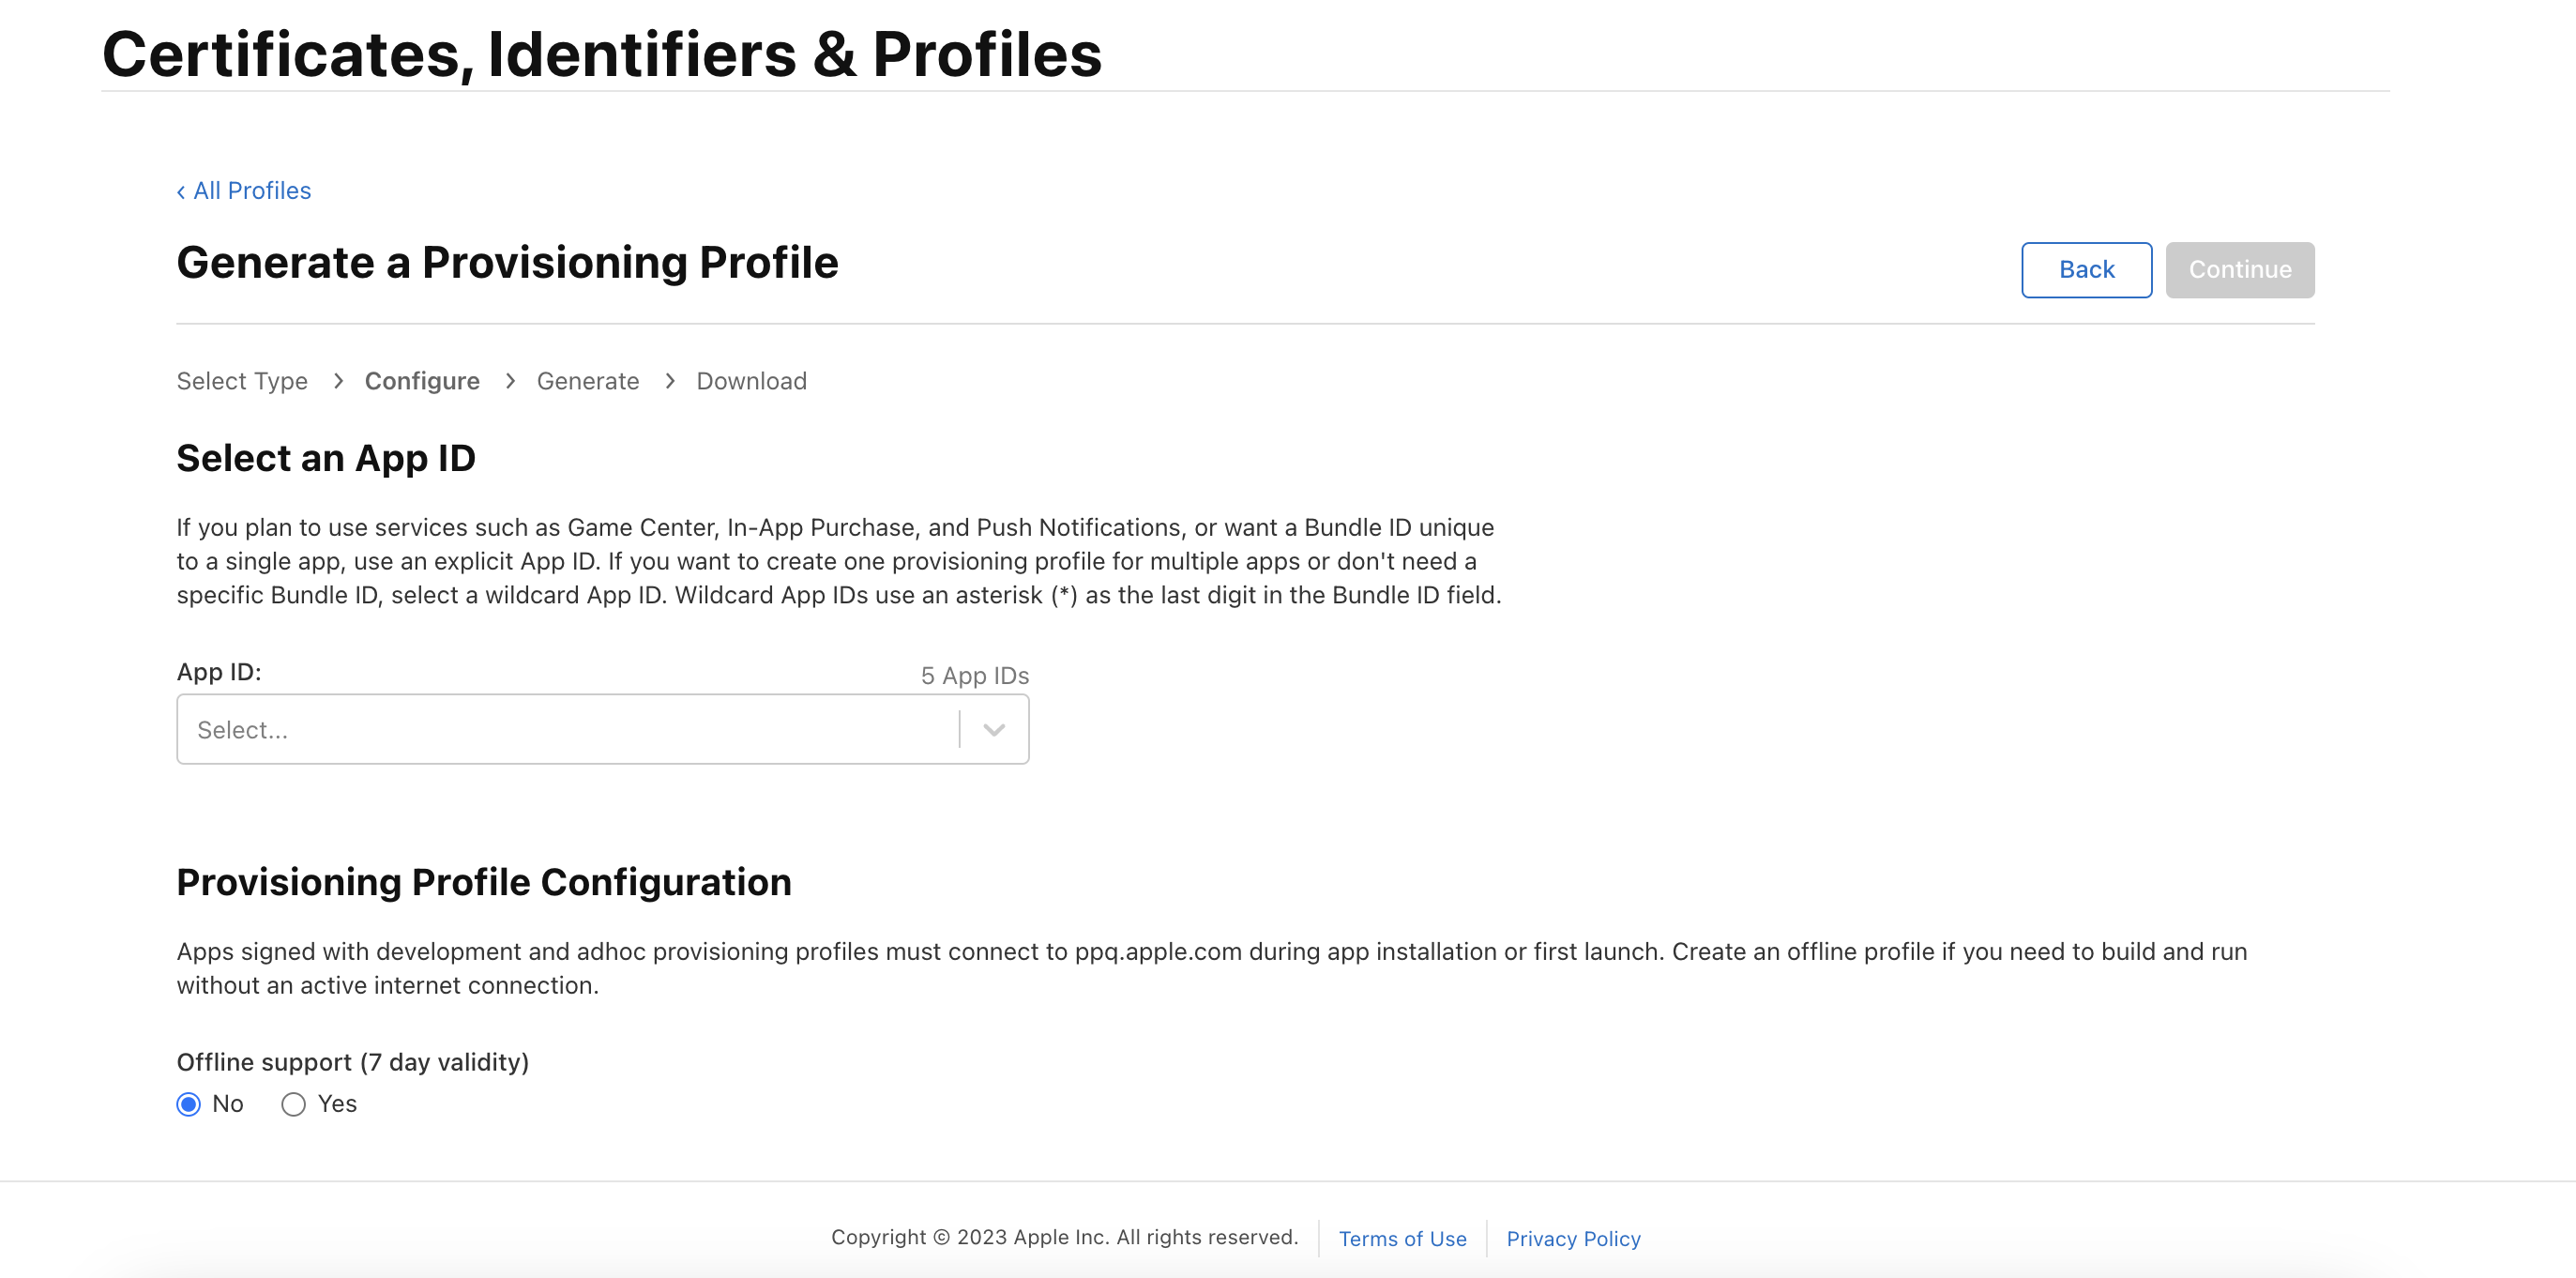
After picking the right App Id from the drop down list, you should click on Continue.
You will see the provision profile on the list.
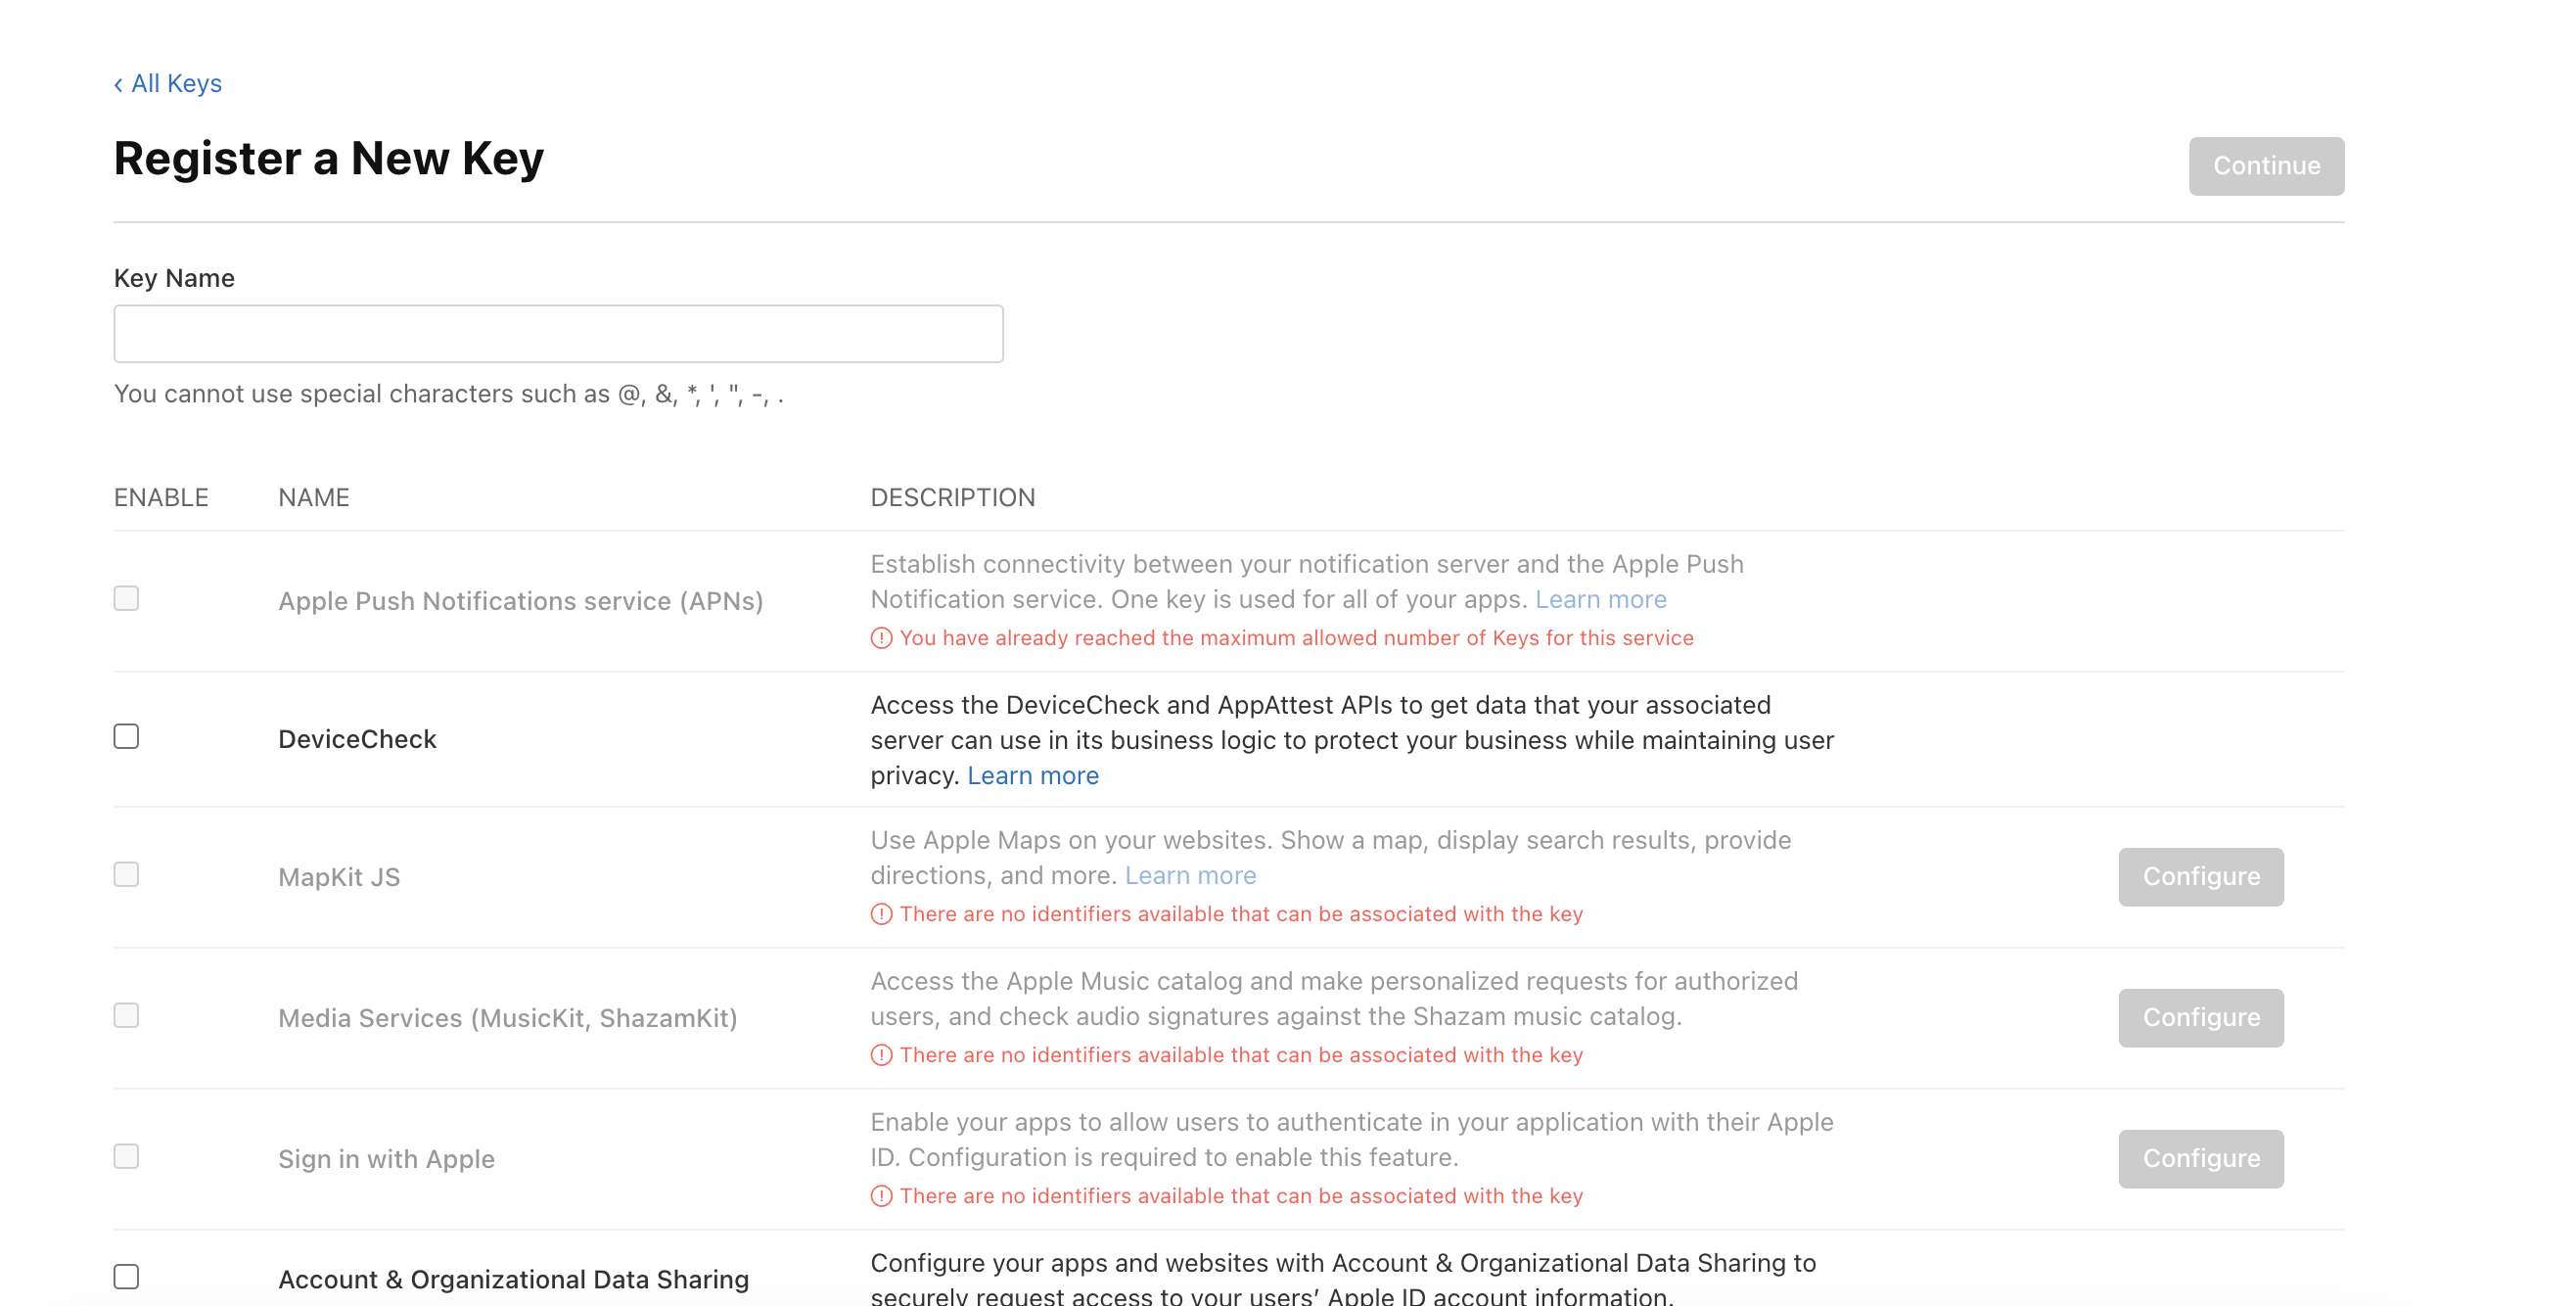
After this we will need to generate a specific APNS key that will be used on the Clound messaging configuration of Firebase Console. The APNS key is a file that is used for generating a unique tokens for users, these tokens are called Device Token and based on Device Token the server will know on which device should push the notification.
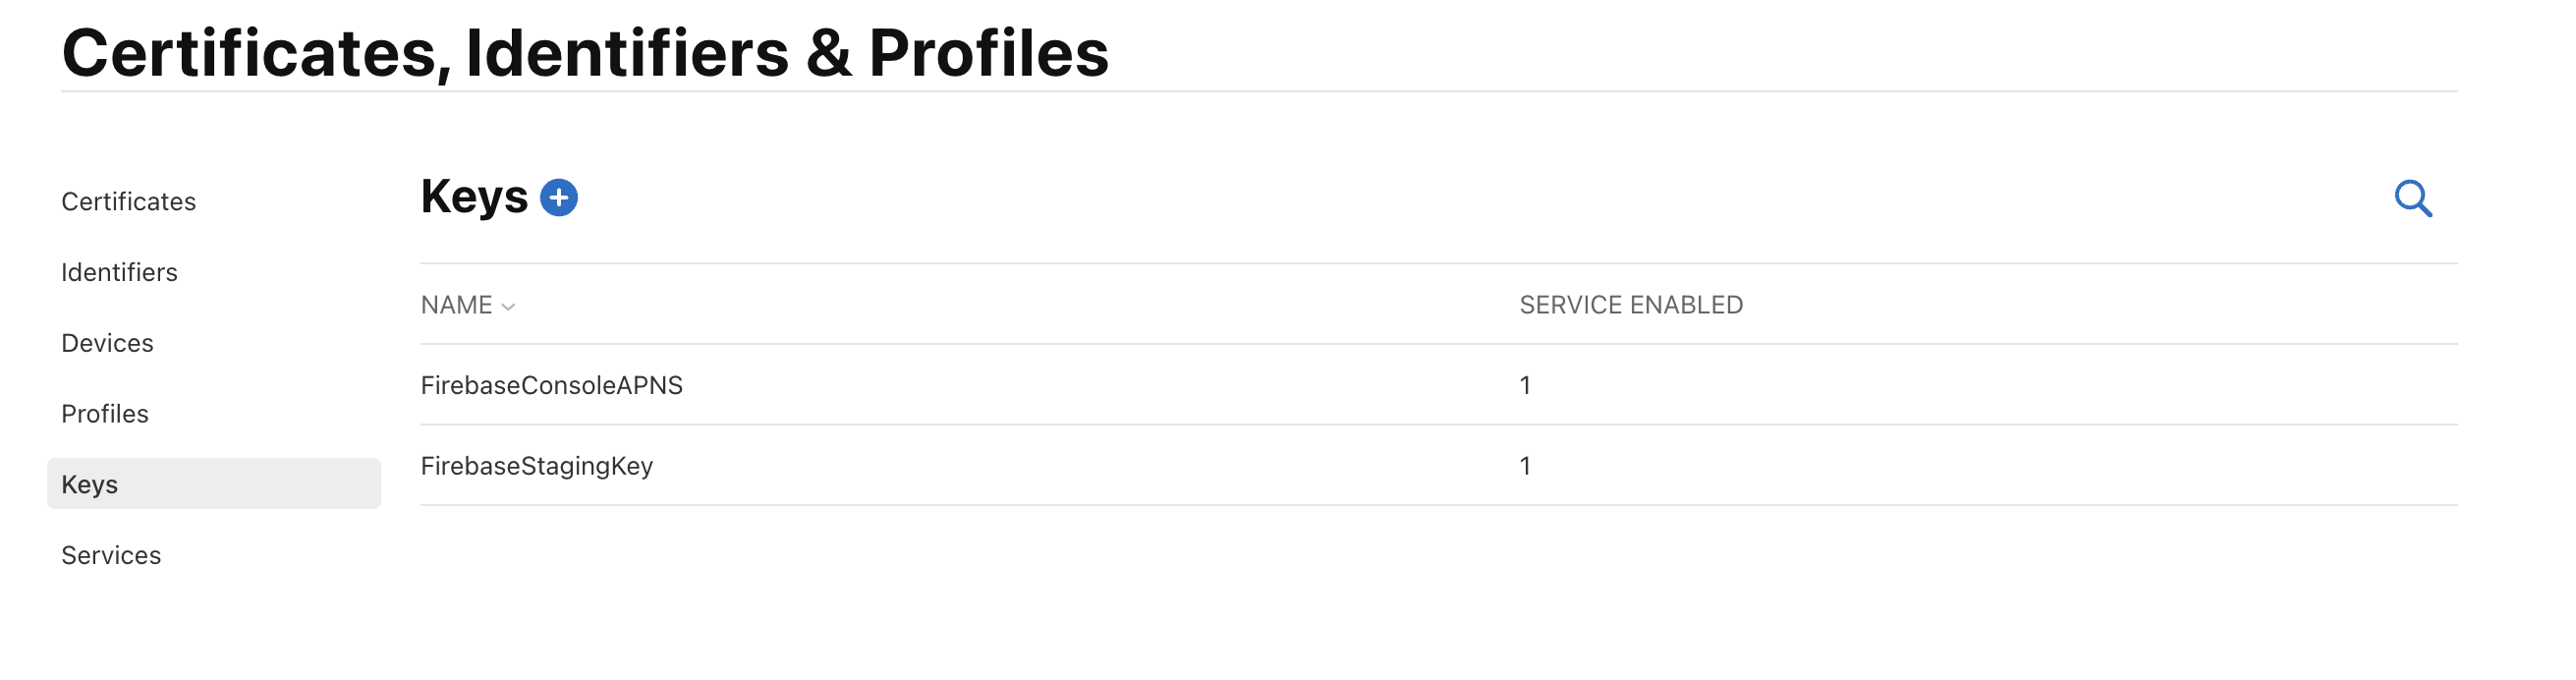
You should enable the Apple Push Notifications service (APNs), please be sure to download it before going back because you will need this file for completing the Firebase Configuration.
After downloading the file on our laptop or PC we should go again at the Firebase Console to do one more thing.
Click on your iOS app settings and after that click on Cloud Messaging tab:
Scroll down and we will see the place where we need to upload the APNS-key that we have downloaded before.
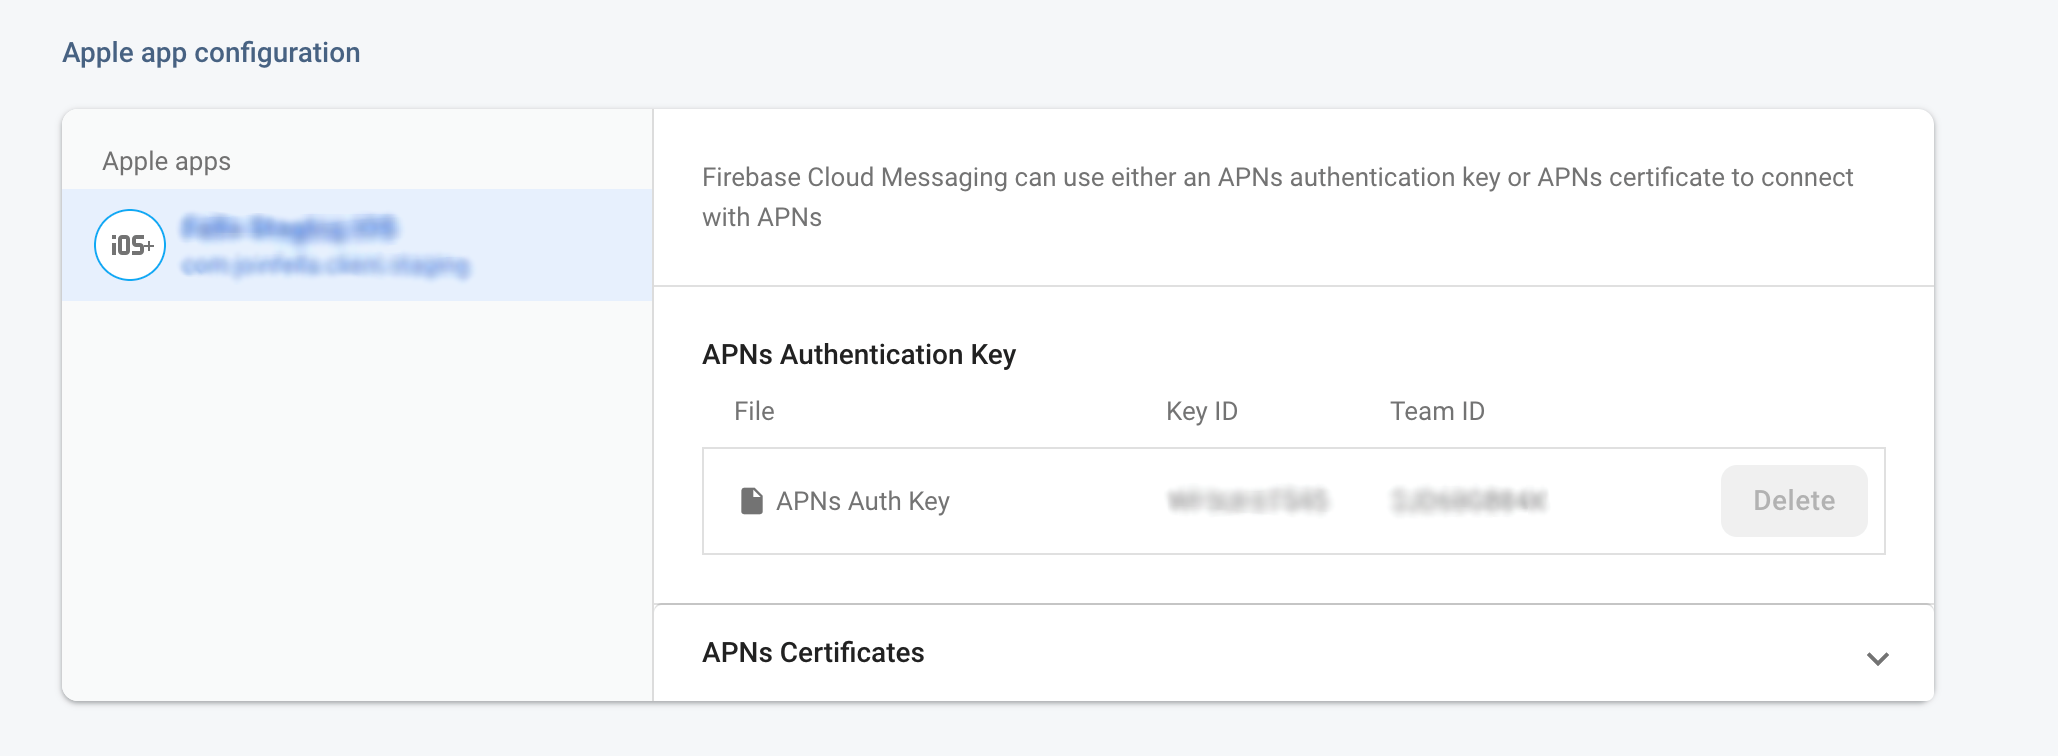
We don’t need to upload the APNs Certificates.
If you remember we have installed a file that is called GoogleService-info.plist. The file GoogleService-Info.plist file contains all of the information required by the Firebase iOS SDK to connect to your Firebase project.
So for now we will need to add this file to the ios folder of our React Native project.
First you need to go back at your project on Visual Studio Code and to drag/drop the GoogleService-info.plist file inside of the ios/ProjectFolderApp/ like below:
After being sure that you have dropped the GoogleService-info.plist file you should go again at the xcode to add this file as a reference from the folder of your project.
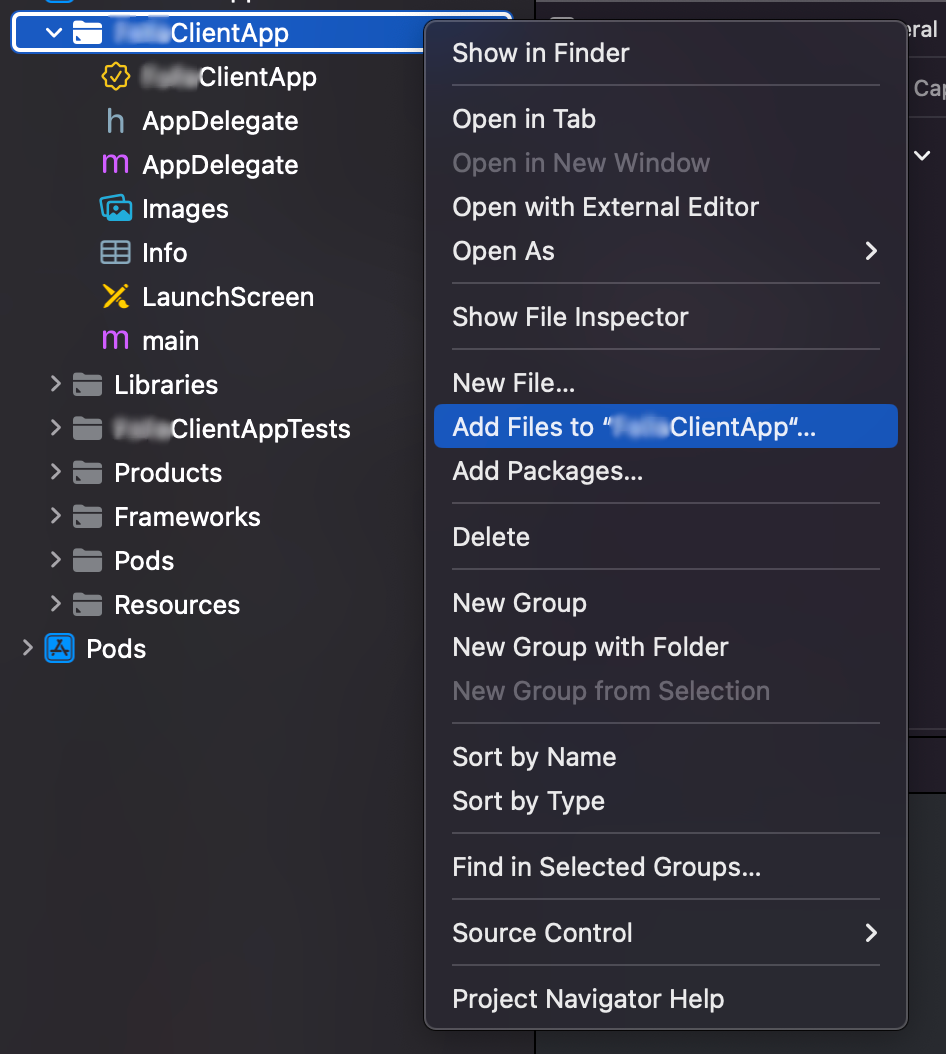
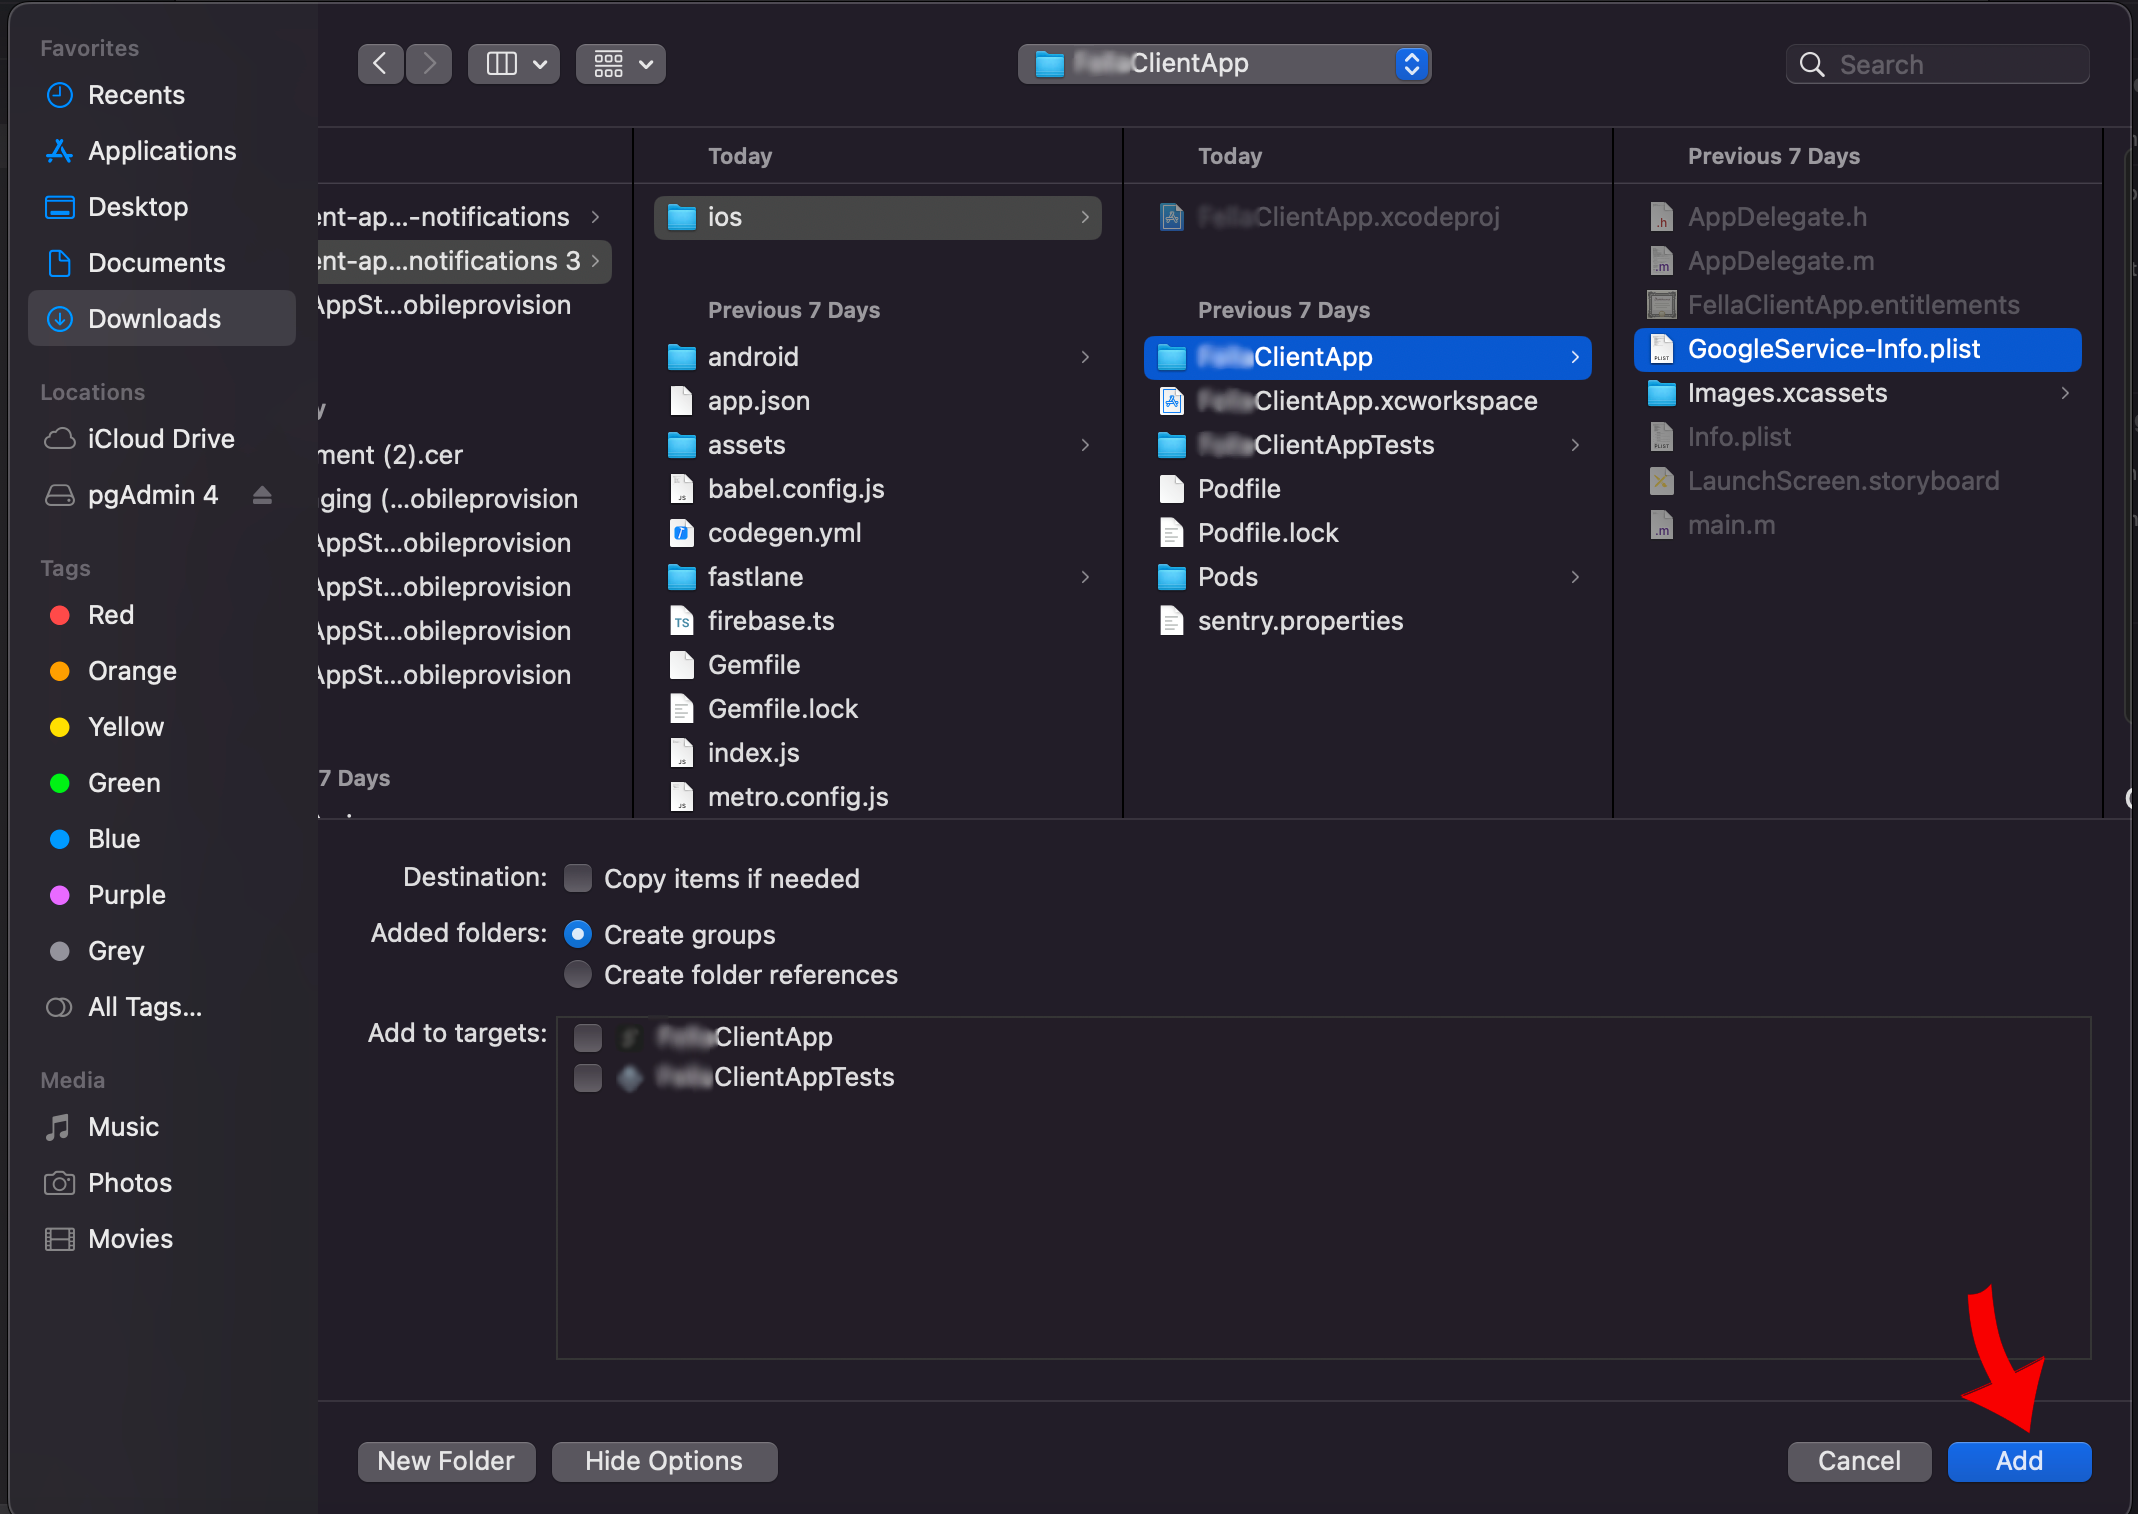
Be sure to uncheck the Add to targets and click on button Add.
After that the only thing that we should do for the configuration things is to add the right provision profiles. As you know we have created the provision profile based on bundle id of the app before. So we are going to download this provision profile from https://developer.apple.com/account/ios/certificate/. The provision profile is going to be used to control and authorize the devices on which the app can run and the Apple services it can access.

Now we have finished all steps of configuring the infrastructure of remote push notifications for iOS app and we are able to continue the code part on our project.
The first thing that we should do is to create a method that will be used to get the unique device tokens based on user device. You can call this method when the user is logged in because we want to push notifications to this user just on the case when the user is logged in and not where the user is not logged in.
import { useEffect } from 'react';
import PushNotification from 'react-native-push-notification';
import messaging from '@react-native-firebase/messaging';
import { Platform } from 'react-native';
import firebase from '@react-native-firebase/app';
import PushNotificationIOS from '@react-native-community/push-notification-ios';

const RemotePushController = () => {
  const getToken = async () => {
    const fcmToken = await messaging().getToken();
    console.log('DEVICE TOKEN', fcmToken);
  };
const notificationsConfigureAndroid = () => {
    try {
      if (Platform.OS === 'android') {
        PushNotification.createChannel(
          {
            channelId: 'your_channel_id',
            channelName: 'My channel',
            channelDescription: 'Notifications channel',
            playSound: false,
            soundName: 'default',
            importance: 4,
            vibrate: true,
          },
          created => console.log(`createChannel returned '${created}'`),
        );
        PushNotification.getChannels(function (channel_ids) {
          console.log(channel_ids);
        });
        messaging().onMessage(async (remoteMessage: any) => {
          PushNotification.localNotification({
            message: remoteMessage.notification.body,
            title: remoteMessage.notification.title,
            bigPictureUrl: remoteMessage.notification.android.imageUrl,
            smallIcon: remoteMessage.notification.android.imageUrl,
            channelId: 'fcm_fallback_notification_channel',
            vibrate: true,
          });
        });
      }
    } catch (error) {
      console.log(error);
    }
  };  const notificationsConfigureForiOS = async () => {
    await messaging().onMessage(message => {
      console.log('REMOTE NOTIFICATION ==>', message);
      PushNotificationIOS.presentLocalNotification({
        alertTitle: message.notification?.title,
        alertBody: message.notification?.body,
      } as any);
    });
  };
  useEffect(() => {
    notificationsConfigureAndroid();
    getToken();
    notificationsConfigureForiOS();
  }, []);

  return null;
};

export default RemotePushController;
I have called the RemotePushController method inside my Dashboard Screen on my app like below:
import RemotePushController from "../../utils/remotePushController.ts";

const Dashboard = () => {
return (
<>
<RemotePushController />
</>
)
}
We know that this method will be called just when the user is logged in because we navigate the user to the Dashboard screen just on the case when the user has writed his right credentials.
After that we will get the device token from the console.logs that we have added inside of RemotePushController.
The device token should be something like this below:
cx7GOretNEGksy0zMT1-2:APA91bEO8idZmFNSL8-vJgXNVxPk2tXqWe4A4GHUhjmr0d6N3jdjdOPcsQP3m2UInOUflZNqBEkMi5CtjzjHPl5GDmxDiwstc-d38832012312eoBased on that we can test our first notification by using the platform that Firebase offers for us https://testfcm.com/.
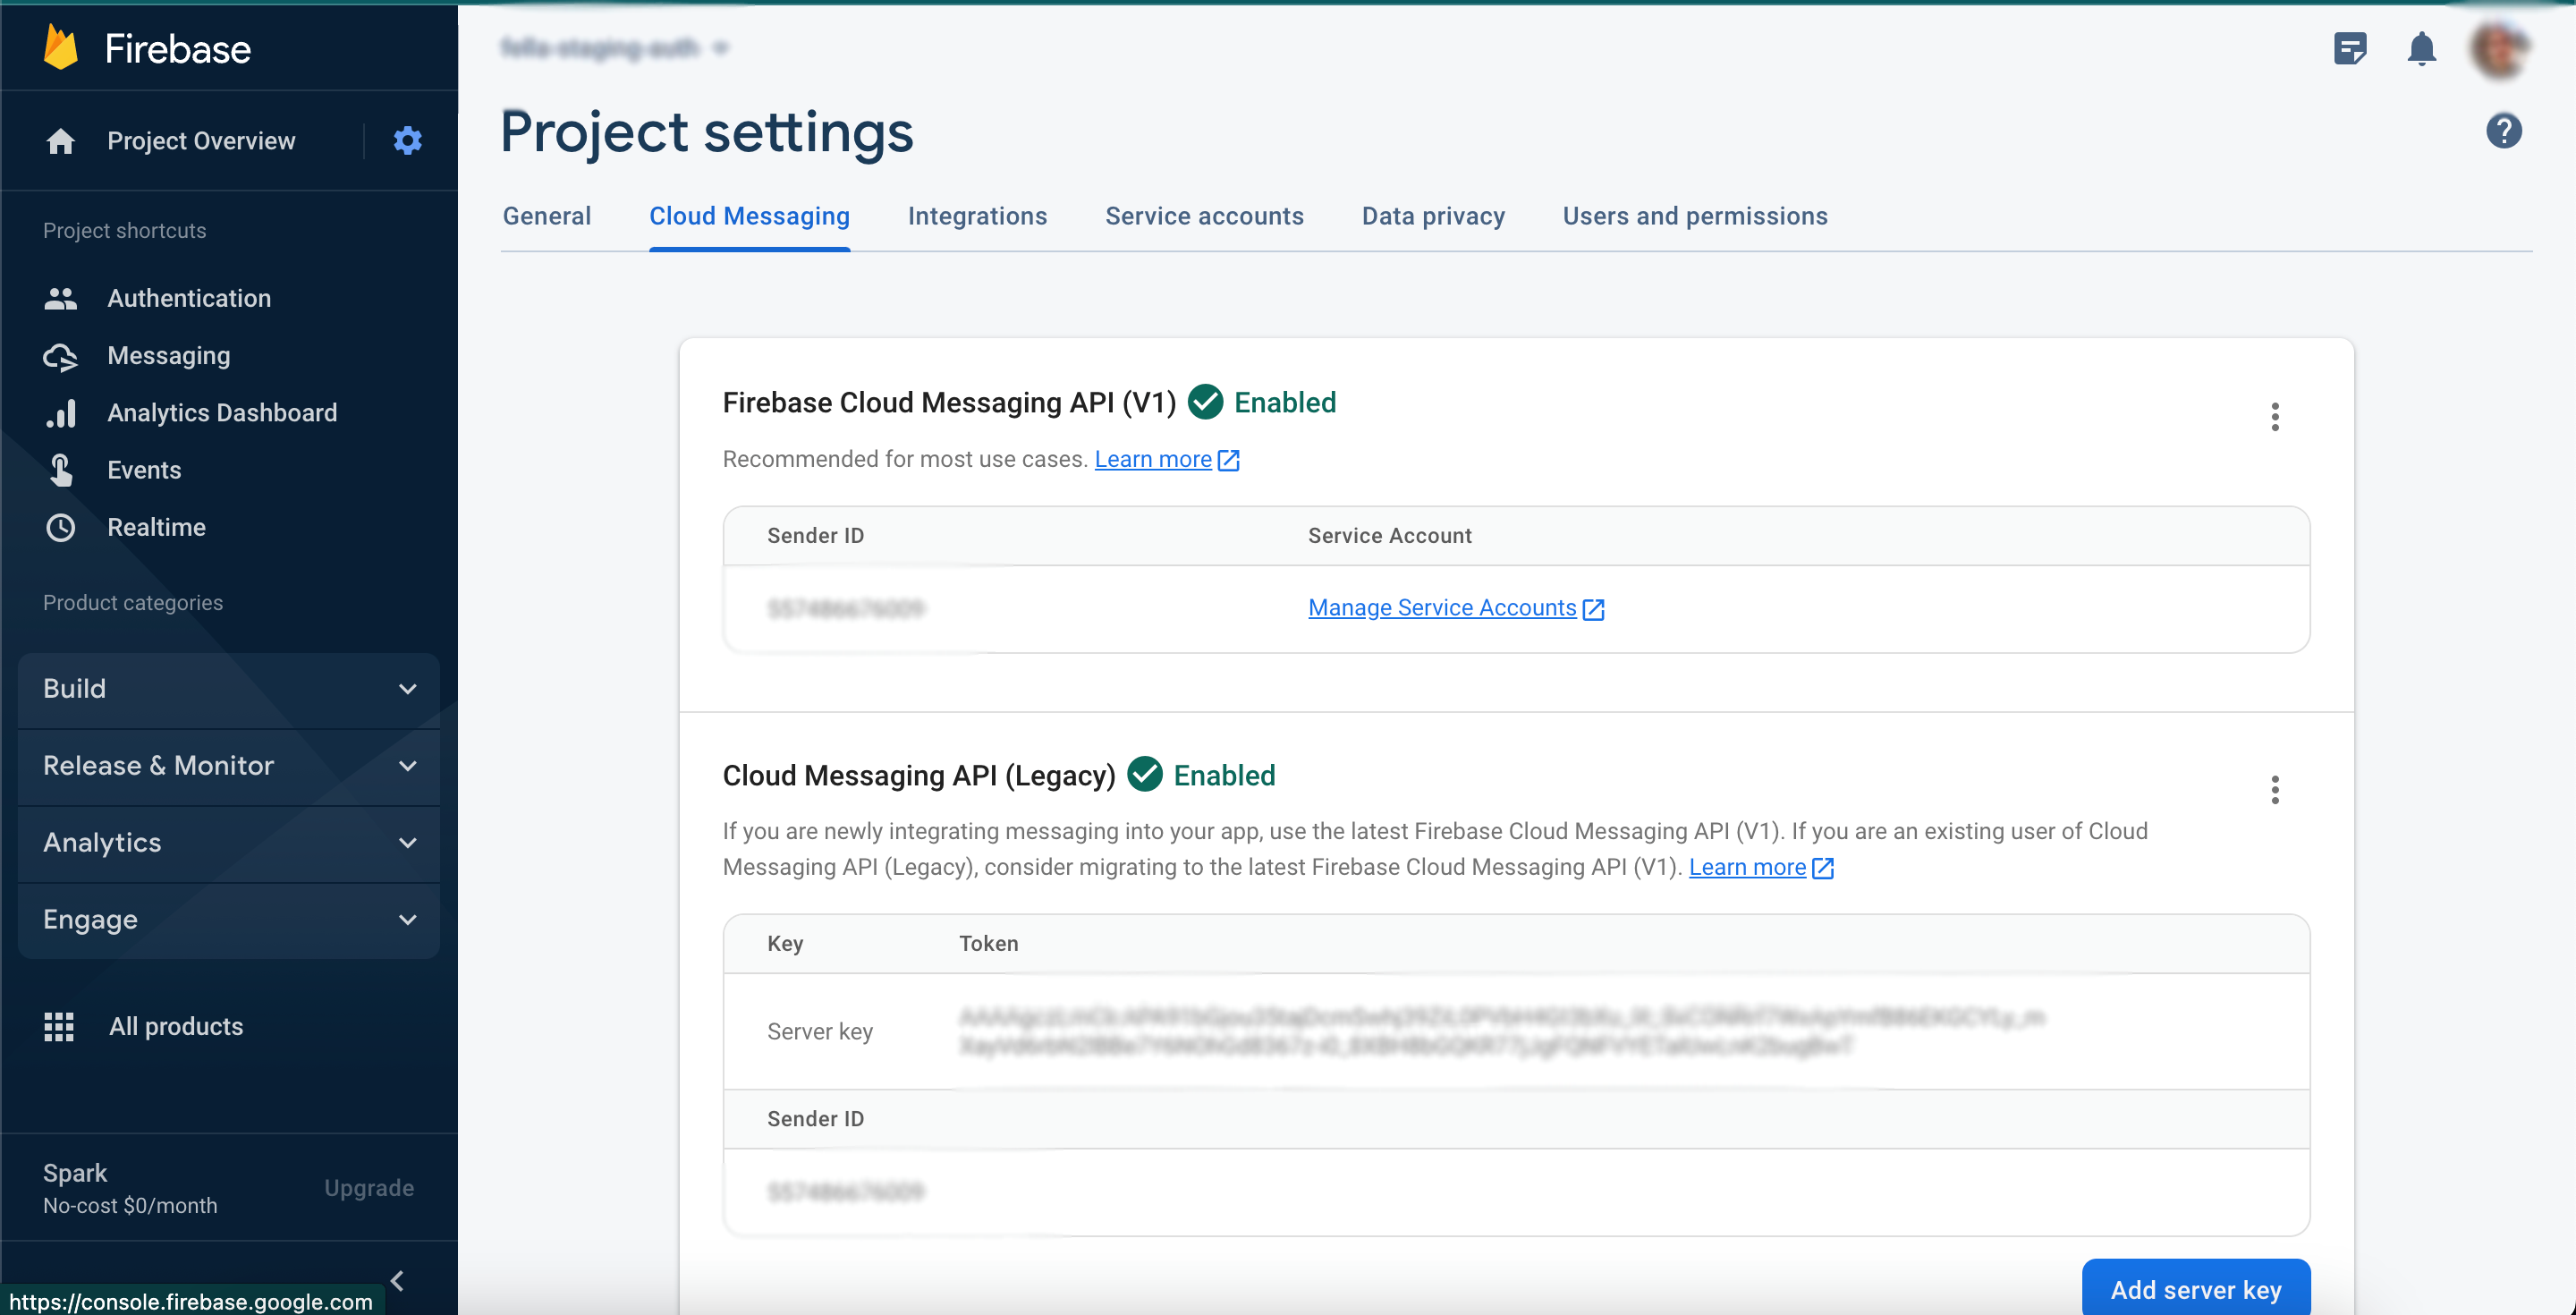
First we need to copy the Server key from the ios app on the Cloud Messaging tab:
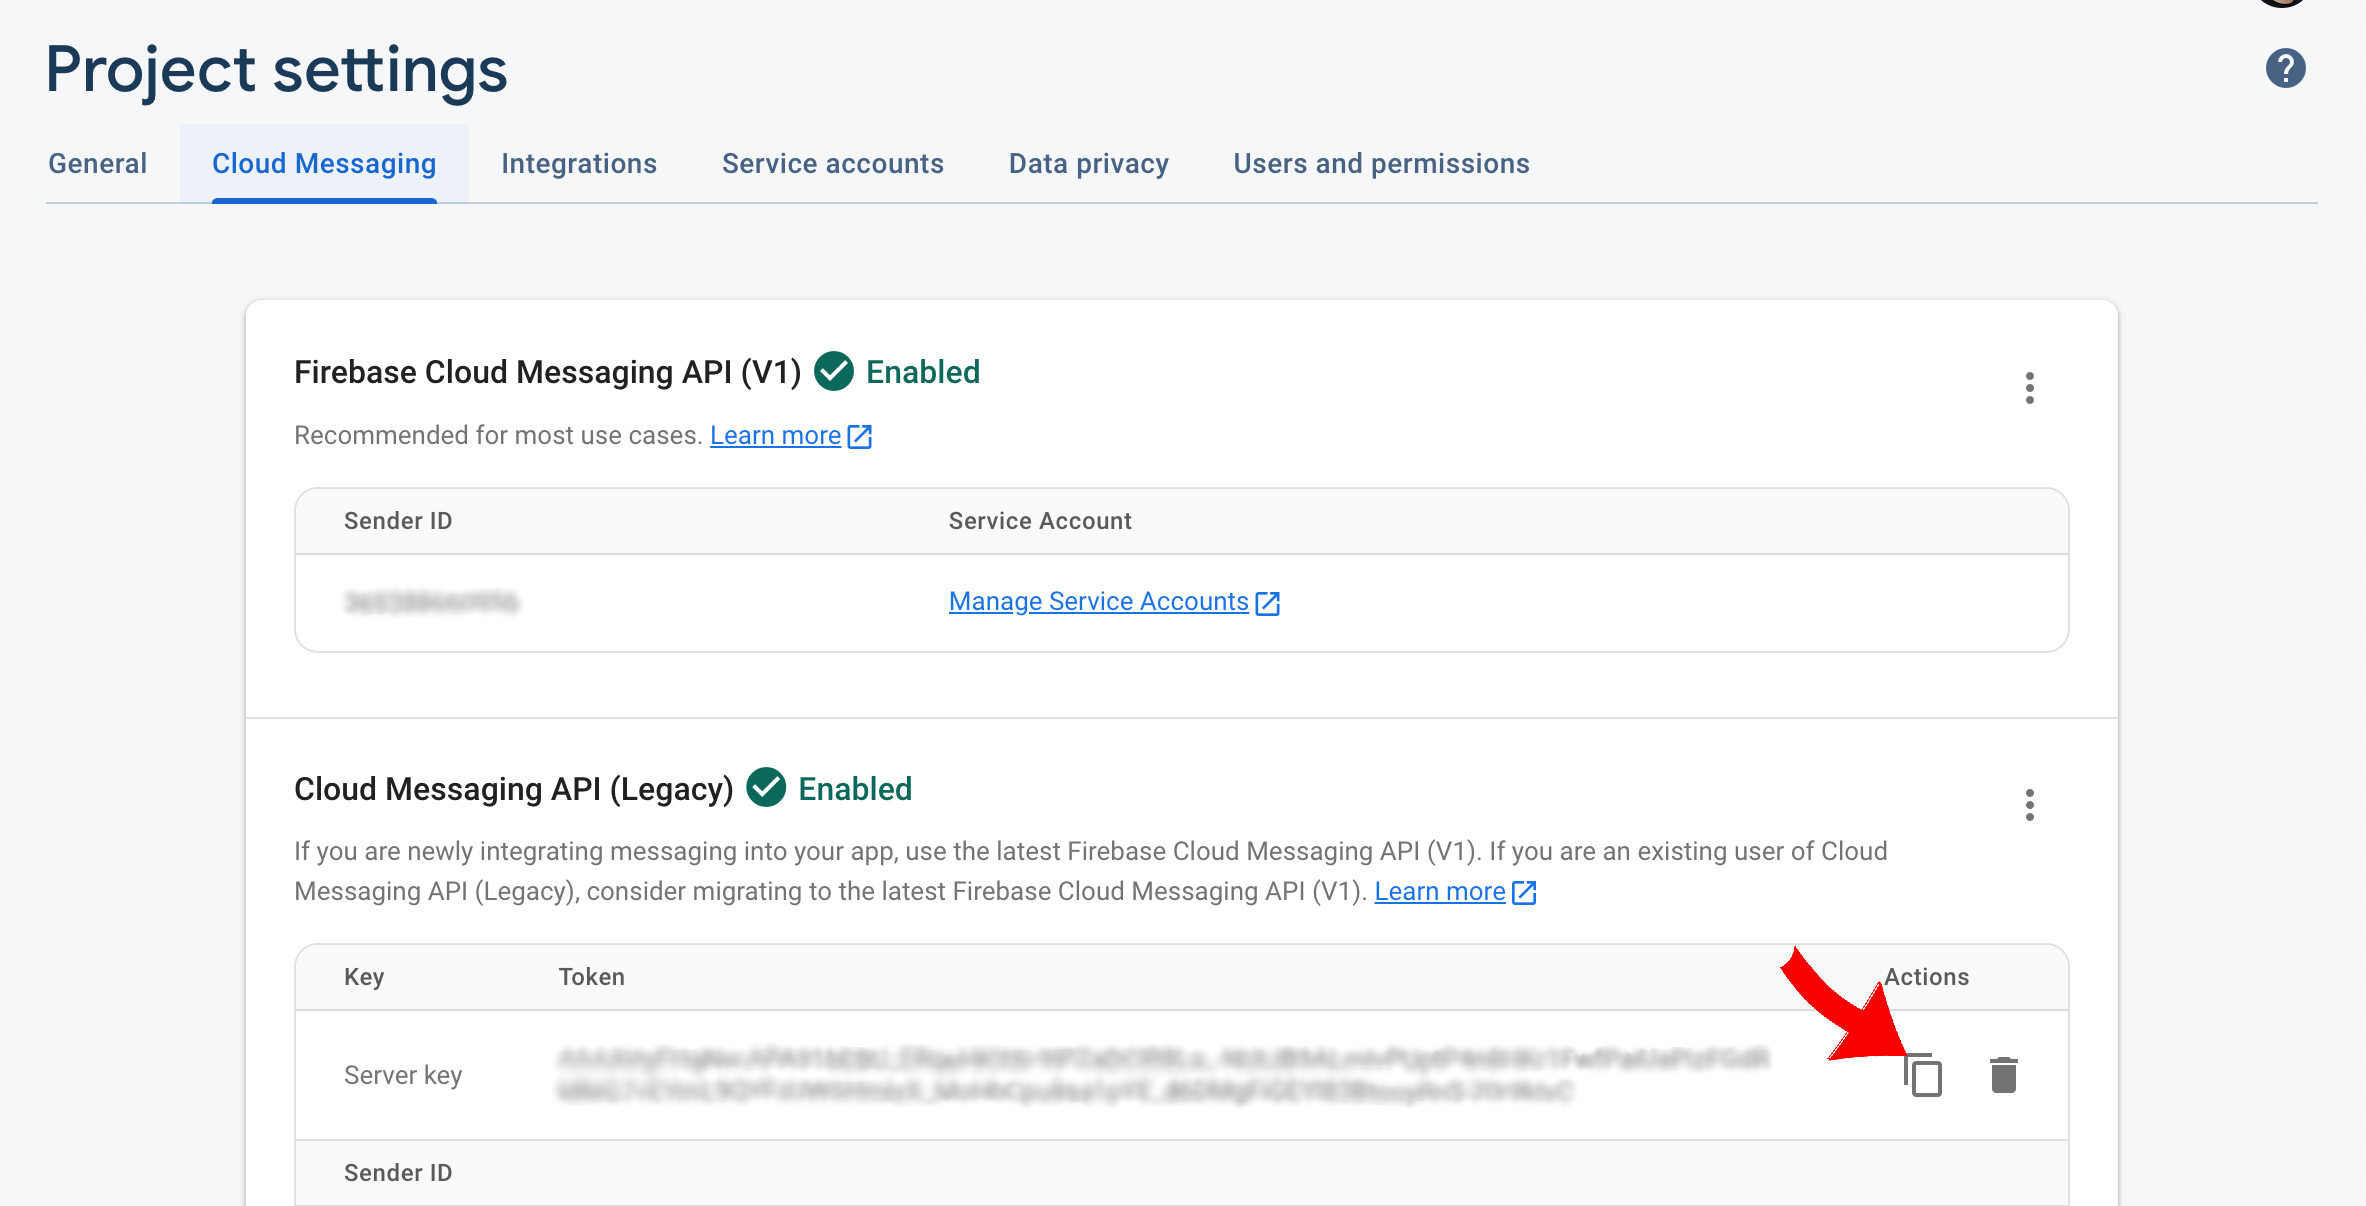
Then paste the Server Key that we have copied before, and the device token that we took from the console.log on our project, also we need to have a title and the body as a text description for the notification that we want to push to the user device, so all of these fields are required.
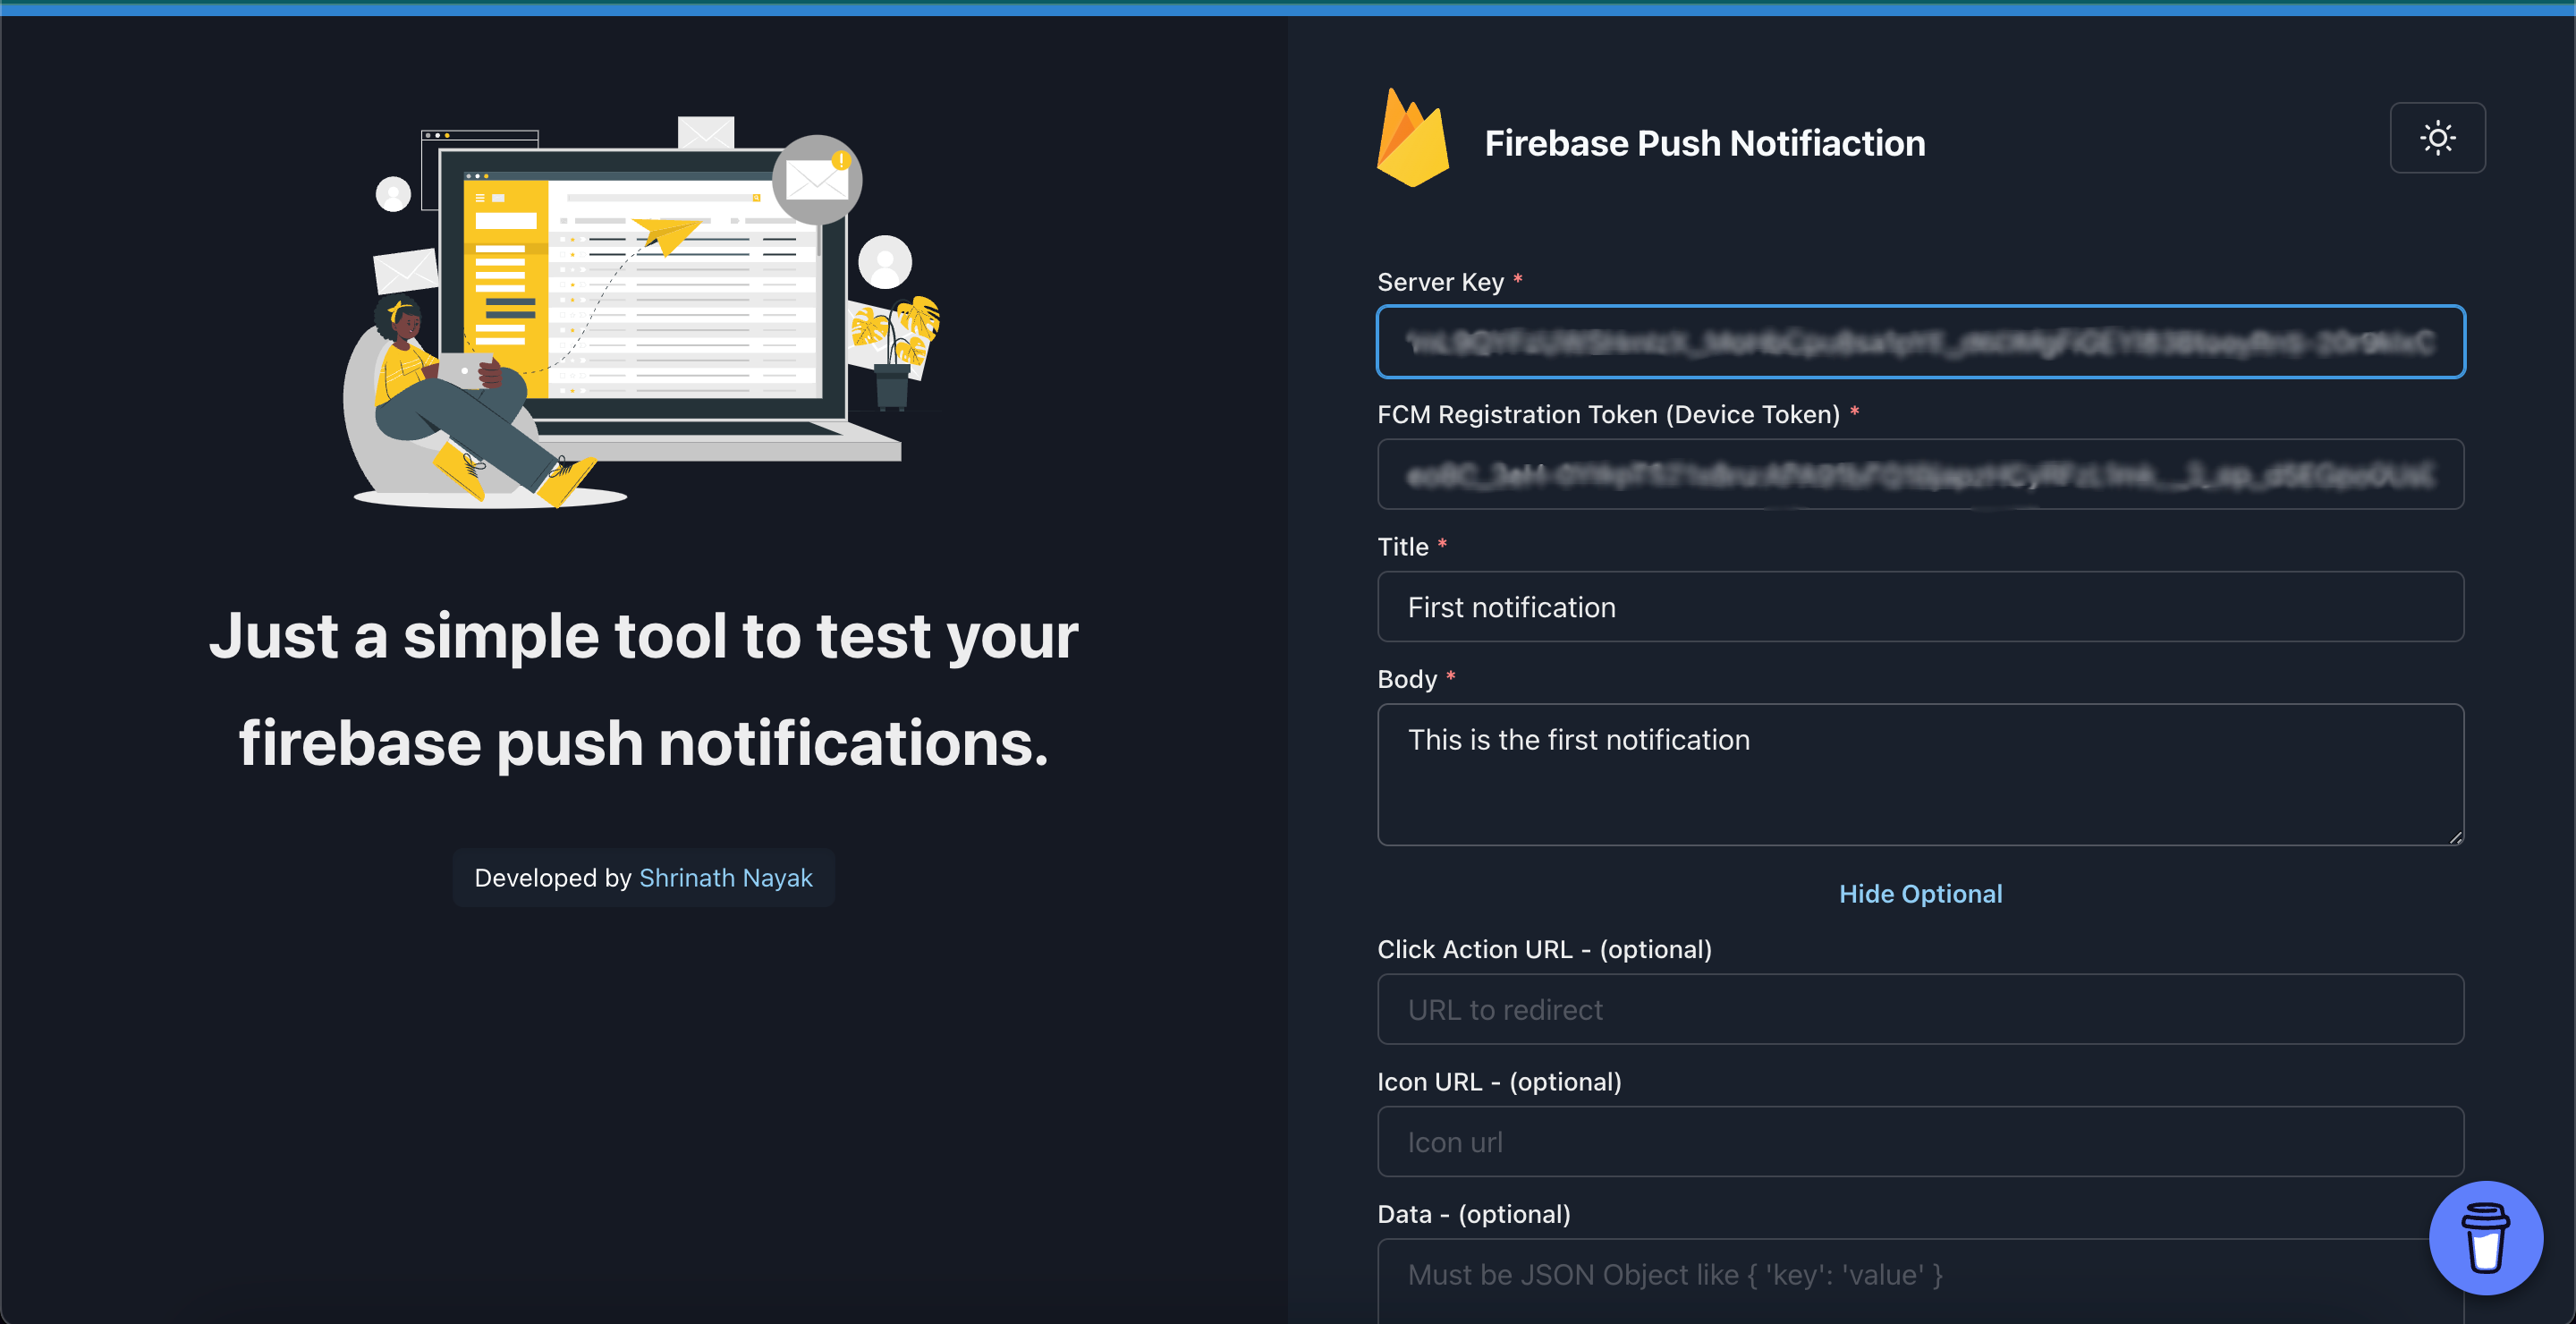
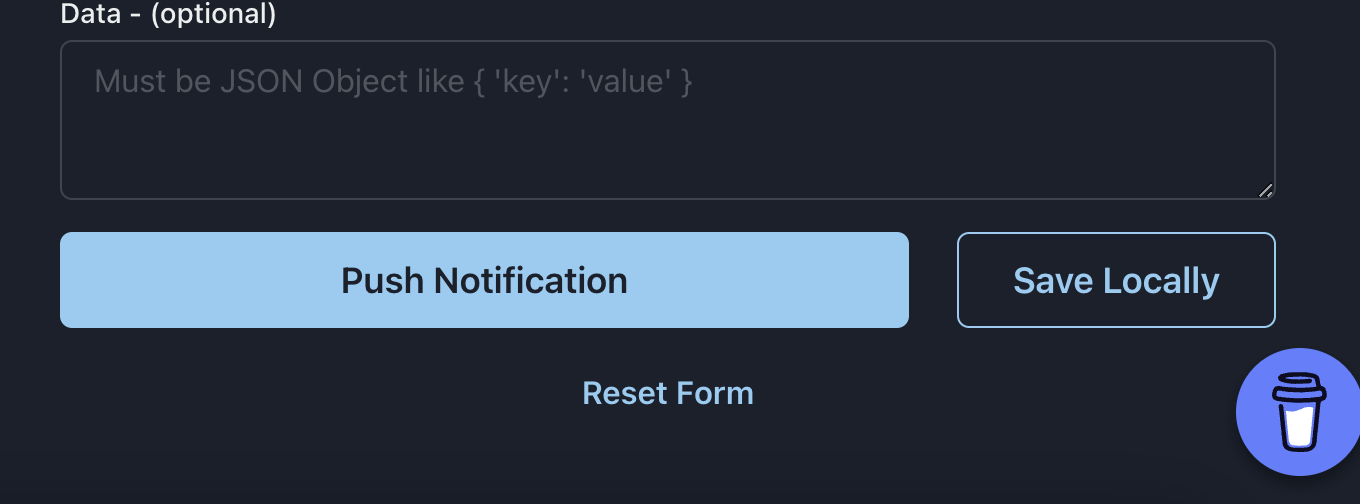
Then just scroll down and click on button Push Notification.
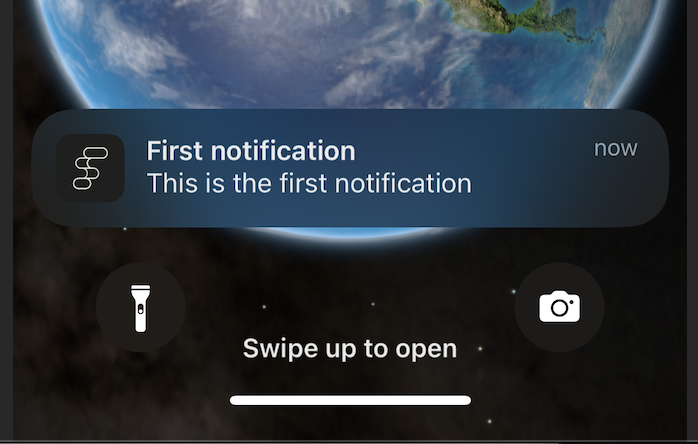
So if you’re not recieving the notification try to review the blog on every step. Now are done now with the iOS app.
Configuration for Android app
Firebase project setup (Android)
The process for creating the app for android on firebase console is similar as we did before for the iOS app, but not all.
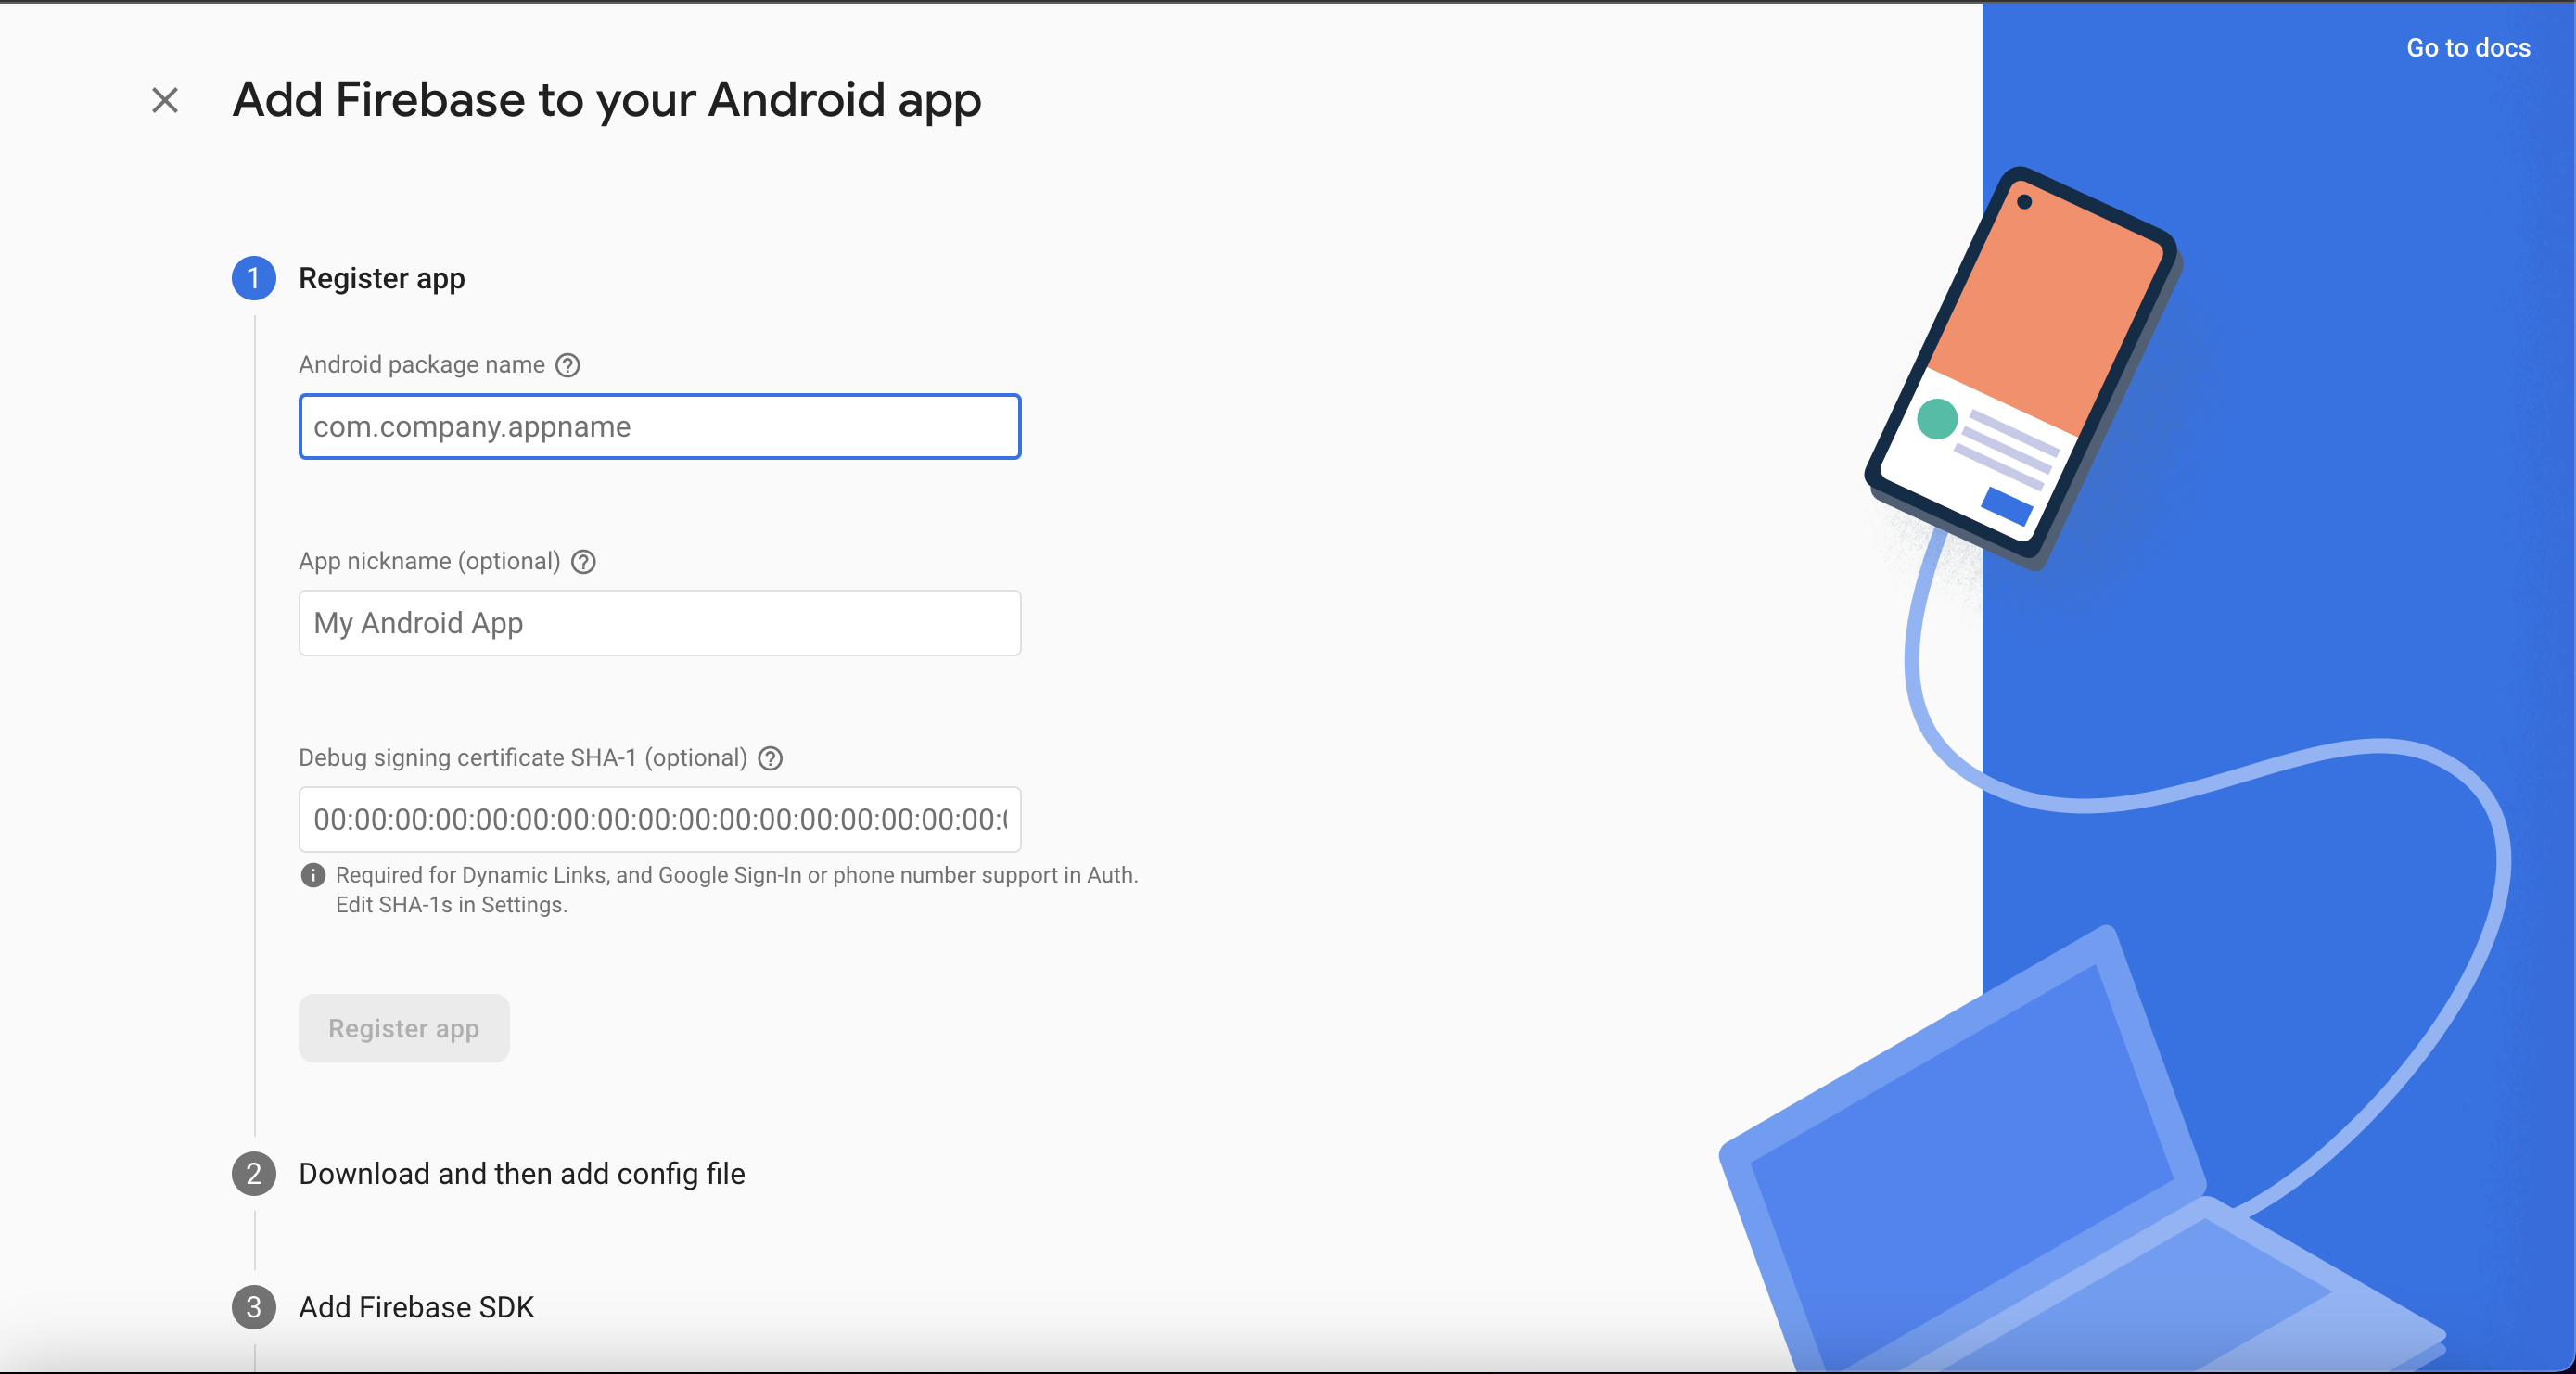
The android package name can be found on this path: android/app/src/main/AndroidManifest.xml
<manifest xmlns:android="http://schemas.android.com/apk/res/android"
  package="com.notificationsApp">
You can just copy and paste it to the firebase console input.
After that please ignore all upcomming steps like (Download and then add config file, Add Firebase SDK and Next steps) because on this blog I will explain it on details how to do every step that you need.
For configuring the android app to recieve remote notifications that are driven from a specific server we will need to do some changes on the android files.
The first thing that you should do is to go at this path: android/app/build.gradle and add this code block:
    // For React Native Push Notification
    implementation platform('com.google.firebase:firebase-bom:29.0.0')
    implementation 'com.google.firebase:firebase-messaging'
    implementation project(":react-native-push-notification")
Then we will need to go at this path android/app/src/main/AndroidManifest.xml and to paste the code:
<uses-permission android:name="android.permission.VIBRATE" />
    <uses-permission android:name="android.permission.RECEIVE_BOOT_COMPLETED"/>
    <uses-permission android:name="android.permission.WAKE_LOCK" />
    <permission
     android:name="${applicationId}.permission.C2D_MESSAGE"
     android:protectionLevel="signature" />
    <uses-permission android:name="${applicationId}.permission.C2D_MESSAGE" />
<meta-data  android:name="com.dieam.reactnativepushnotification.notification_channel_name"
      android:value="channel-id-1"/>
      <meta-data  android:name="com.dieam.reactnativepushnotification.notification_channel_description"
      android:value="YOUR NOTIFICATION CHANNEL DESCRIPTION"/>
     <receiver
      android:name="com.google.android.gms.gcm.GcmReceiver"
      android:exported="false"
      android:permission="com.google.android.c2dm.permission.SEND" >
     <intent-filter>
     <action android:name="com.google.android.c2dm.intent.RECEIVE" />
     </intent-filter>
     </receiver>

<meta-data  android:name="com.dieam.reactnativepushnotification.notification_foreground"
                    android:value="false"/>
      <meta-data  android:name="com.dieam.reactnativepushnotification.notification_color"
        android:resource="@color/white"/> <!-- or @android:color/{name} to use a standard color -->
      <meta-data  android:name="com.dieam.firebase.messaging.default_notification_channel_id"
        android:resource="@string/default_notification_channel_id"/>
      <receiver android:name="com.dieam.reactnativepushnotification.modules.RNPushNotificationActions" android:exported="false" />
      <receiver android:name="com.dieam.reactnativepushnotification.modules.RNPushNotificationPublisher" android:exported="false" />
      <receiver android:name="com.dieam.reactnativepushnotification.modules.RNPushNotificationBootEventReceiver" android:exported="false">
        <intent-filter>
                <action android:name="android.intent.action.BOOT_COMPLETED" />
                <action android:name="android.intent.action.QUICKBOOT_POWERON" />
                <action android:name="com.htc.intent.action.QUICKBOOT_POWERON"/>
        </intent-filter>
      </receiver>
      <service
          android:name="com.dieam.reactnativepushnotification.modules.RNPushNotificationListenerService"
          android:exported="false" >
        <intent-filter>
                <action android:name="com.google.firebase.MESSAGING_EVENT" />
        </intent-filter>
      </service>
      <service android:name="com.dieam.reactnativepushnotification.modules.RNPushNotificationRegistrationService"/>
If you’re having problems with ordering the codes above with the code inside of your AndroidManifest.xml file please use the code below:
<manifest xmlns:android="http://schemas.android.com/apk/res/android"
  package="com.notificationsApp">

    <uses-permission android:name="android.permission.INTERNET" />
    <uses-permission android:name="android.permission.ACCESS_NETWORK_STATE" />
    <uses-permission android:name="android.permission.VIBRATE" />
    <uses-permission android:name="android.permission.RECEIVE_BOOT_COMPLETED"/>
    <uses-permission android:name="android.permission.WAKE_LOCK" />
    <uses-permission android:name="android.permission.FOREGROUND_SERVICE"/>
    <permission
     android:name="${applicationId}.permission.C2D_MESSAGE"
     android:protectionLevel="signature" />
    <uses-permission android:name="${applicationId}.permission.C2D_MESSAGE" />
    <application
      android:name=".MainApplication"
      android:label="@string/app_name"
      android:icon="@mipmap/ic_launcher"
      android:roundIcon="@mipmap/ic_launcher"
      android:allowBackup="false"
      android:screenOrientation="portrait"
      android:theme="@style/AppTheme"
      android:usesCleartextTraffic="true">
      <meta-data  android:name="com.dieam.reactnativepushnotification.notification_channel_name"
      android:value="channel-id-1"/>
      <meta-data  android:name="com.dieam.reactnativepushnotification.notification_channel_description"
      android:value="YOUR NOTIFICATION CHANNEL DESCRIPTION"/>
     <receiver
      android:name="com.google.android.gms.gcm.GcmReceiver"
      android:exported="false"
      android:permission="com.google.android.c2dm.permission.SEND" >
     <intent-filter>
     <action android:name="com.google.android.c2dm.intent.RECEIVE" />
     </intent-filter>
     </receiver>
      <meta-data
      android:name="com.google.android.gms.version"
      android:value="@integer/google_play_services_version" />
      <activity
        android:name=".MainActivity"
        android:label="@string/app_name"
        android:configChanges="keyboard|keyboardHidden|orientation|screenSize|uiMode"
        android:launchMode="singleTask"
        android:windowSoftInputMode="adjustPan"
        android:exported="true">
        <intent-filter>
            <action android:name="android.intent.action.MAIN" />
            <category android:name="android.intent.category.LAUNCHER" />
        </intent-filter>
      </activity>
      <meta-data  android:name="com.dieam.reactnativepushnotification.notification_foreground"
                    android:value="true"/>
      <meta-data  android:name="com.dieam.reactnativepushnotification.notification_color"
        android:resource="@color/white"/> <!-- or @android:color/{name} to use a standard color -->
      <meta-data  android:name="com.dieam.firebase.messaging.default_notification_channel_id"
        android:resource="@string/default_notification_channel_id"/>
      <receiver android:name="com.dieam.reactnativepushnotification.modules.RNPushNotificationActions" android:exported="false" />
      <receiver android:name="com.dieam.reactnativepushnotification.modules.RNPushNotificationPublisher" android:exported="false" />
      <receiver android:name="com.dieam.reactnativepushnotification.modules.RNPushNotificationBootEventReceiver" android:exported="false">
        <intent-filter>
                <action android:name="android.intent.action.BOOT_COMPLETED" />
                <action android:name="android.intent.action.QUICKBOOT_POWERON" />
                <action android:name="com.htc.intent.action.QUICKBOOT_POWERON"/>
        </intent-filter>
      </receiver>
      <service
          android:name="com.dieam.reactnativepushnotification.modules.RNPushNotificationListenerService"
          android:exported="false" >
        <intent-filter>
                <action android:name="com.google.firebase.MESSAGING_EVENT" />
        </intent-filter>
      </service>
      <service android:name="com.dieam.reactnativepushnotification.modules.RNPushNotificationRegistrationService"/>
    </application>
</manifest>
The next change will be on this path android/app/src/main/res/values/colors.xml.
Create a file called colors.xml and paste the code below:
<resources>
    <color name="white">#FFF</color>
</resources>
Then go to this path android/app/src/main/res/values/strings.xml and paste the code below:
<string name="default_notification_channel_id">channel-id-1</string>At android/build.gradle:
buildscript {
    ext {
        googlePlayServicesVersion = "+" //add this change
        firebaseMessagingVersion = "+" //add this change
        buildToolsVersion = "30.0.2"
        minSdkVersion = 21
        compileSdkVersion = 31
	@@ -10,6 +12,7 @@ buildscript {
        androidXAnnotation = "1.2.0"
        androidXBrowser = "1.3.0"
        googlePlayServicesAuthVersion = "19.2.0"
        supportLibVersion = "23.1.1" //add this change
    }
The last thing that we should do at configurations, if you’re trying to run the app please be sure to clean the project on Android Studio then rebuild the app. After rebuilding your app try to run the app on android emulator that you want.
If you’re getting any error for firebase initialization I will show you a solution about it. If you remember we have created a method on our code that provides the right device token based on the user device, but for now we will need to do another small change to make the Remote Push Notifications on React Native fully functional.
Go to the file of remotePushController.ts and add this code:
const firebaseConfig = {
    apiKey: 'Your api key',
    authDomain: 'your auth domain',
    databaseURL: 'your database url',
    projectId: 'your project id',
    storageBucket: 'your storage bucket',
    messagingSenderId: 'your messaging sender id',
    appId: 'your app id',
    measurementId: 'your measurement id',
  };

  //this condition will check if the app is not initializated before
  if (!firebase.apps.length) {
    firebase.initializeApp(firebaseConfig);
  }
After that just do the same steps as we did on iOS and use the https://testfcm.com/ to push a test notification for your android app. To let you know the device tokens are not similar if you use android or ios app even that the user is with the same credentials.


 Service


