How to programmatically trigger a deployment to Heroku
Introduction
Permalink to "Introduction"Integrating a headless CMS with a frontend like Next.js (or any other client-side framework) is getting more and more common. In this case, we are using Next.js as our delivery platform which fetches data from Contentful CMS.
We are utilizing a feature of Next.js, SSG (Static site generation), which is a very powerful feature that generates all the pages driven by the dynamic content on build time.
This means that we have to find a way to re-build the next.js app for every change we have in the Conentful CMS. In this article, we are going to show how to do just that.
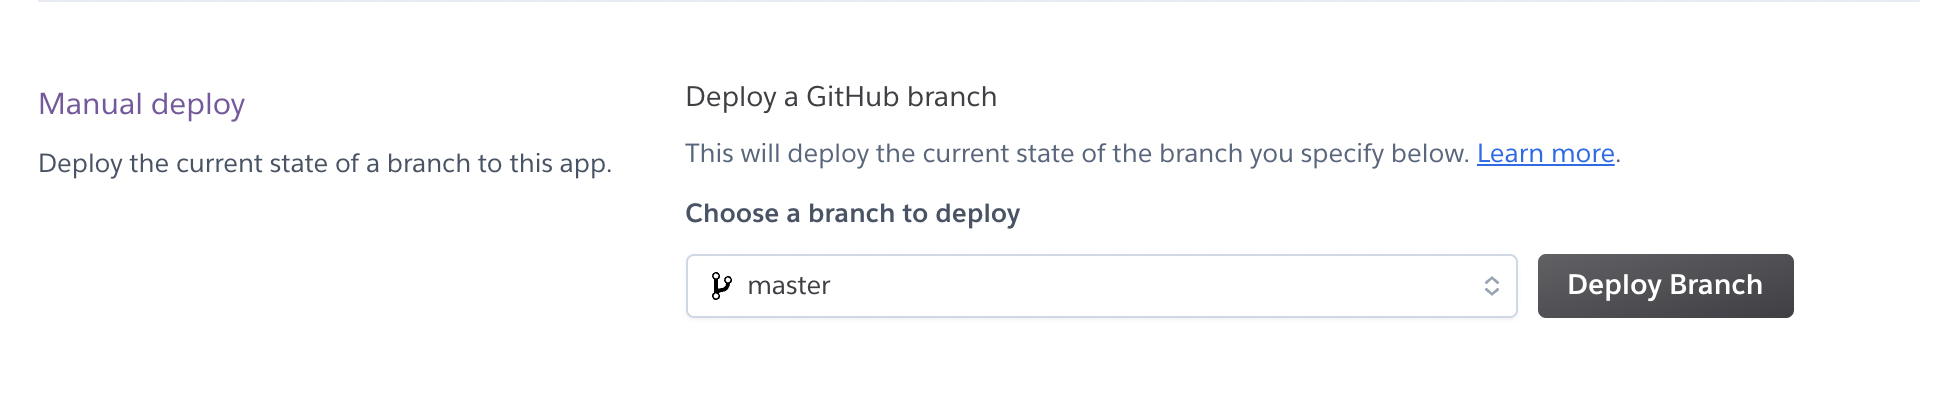
Manually triggering a deployment
Permalink to "Manually triggering a deployment"The next.js app is hosted to Heroku dyno which is linked to a private github repo where the code is hosted.
Heroku platform makes it really easy to manually trigger a deployment, which will fetch the code from the linked github repo, build and deploy it.
Also, for every new commit that is pushed to the github repo, heroku will trigger a deployment.
Programmatically triggering a deployment
Permalink to "Programmatically triggering a deployment"While the ‘Deploy Branch’ is really handy in some cases, we need to find a way to trigger a deployment every time there’s a change to the CMS content.
Unfortunately, Heroku doesn’t have a clear documentation on how to achieve that.
Using chrome dev tools however, we can see the exact endpoint Heroku paltform is using to do the triggering:
POST https://kolkrabbi.heroku.com/apps/<APP_ID>/github/push
{
	branch: 'master'
}
Now we can easily create an api endpoint at our Next.js app that will in turn call the above endpoint.
// page/api/rebuild.js

const handler = async (req, res) => {
  const herokuBuilds = `https://kolkrabbi.heroku.com/apps/${process.env.HEROKU_APP_ID}/github/push`
  const h_response = await fetch(herokuBuilds, {
    method: 'POST',
    headers: {
      'Content-Type': 'application/json',
      Authorization: `Bearer ${process.env.HEROKU_ACCESS_TOKEN || ''}`
    },
    body: JSON.stringify({
      branch: 'master'
    })
  })

  if (h_response.ok)
    return res.send(`OK: triggered manual branch deployment from Heroku. `)

  return res.send("Something went wrong. Can't trigger page rebuild.")
}
As you can see from the code above, we need to have access to:
- HEROKU_APP_ID - The app’s UUID which can be fetched with
heroku apps:info --jsoncommand. - HEROKU_ACCESS_TOKEN - User access token. Go to https://dashboard.heroku.com/account and navigate to the API Key section.
Now that we have an endpoint ready, all we need to do is call this endpoint every time content changes at Contentful CMS.
Webhooks
Permalink to "Webhooks"Contentful offers a simple way to create webhooks through their platform.
Navigate to “Settings” > “Webhooks” > “Add Webhook”
Give a name to the webhook and specify the events on when you want this webhook to be fired:

For the URL of the webhook, put the endpoint we just created:
https://YOUR_HEROKU_APP/api/rebuild
And save the webhook.
That should be it. Now, every time you make a change to Contentful content, heroku should automatically start fetching the latest version of your branch.

Security
Permalink to "Security"It's not a good idea to let the endpoint be publicly accessible. Someone can easily miss-use it by sending hundreds of requests to it. That maybe be a huge problem especially if you are using a paid Heroku plan.
You can be creative in ways to protect this endpoint but we are going to show a basic one.
The endpoints expects a `x_webhook_access` key to be present in the request headers. And then it matches that one with a UUID value from the `.env` file.
const handler = async (req: any, res: any) => {
  if (
    !req.headers.hasOwnProperty('x_webhook_access') ||
    req.headers['x_webhook_access'] != process.env.X_WEBHOOK_ACCESS
  ) {
    return res.status(401).end(`Unauthorized: rebuild triggering not allowed.`)
  }

  // ...
}
Then, in the Conentful dashboard, edit your webhook to include the custom header key `x_webhook_access`:

If you have any questions, feel free to send me an email at gzim@centralsoft.io and I will be happy to help.