Deploy a PostgreSQL Database to Heroku on a Node.js App + Sequelize
Heroku Postgres is a SQL database service that lets you utilize a relational database like PostgreSQL on the Heroku platform.
Heroku provides a free PostgreSQL database hosting option. This might be useful if you're starting a new project or just quickly need a hosted database for experimenting, prototyping, or proofs-of-concept.
This article does not cover creating a PostgreSQL database or setting up an express application.
Create new application
Permalink to "Create new application"The first thing you should do is build a new Heroku application. Log in to your Heroku account and navigate to the dashboard.
You may either access your current apps (if you have any) from the dashboard or build new ones.
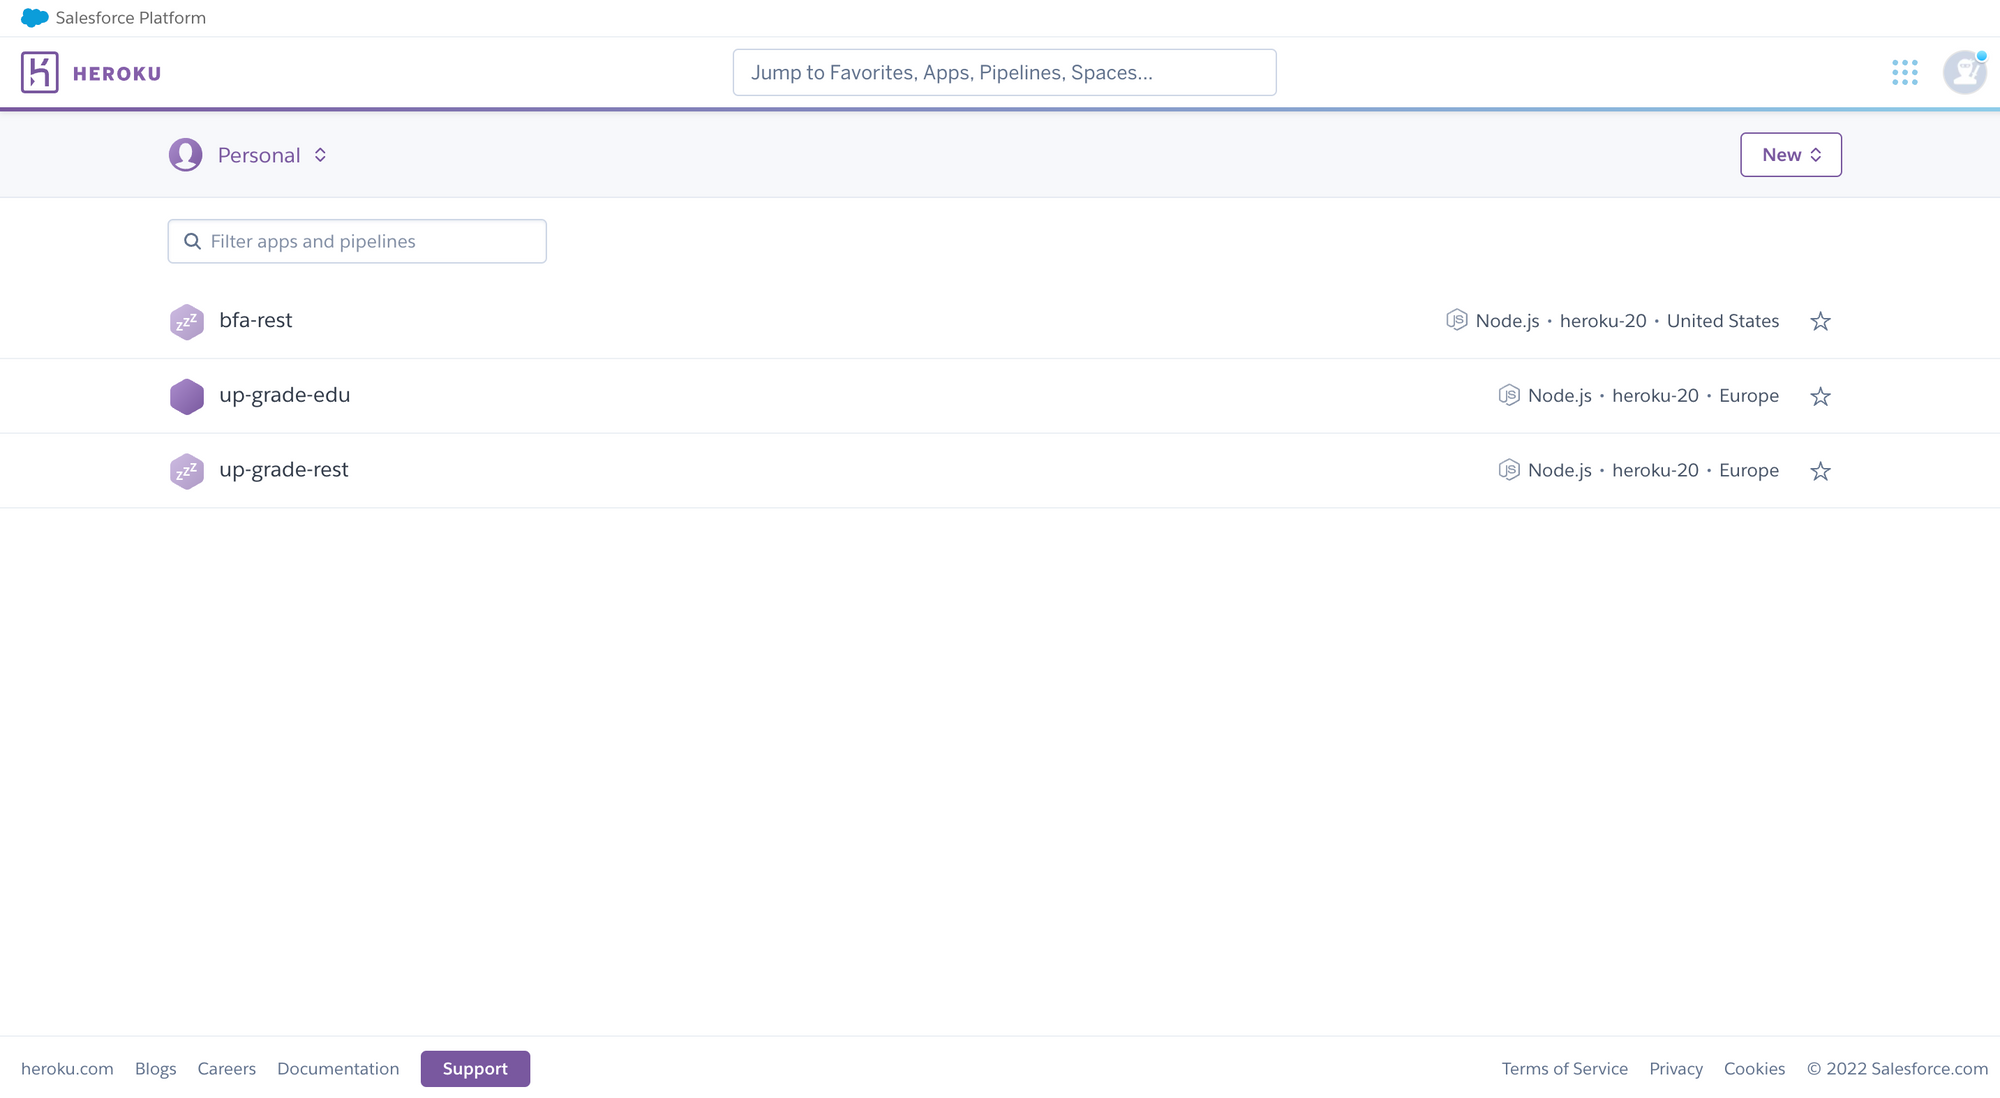
Assuming that you don’t have any current apps, we are going to create one by clicking on the New button and choose Create new app
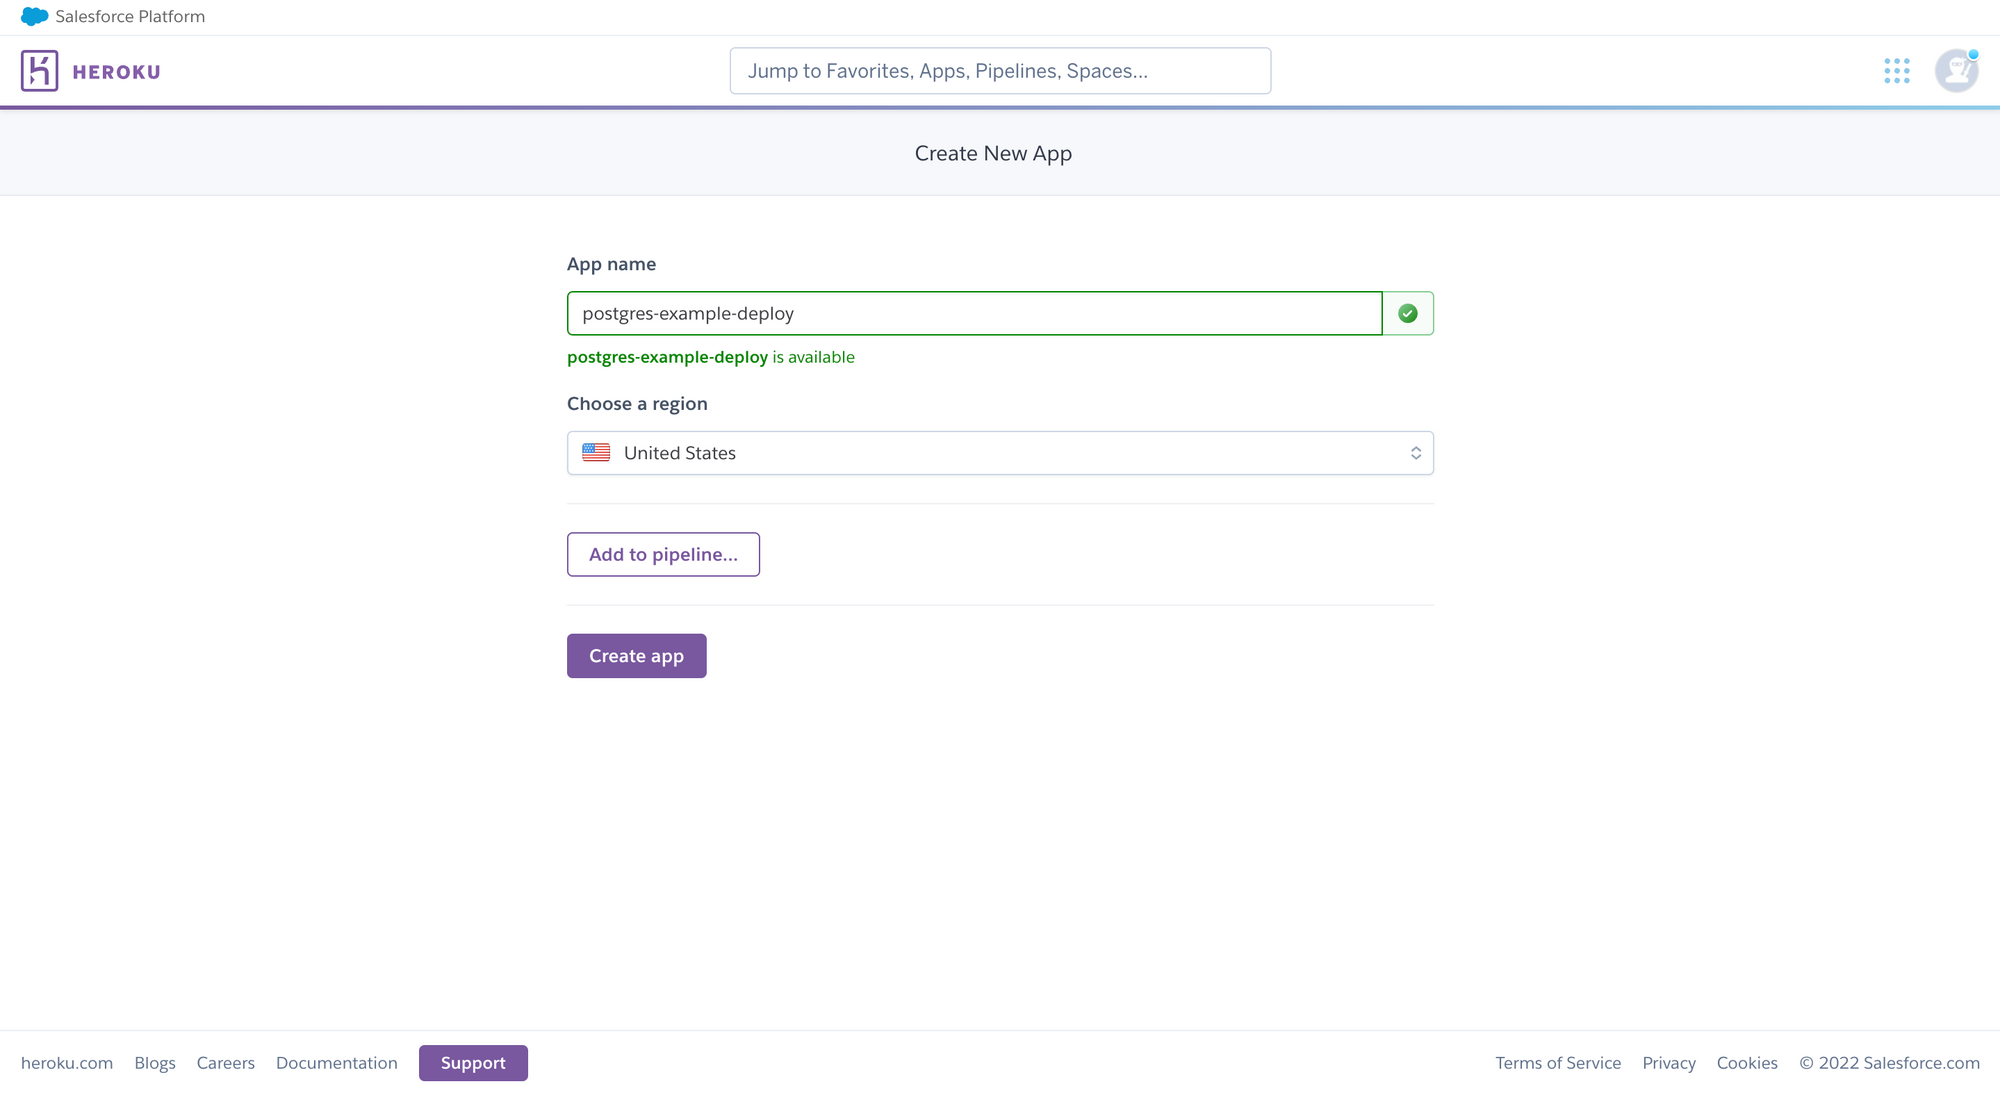
Here, give it a name and choose a region, and then click Create app. Heroku creates the app in the background once you click the button, and then it leads you to the app's dashboard.
Add a PostreSQL database
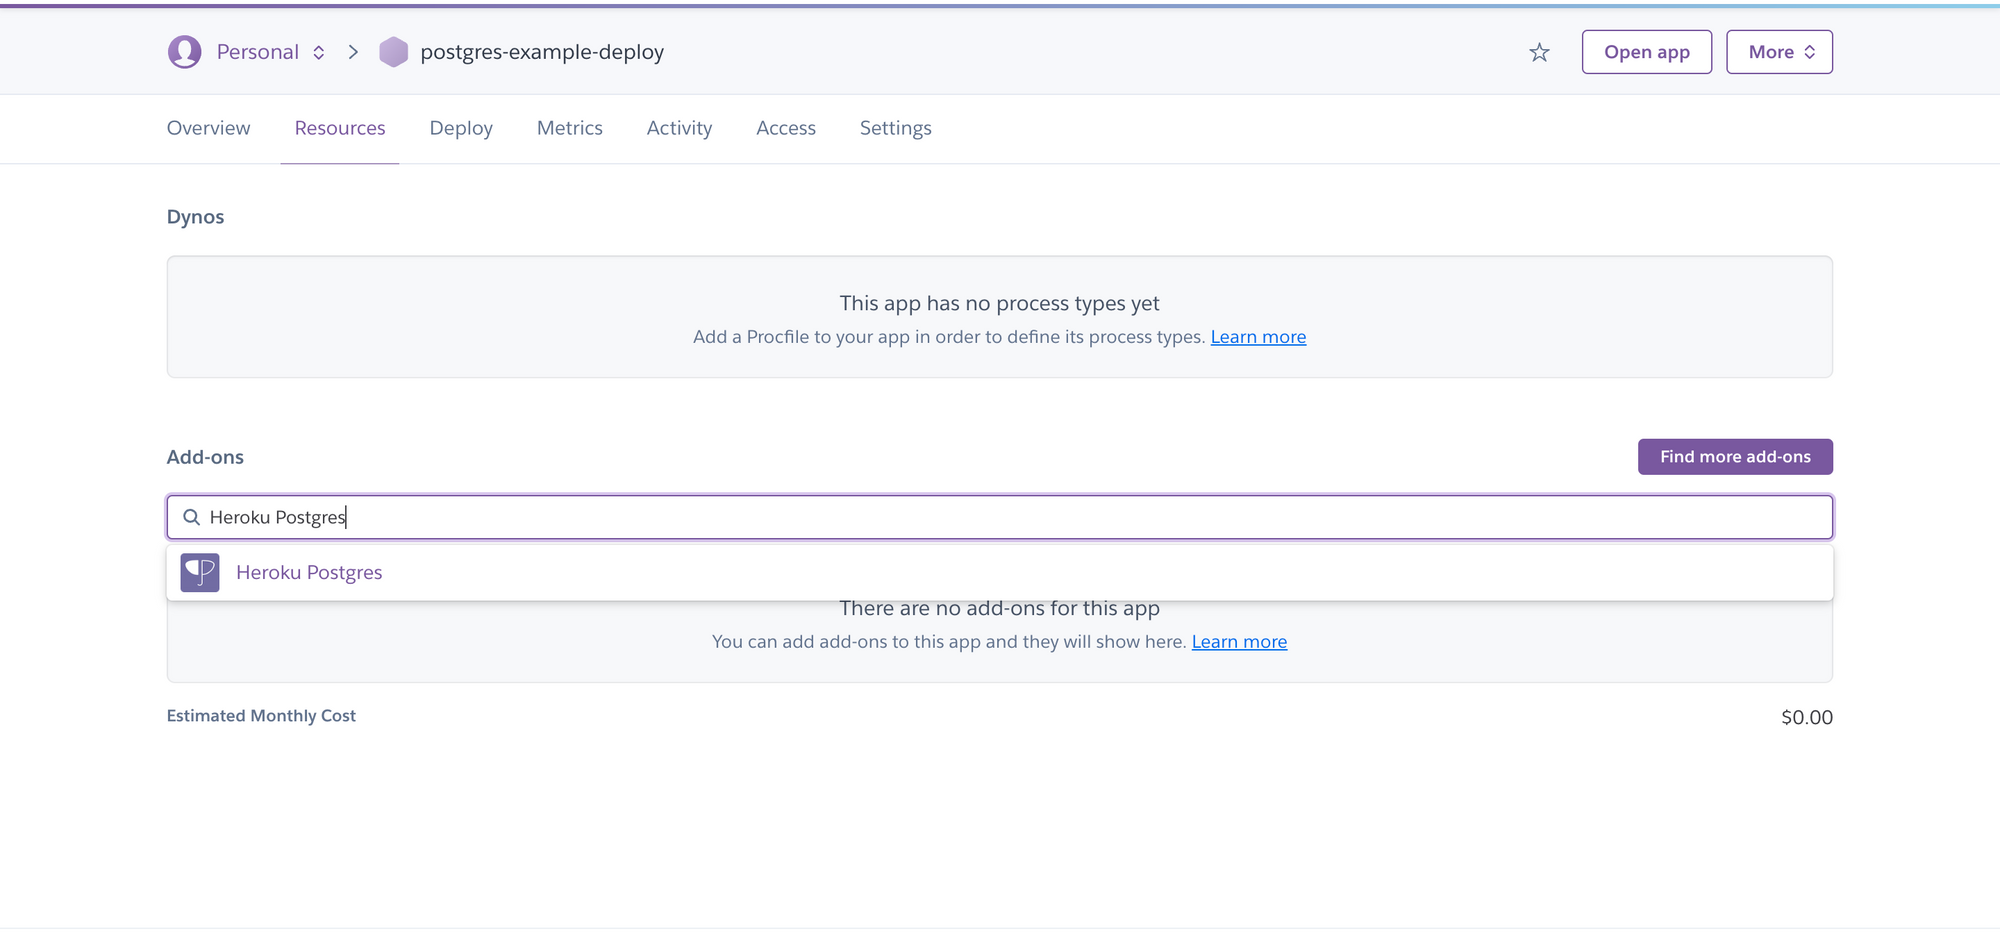
Permalink to "Add a PostreSQL database"To connect a PostgreSQL database to the app you just established, go to the Resources tab in the dashboard's header. Then, in the Add-ons search box, type Heroku Postgres.
The next window prompts you to select a database price plan. Select Hobby Dev - Free and then click Provision:
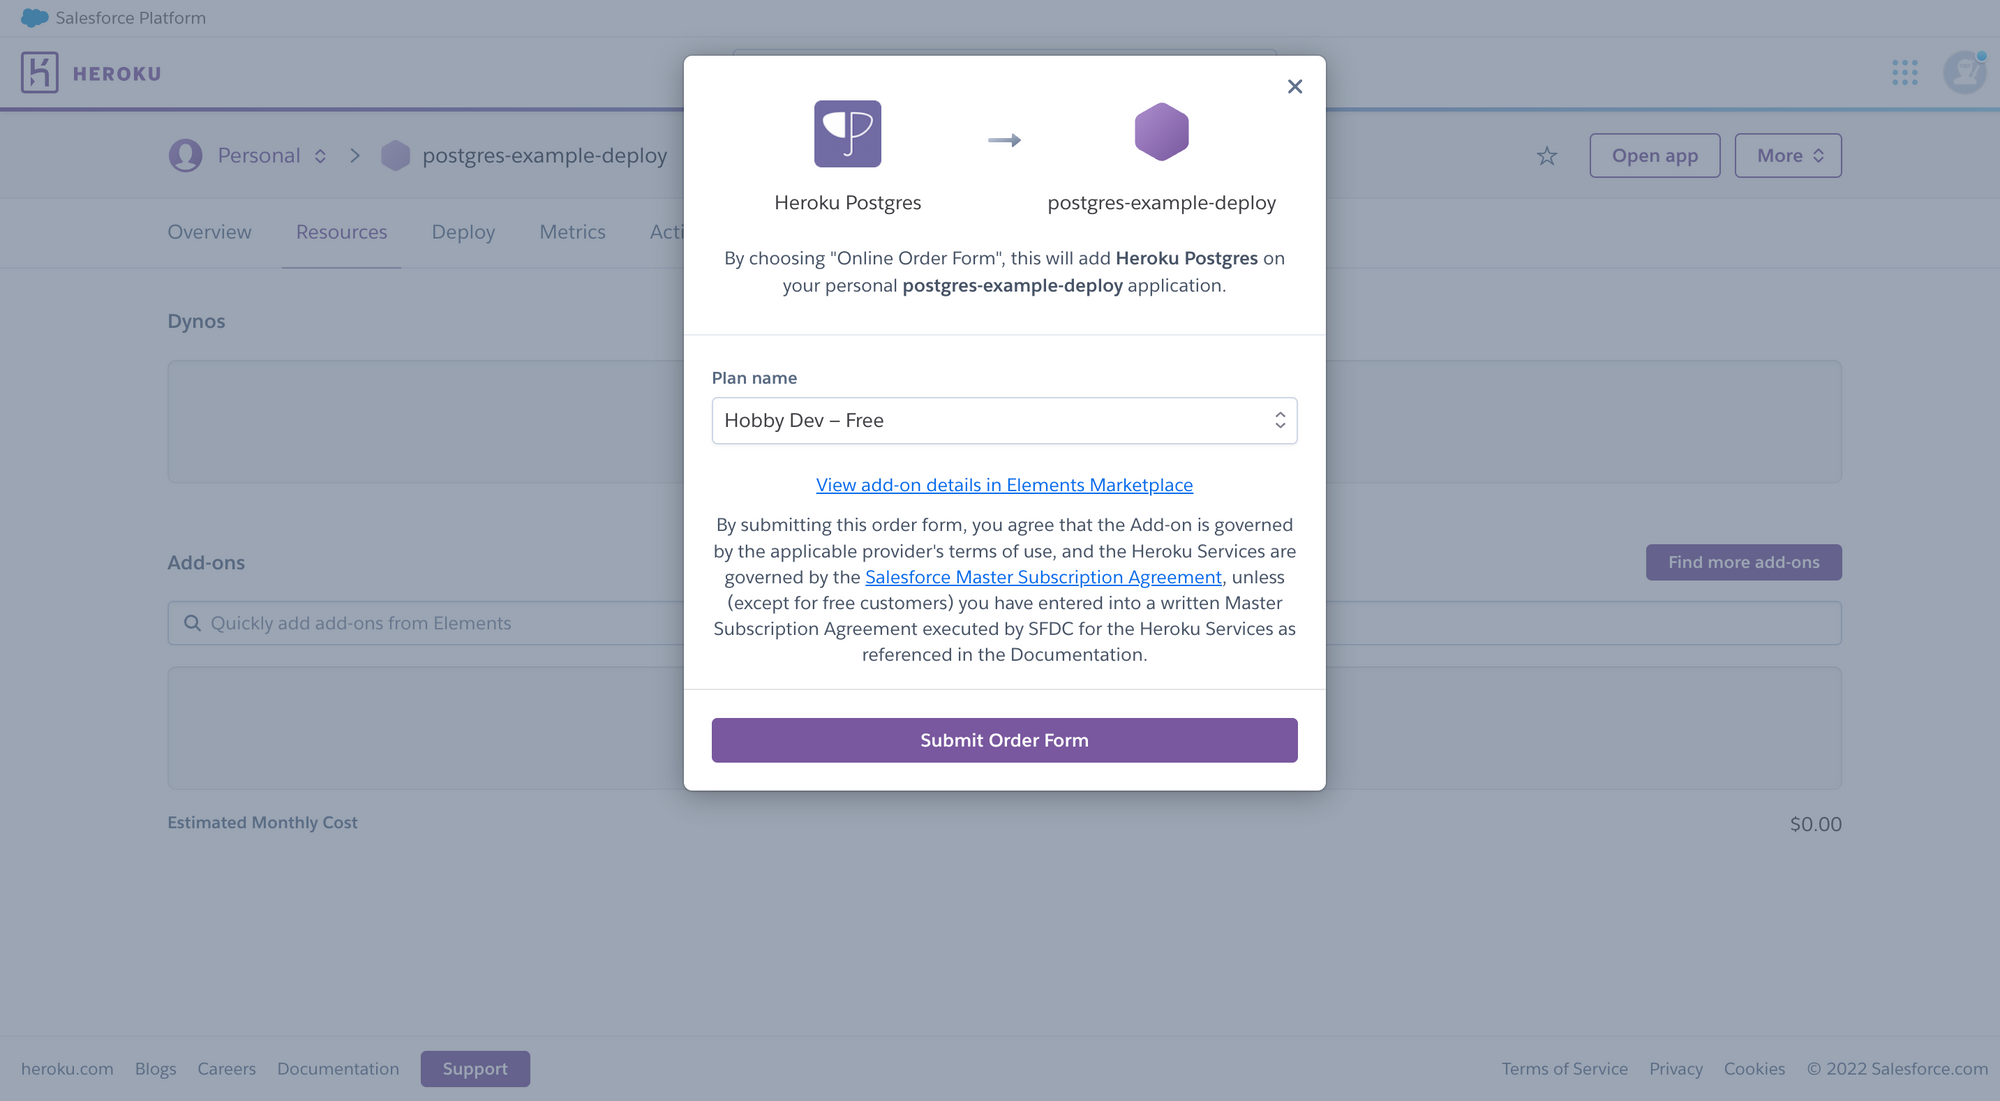
After that, simply click Submit Order Form. The PostgreSQL database has been constructed and is now available for usage.
Database credentials
Permalink to "Database credentials"To connect your app to the database, you must first obtain the database credentials. Return to your application dashboard and choose Heroku Postgres.
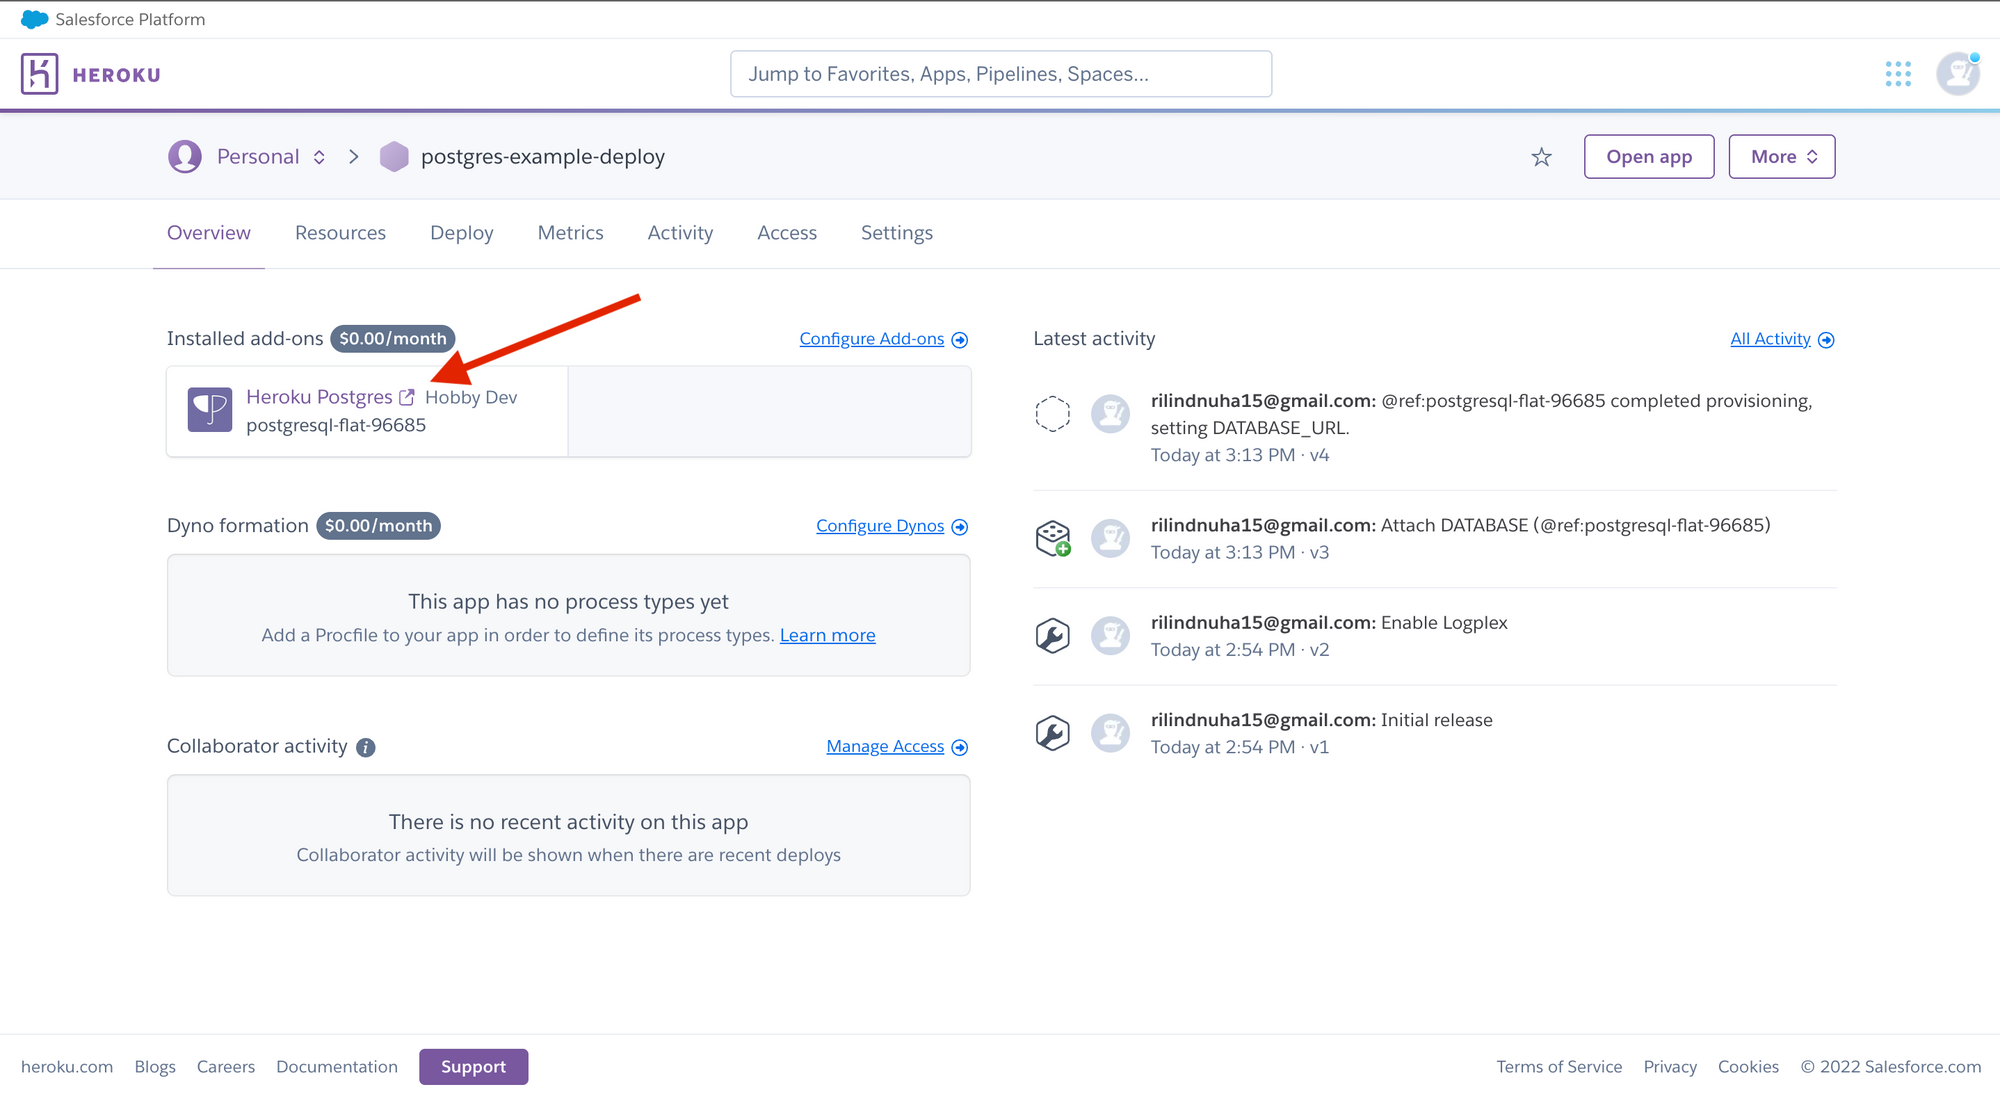
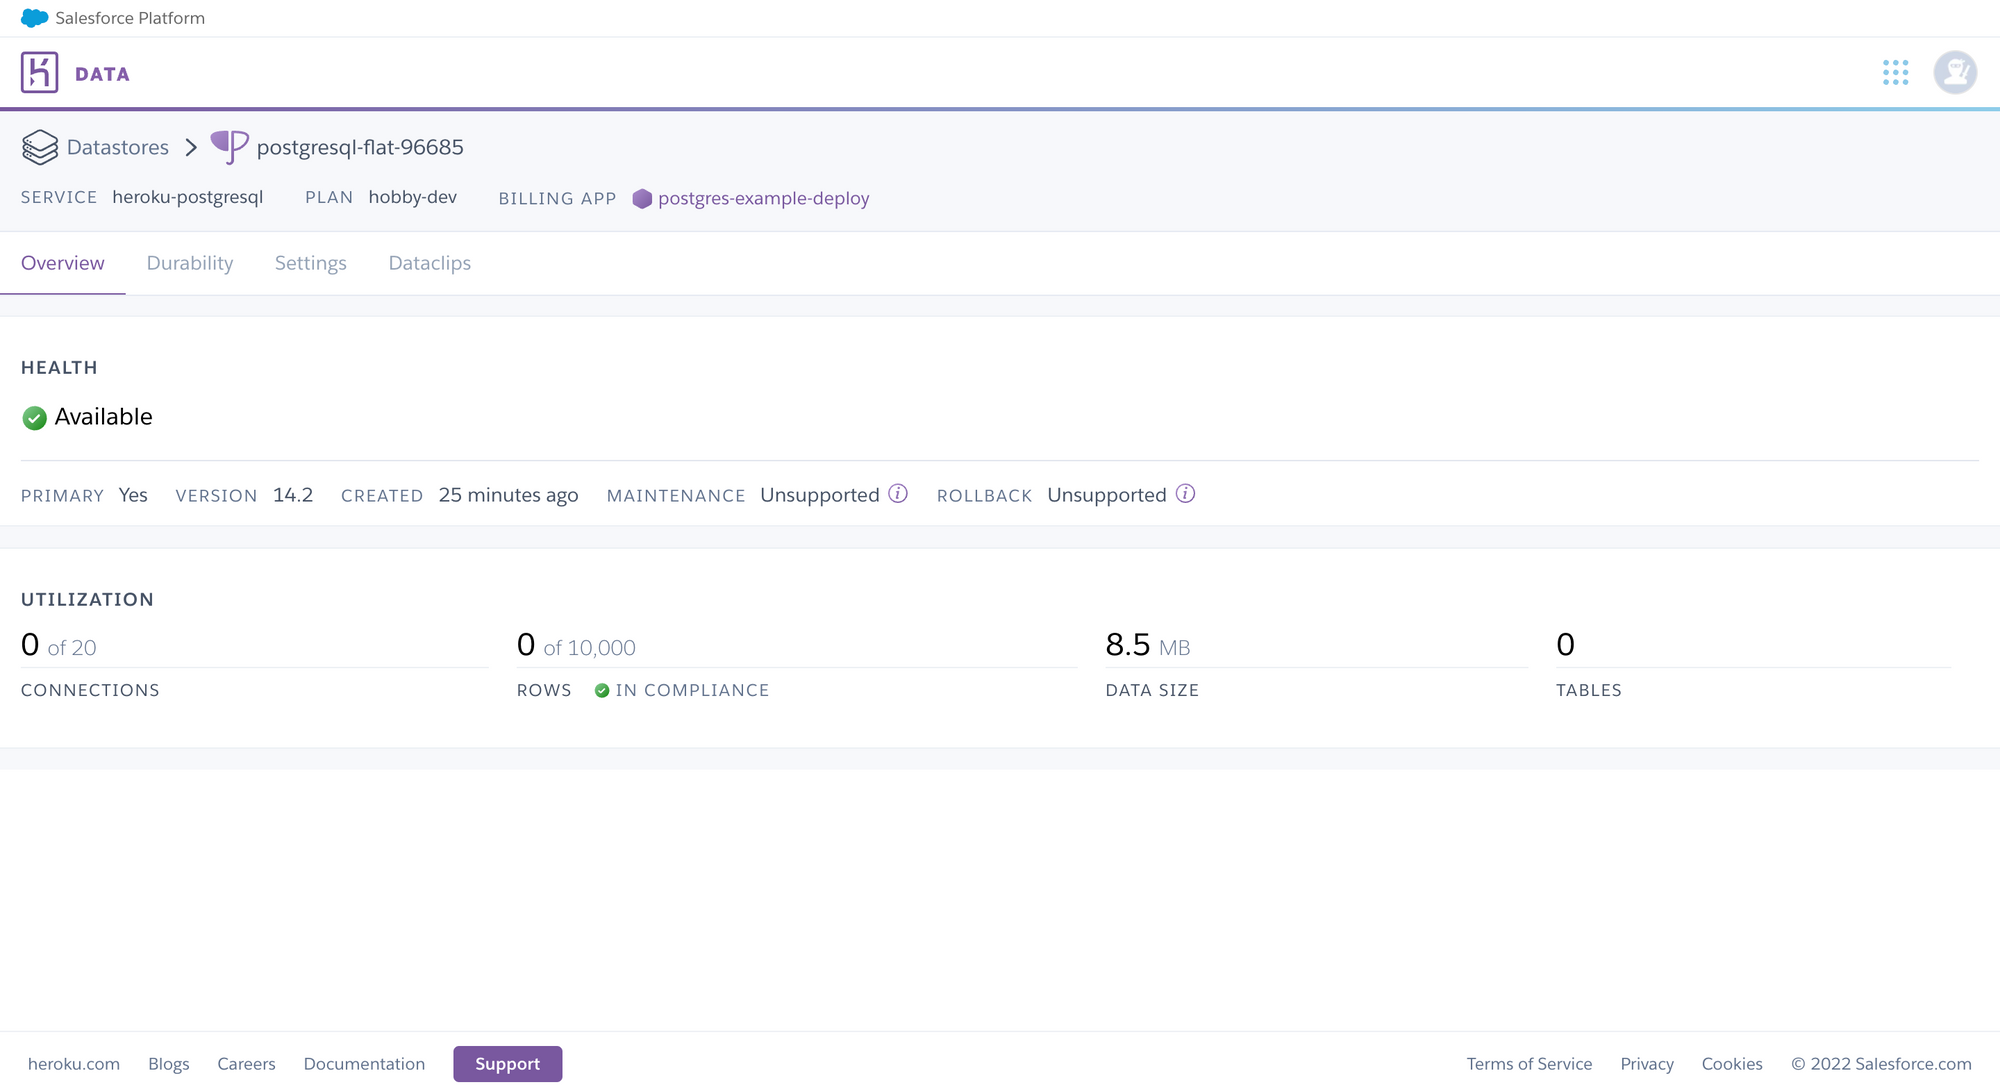
This leads you to the dashboard page of the database. This page contains information such as:
- health of the database
- number of connections
- data size
Click on the Settings button to retrieve database details.
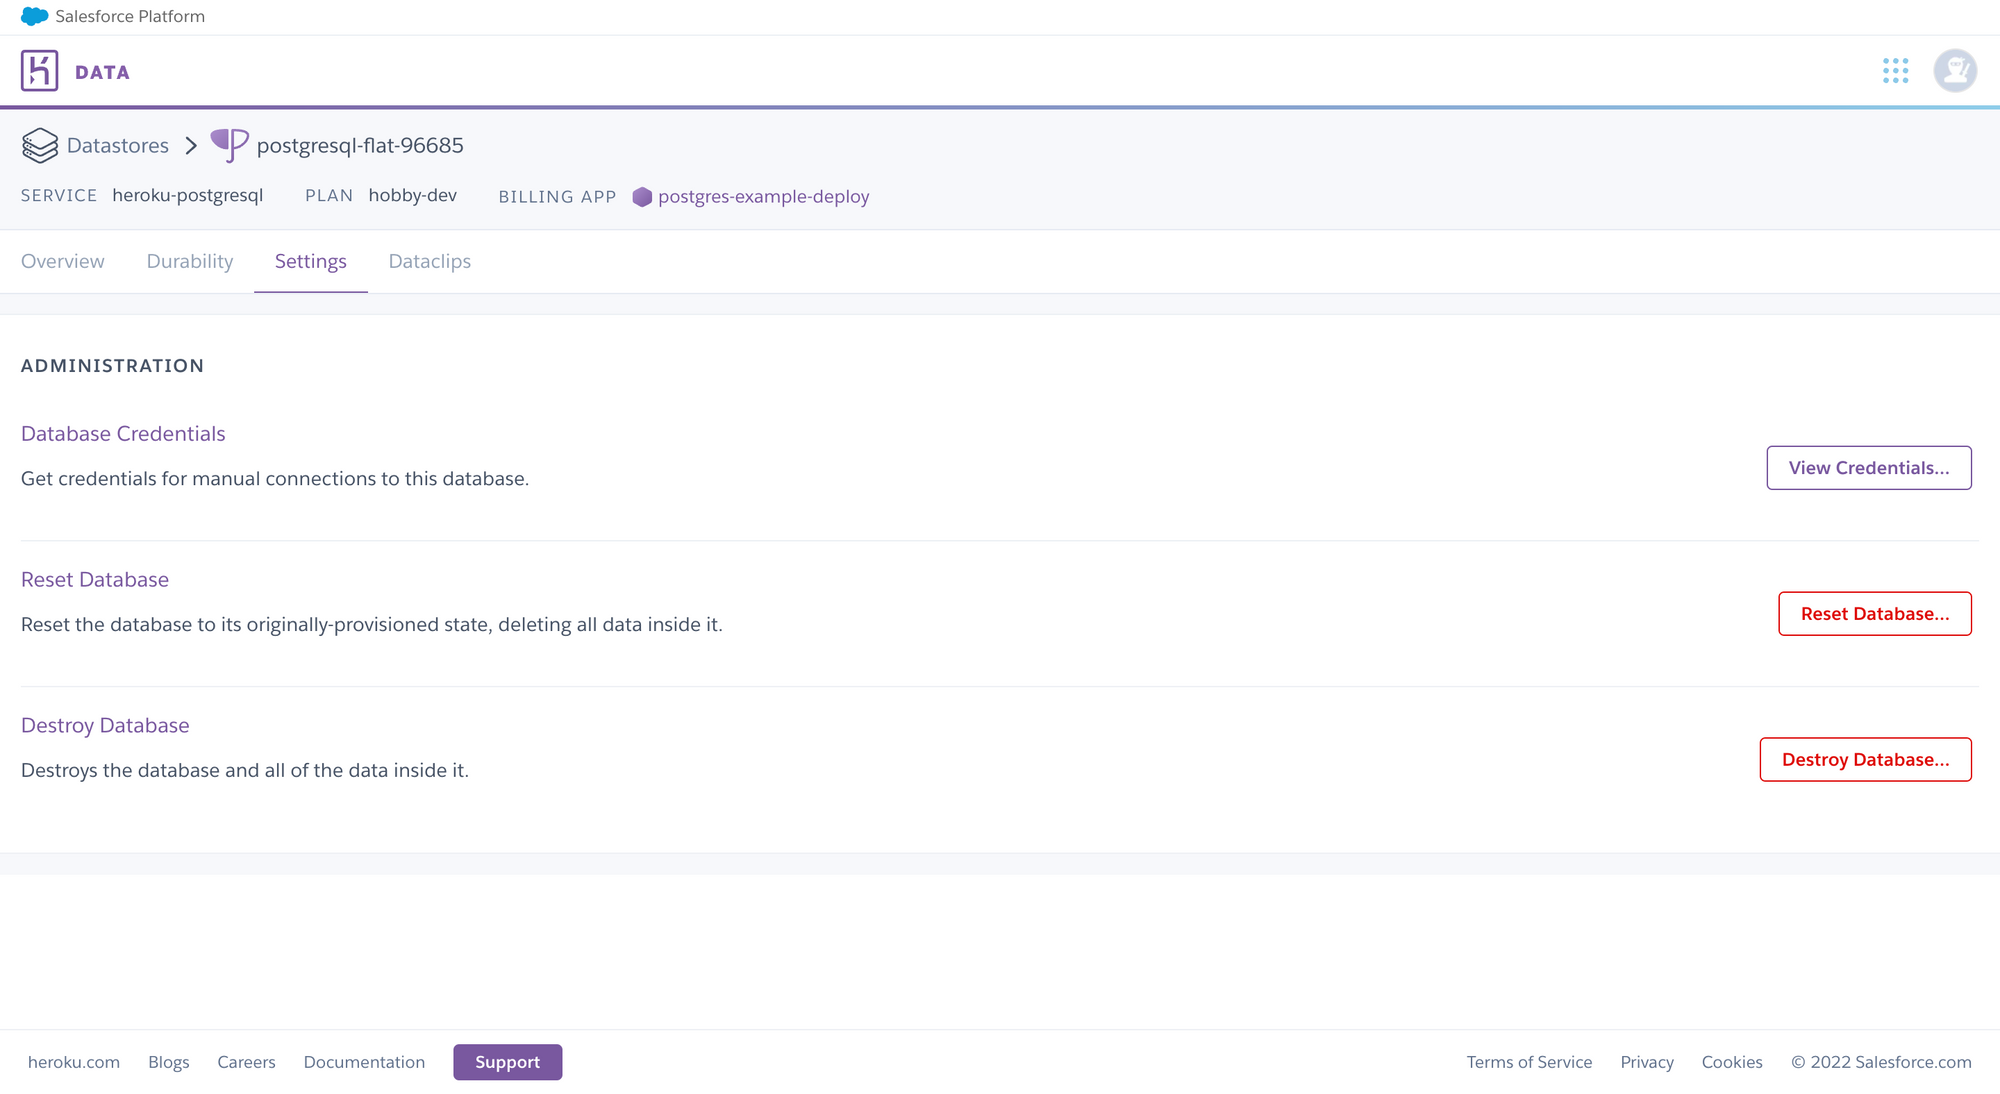
Then click the View Credentials button to see your PostgreSQL database's credentials.
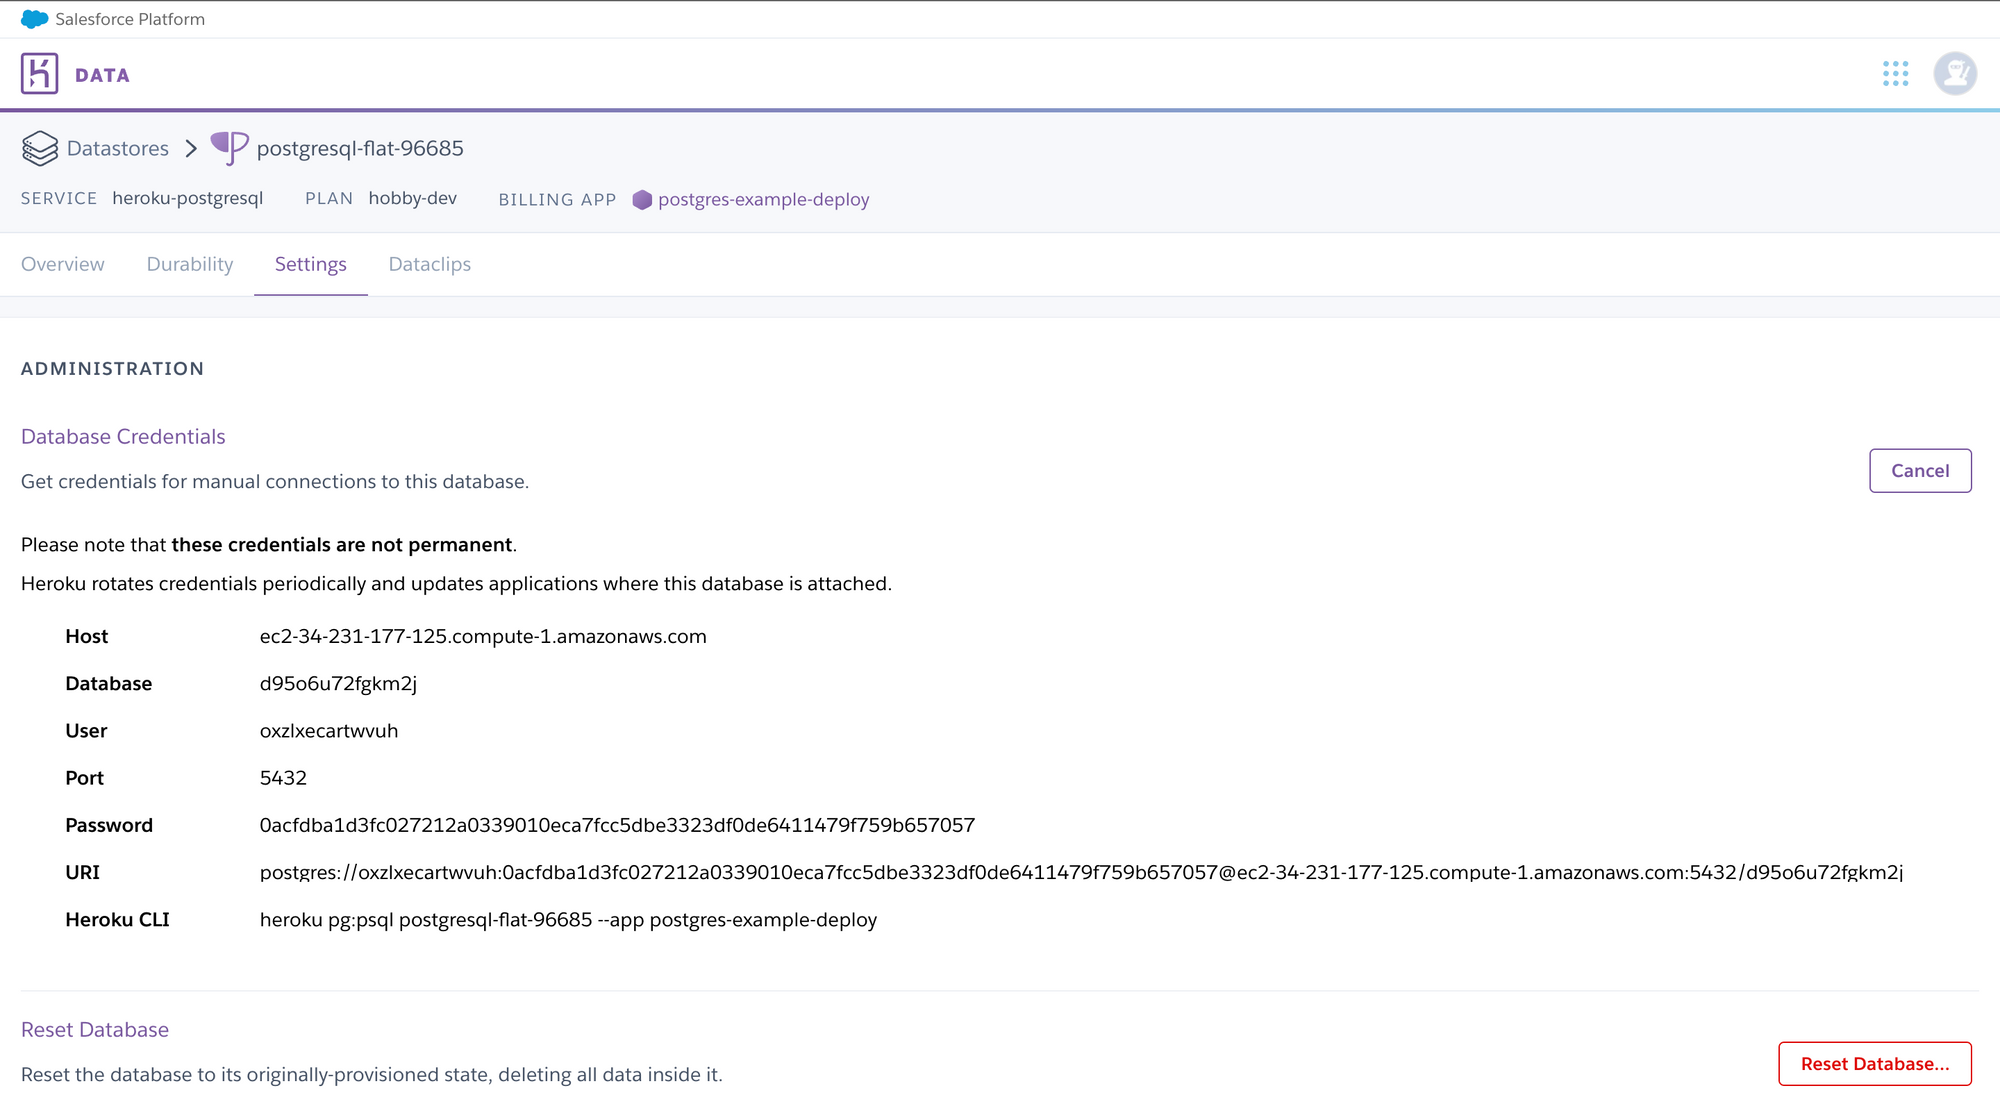
Here we have the database credentials that you will use to establish the connection to Postgres.
Connect to the database
Permalink to "Connect to the database"In my Node.js app, I am using Sequelize as an ORM, and also here I am going to demonstrate how to connect to your Heroku Postgres from your Node app using Sequelize, but it’s pretty much the same thing if you are using other options.
Establish the connection via Sequelize
Permalink to "Establish the connection via Sequelize"The next step is to update the "Production" section of your config.js file. This may be found in your DB folder, under Config. Set the variables to use the correct credentials provided by Heroku Postgres on Production:
production: {
    username: DB_USERNAME_PROD,
    password: DB_PASSWORD_PROD,
    database: DB_NAME_PROD,
    host: DB_HOST_PROD,
    dialect: 'postgres',
  },
After that, you can use these credentials to initialize a sequelize client and connect to Postgres.
const { Sequelize } = require('sequelize')
const { DB_HOST, DB_NAME, DB_USERNAME, DB_PASSWORD } = process.env

export const sequelize = new Sequelize(DB_NAME!, DB_USERNAME!, DB_PASSWORD, {
  host: DB_HOST,
  dialect: 'postgres',
  logging: false,
})

export const sequelizeConnection = async () => {
  try {
    sequelize
      .authenticate()
      .then(() => {
        console.log('Postgres connection has been established successfully.')
      })
  } catch (error) {
    console.error('Unable to connect to the database:', error)
}
If you want to use the same-named configs (DB_USERNAME, DB_PASSWORD,..etc) that you most probably have in your .env file, you will have to register them in your Node.js app config vars. You can find them under the Settings menu on the dashboard.
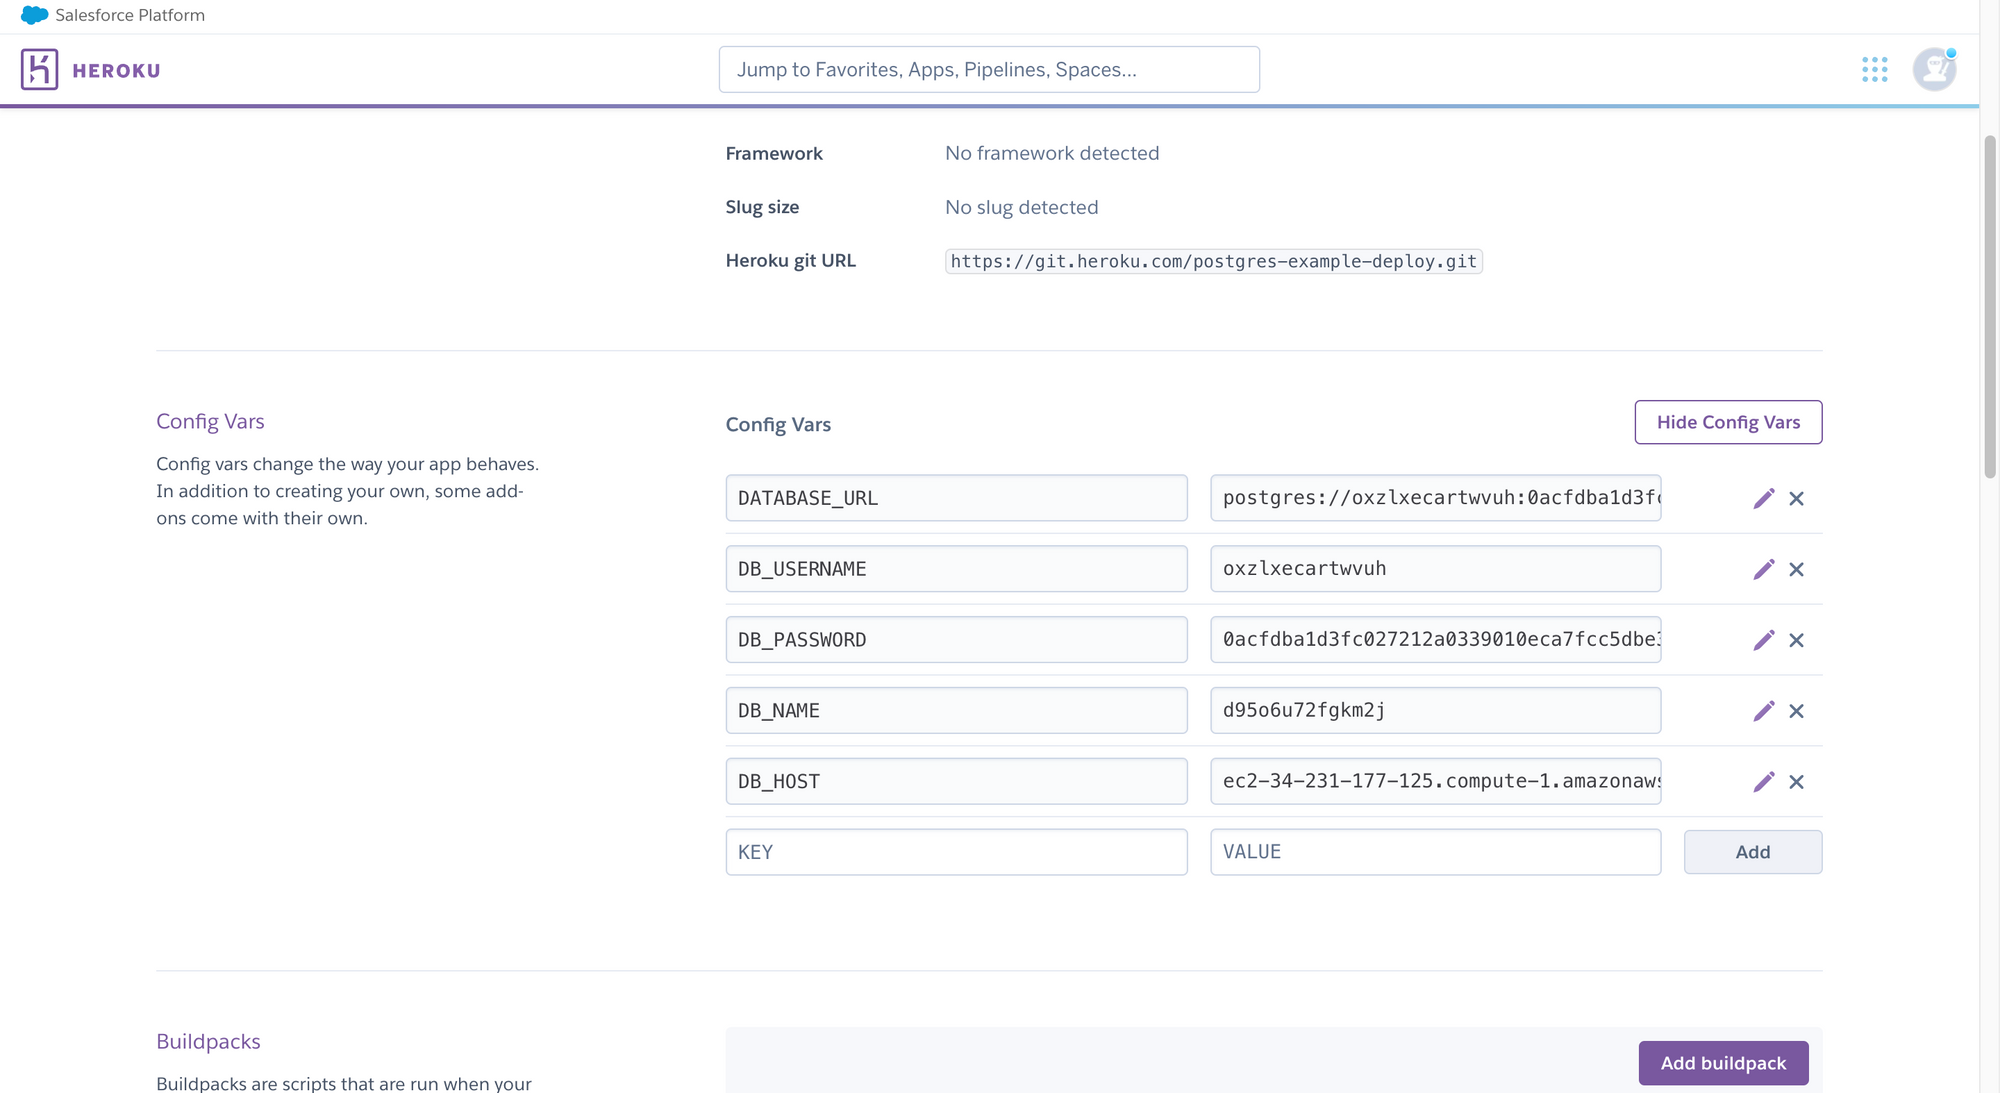
Like this, you can register all the configs that you need in your Node app, and then when the app is running in production, it will look for those configs defined there.
Deploy your app
Permalink to "Deploy your app"You can now use the following command to deploy your main branch to Heroku:
git push heroku <your_main_branch>
you can also do it the other way around by linking your GitHub account in your Heroku dashboard's Deploy section and then running a deployment from there.
After your deployment has been initiated, you will want to check if the build and deployment was successful. You can view your logs in real-time by running this command on your terminal:
heroku logs --tail --app app_name
SSL Issue
Permalink to "SSL Issue"If you ran the previous command in your cli, you most probably saw an exception thrown like this:
ConnectionError [SequelizeConnectionError]: no pg_hba.conf entry for host "54.173.36.226", user "tbcbvzkireftsp", database "dc48lcsbrpb2bk", no encryption
at Client._connectionCallback (/app/node_modules/sequelize/lib/dialects/postgres/connection-manager.js:142:24)
This error indicates that there was a failed authentication attempt to the database, so the connection couldn't be established. This can happen for a variety of reasons:
The authentication failed because the user and password credentials were invalid: ((user "xxxx", database "yyyy")). This could happen if you're trying to connect to the database using the wrong or revoked credentials.
If you are sure that your credentials are correct, it most probably means that the authentication failed because the connection didn't use SSL encryption (SSL off).
All Heroku Postgres production databases require using SSL connections to ensure that communications between applications and the database remain secure. If your client is not using SSL to connect to your database (like we are not using it now), you will see these errors even if you're using the right credentials to connect to it.
So what's the solution now? Should we have an SSL certificate to connect to the database? Hmm, yes, but not for now because we mentioned that this article will demonstrate the deployment instruction used for side projects, MVPs, or proofs-of-concept, and we won’t get our hands dirty with that in such cases.
So we are going to tweak the code a little bit by adding a new property to the sequelize configuration. All you need to do is to pass the following SSL configuration object to the sequelize constructor:
dialectOptions: {
   ssl: {
     require: true,
     rejectUnauthorized: false,
  },
},
Now, your sequelize configuration should look as follows:
export const sequelize = new Sequelize(DB_NAME!, DB_USERNAME!, DB_PASSWORD, {
  host: DB_HOST,
  dialect: 'postgres',
  logging: false,
  ...(process.env.NODE_ENV === 'production' && {
    dialectOptions: {
      ssl: {
        require: true,
        rejectUnauthorized: false,
      },
    },
  }),
})
We are setting this property only when in production because if we set this unconditionally while using the app locally, you may run into this issue:
Unhandled rejection SequelizeConnectionError: The server does not support SSL connections
This means that we don’t need to have SSL enabled on localhost because then it can’t access your local Postgres database.
Now just push the changes in your main branch, then trigger another deployment, and we are good to go.
Additionally, Heroku will create the database for you, so you don’t need to do that. You can just run seedings or migrations if you have them, or else you can just start using it for your needs.